How to Create Low-Code Workflow Automations with Pipedream and InfluxDB
By
Charles Mahler /
Product, Use Cases, Developer
Feb 16, 2022
Navigate to:
A big part of modern software development involves working with APIs. While using 3rd party services can speed up development, moving data around and gluing things together can be pretty dull. Luckily, there are a growing number of tools that help deal with the boring stuff so you can focus on more interesting things. One of these tools is Pipedream.
In this tutorial, you will learn how to connect InfluxDB and Pipedream to create a flexible alerting and notification system that can be extended with the functionality provided by 100s of different APIs accessible through Pipedream.
What is Pipedream?
Pipedream is an integration platform designed to help developers build event-driven workflows. In plain English, that means Pipedream makes it easy to combine a bunch of different tools together by providing integrations with 400+ different API providers.
You can think of Pipedream as a middle ground between writing your own custom API integrations vs. using low-code or no-code platforms like Zapier or IFTTT. For many tasks, you can speed up your development time significantly by using the building blocks provided by Pipedream, but you also have the option to write your own custom code if needed. Pipedream also provides a number of features to make testing and debugging your workflows easier via their UI.
Some common use cases for Pipedream are:
- Connecting SaaS apps together
- Custom notifications and alerting
- Database automations
- Mobile app or JAMstack site backends
- Rate limiting
Pipedream key concepts
There are three main components that are used when working with Pipedream:
- Workflows - Workflows are the "container" that comprise all the actions you want to take on any input when working with Pipedream.
- Triggers - Triggers define how a workflow starts. They can be basic HTTP requests, a pre-scheduled time, or triggered by a 3rd party app.
- Steps - Steps are the building blocks of the workflow. They are run sequentially after the workflow is triggered. They can be pre-built components and actions provided by Pipedream or your own custom code. Data can be passed at each stage to the next step.
Setting up InfluxDB
To follow this tutorial, you will need a running instance of InfluxDB and a free Pipedream account. Once you have your InfluxDB instance running, you need to create a bucket which will be used for testing and sending alerts to Pipedream for further action.
Once your bucket is created, you need to insert some sample data by going to the Data Explorer and clicking the Script Editor button:
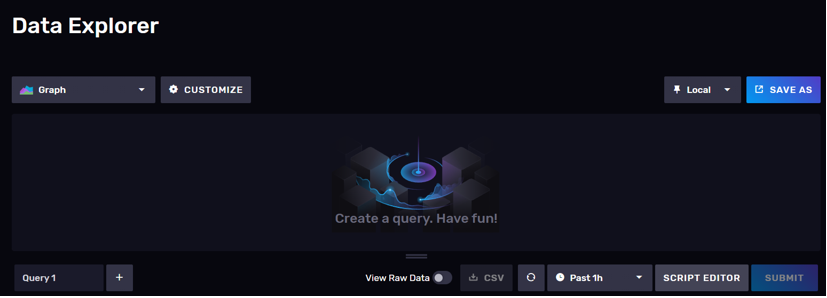
Enter the following Flux query into the editor and change the bucket and org parameter values to the bucket you just created and your account organization name, then click submit.
import "experimental/csv"

relativeToNow = (tables=<-) =>
  tables
    |> elapsed()
    |> sort(columns: ["_time"], desc: true)
    |> cumulativeSum(columns: ["elapsed"])
    |> map(fn: (r) => ({ r with _time: time(v: int(v: now()) - (r.elapsed * 1000000000))}))

csv.from(url: "https://influx-testdata.s3.amazonaws.com/noaa.csv")
  |> relativeToNow()
  |> to(bucket: "your-bucket-name", org: "org-name")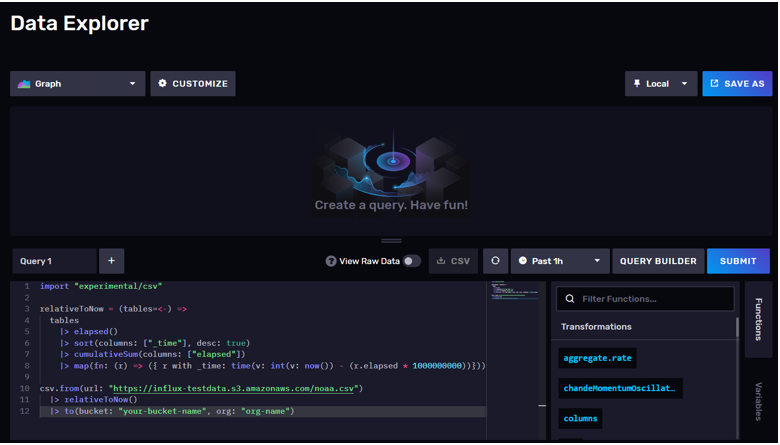
This query will store the NOAA water sample data set in your bucket and modify the timestamps so they are set relative to the current time, which will make querying the data easier.
Setting up Pipedream
Inside your Pipedream dashboard, click on the workflows tab and then click the blue “new” button to add a new workflow. You should see the following on your screen:
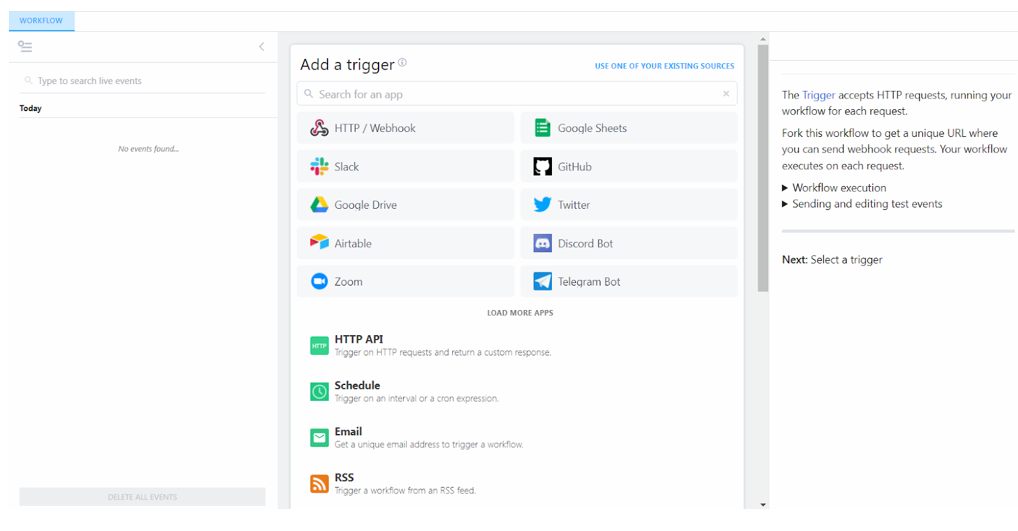
For this tutorial we will be using the HTTP API trigger, which gives you a URL that will trigger the workflow whenever an HTTP request is sent to the endpoint. After clicking on the HTTP API trigger button, your workflow should look like this:
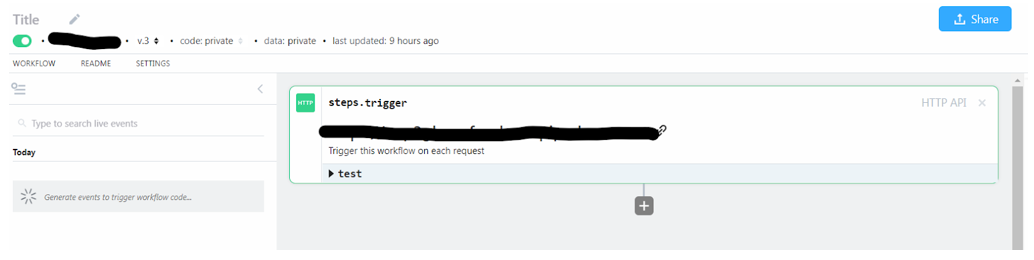
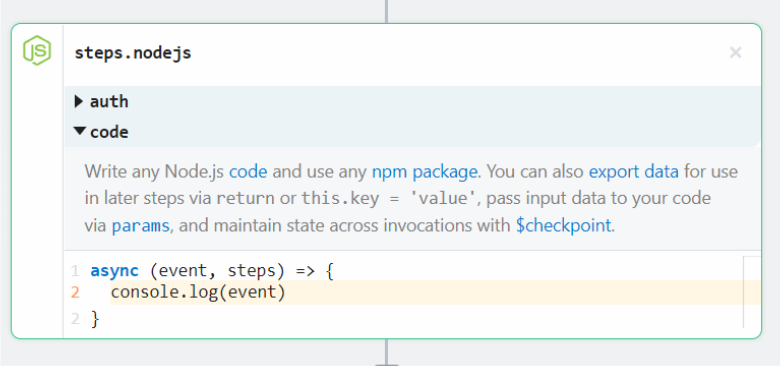
Next you can add a NodeJS step. In this case, we will keep it simple and just use console.log to see the event object that is being passed from the HTTP trigger. When we create our alert in the next stage, this will show us the object created by the InfluxDB alert that is being sent to Pipedream.
Finally, we’ll send off an email to notify ourselves when an error occurs.
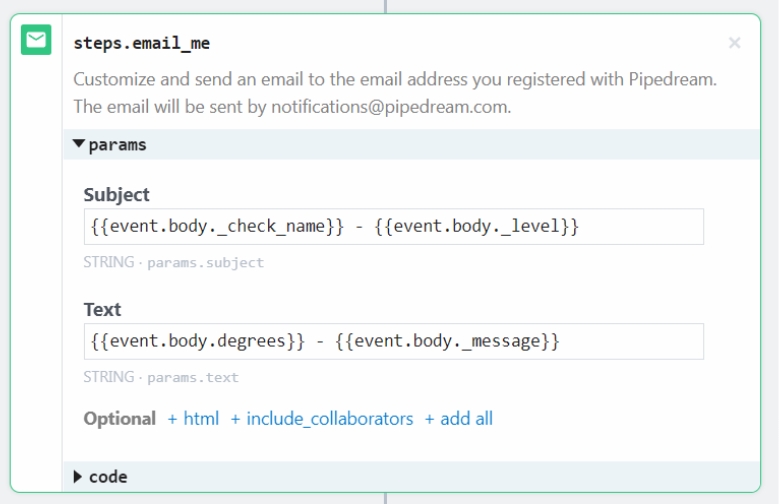
One of the best benefits of using Pipedream can be seen here the UI automatically parses the event being passed and allows you to click and grab the properties you want from the event object. You can also replay past events to try and debug or modify your workflows to see how the results change, which makes development smoother.
Once you have the notification email formatted how you want it, deploy and save your workflow. Make sure to copy the URL of the HTTP API trigger because we will need that in the next step.
Creating InfluxDB alerts and checks
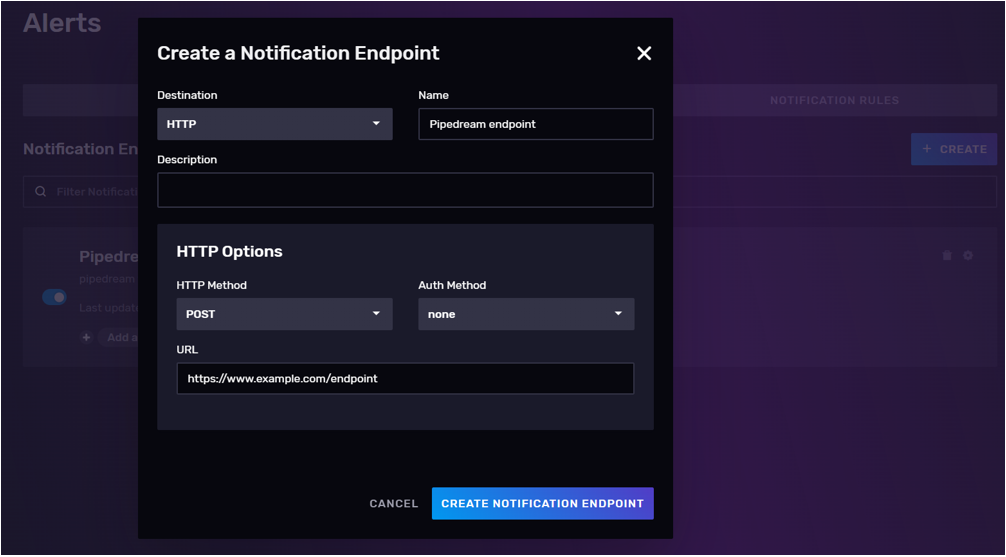
Now that Pipedream is set up and ready to receive requests, you can move on to the next step, which is creating the alert in InfluxDB. Go to the Alerts tab and then click on the button to create a notification endpoint. Select HTTP as the destination, name your endpoint, and then paste in the URL from your Pipedream URL trigger and select POST as the HTTP Method.
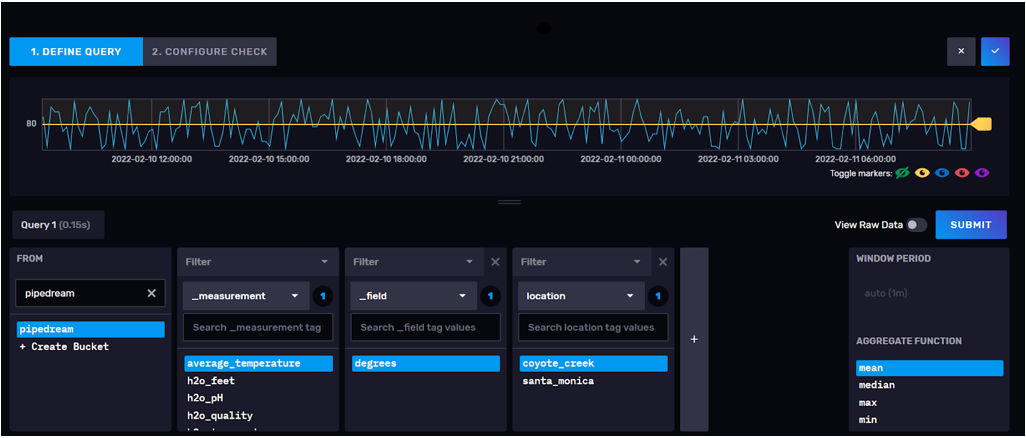
Now move to the Checks tab and create a Threshold check. This will open up a Data Explorer view where you can configure the bucket you want to check and the fields you want to query. Select your bucket that you stored your data in earlier and which field and location you want to send an alert on.
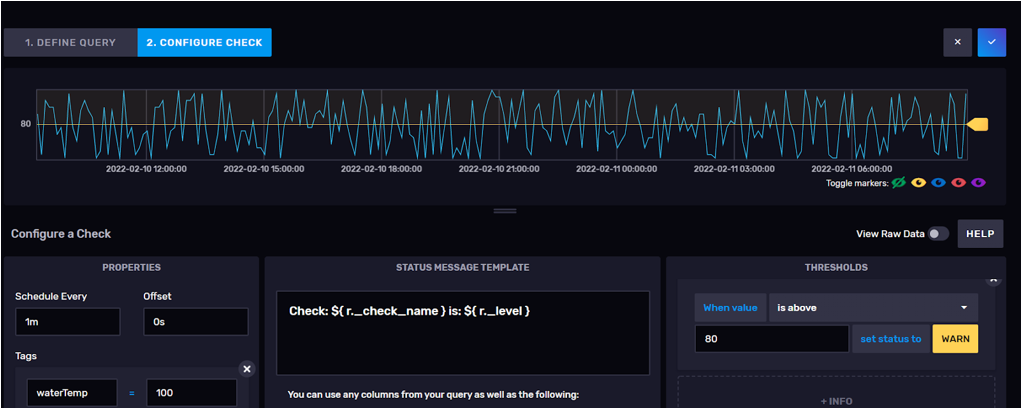
In the next tab you can further configure your check. Here are some of the more important things to note:
- Schedule Every - This will schedule how frequently the check is run. By default, the check runs every minute
- Tags - Setting a tag will allow you to filter for certain checks later when we create the notification rules.
- Status Message - The message that will be sent with the notification HTTP request and can be customized to include field values, column names, and more. You can learn more about customizing this message in the docs.
- Thresholds - Conditions can be set based on the returned value from queries for each threshold level. In the next step, you will see how threshold levels can be used to filter out when notification alerts are sent.
For this tutorial you can choose whatever you want for your query and rules just make sure your threshold values get triggered so you get some test data going to Pipedream.
If you plan on making more than one endpoint in Pipedream, you’ll also want to add tags to your checks so you can filter each check to the right endpoint.
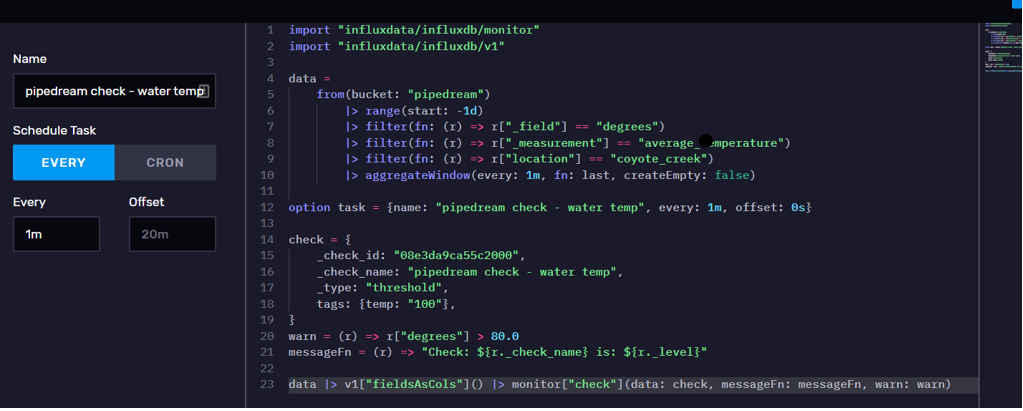
If you want more control over your checks, you also have the option of looking directly at the Flux script which was generated by the UI automatically. Go back to the Checks tab and click on the settings icon of the check you just made. Click on edit and you can customize the Flux script.
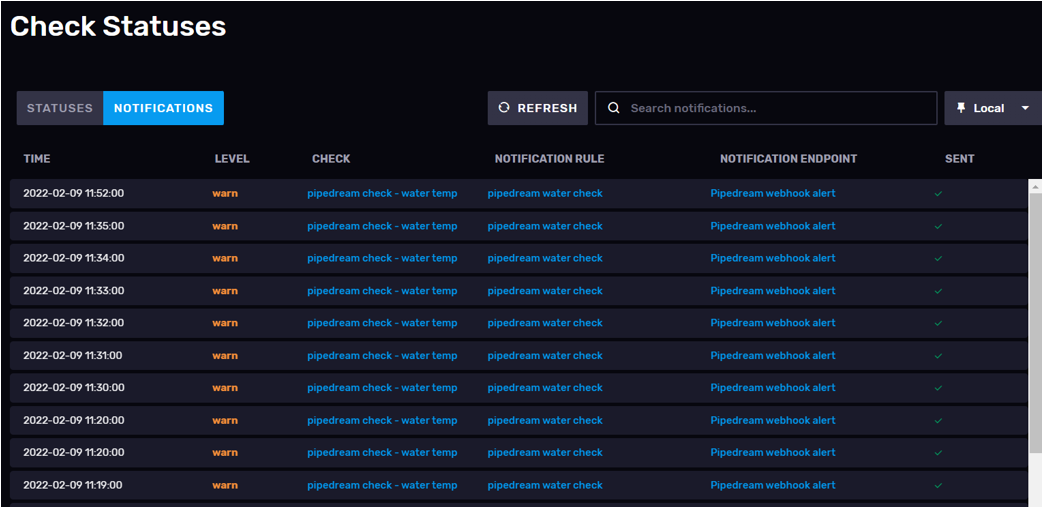
You can confirm your checks are running properly by looking at the Alerts History page.
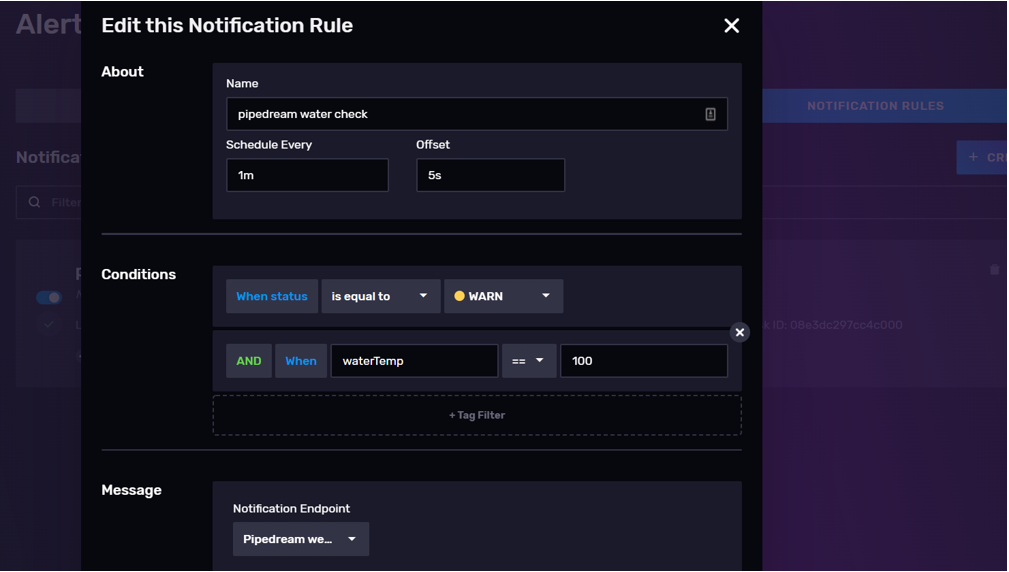
The final thing you need to do is create a notification rule. Set the conditions to match the tag and threshold level you want to monitor, and then select the notification endpoint that you created earlier. If you don’t create this rule, your checks will run and be stored in the _monitoring bucket, but nothing will happen with them.
Results
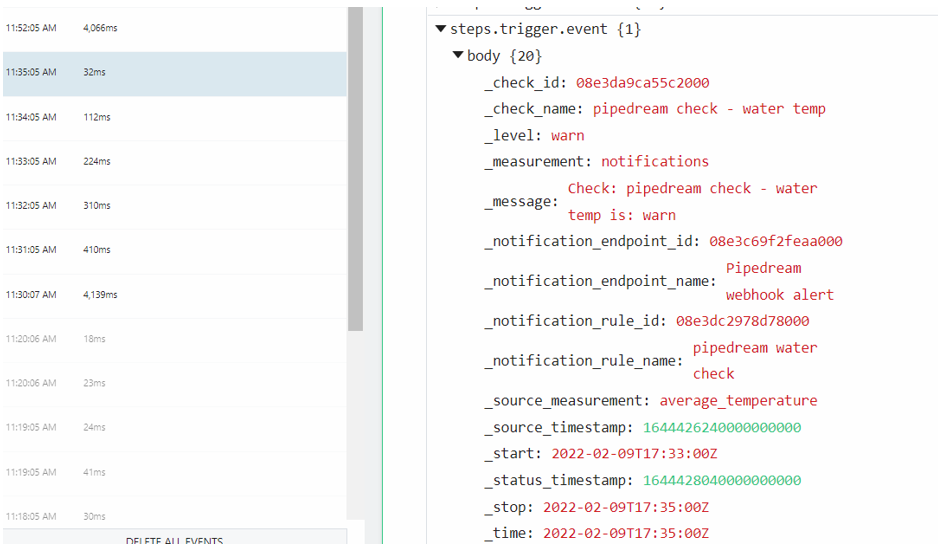
If everything is set up properly, then you should start seeing the events appearing in your Pipedream workflow:
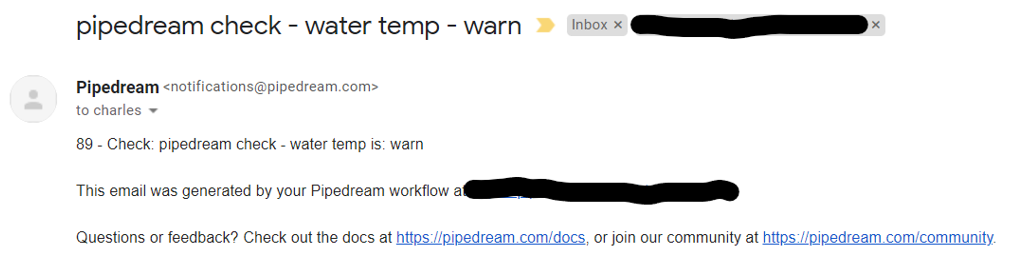
And if I check my email, I can also see the messages coming in properly:
If you don’t plan on using these alerts long-term, make sure to disable them in the InfluxDB UI, so they aren’t running constantly in the background and potentially running up a bill or burning through your free tier limits.
Additional use cases
Now that you have a basic workflow setup to confirm everything is working, you have tons of options for taking things to the next level with the many integrations you have access to through Pipedream. In this section, I’ll go over a few potential ideas for more advanced usage of Pipedream.
Extend your current workflow
Right now the alert workflow will only send an email to the address you used to make your Pipedream account. If you are using this type of alert in production, you will want to make sure you send the alert to the person who is currently on-call by grabbing their contact info via an API call.
Here are some potentially useful integrations to check out:
- Twilio - Send a text message to your on-call engineer.
- Slack - If you have a channel for support or SRE, it might make sense to send a message there to notify them of the alert.
- Zoom - Pipedream can be used to automatically create a Zoom meeting and send out the link for incident response.
- Database Integrations - Pipedream has integrations with all the major databases like Postgres, MySQL, and MongoDB. Data can be queried and used as part of your workflow. Additional data can help provide context for whoever has to deal with the alert.
It should be noted that Flux also provides integrations with many of these services through its standard library packages, so if you don’t want/need to use multiple steps in a workflow with Pipedream it may be easier to just communicate with the API through Flux instead.
Conditional workflows
Pipedream doesn’t currently have direct support for handling branching or conditional workflows in the user interface. The solution to this right now is to create a new workflow that is triggered by your main workflow.
The way you would do this is to use a JavaScript step in the primary workflow and then read the incoming data and use conditional statements to determine which workflow should run next. You can send the data from the current workflow in the body of the HTTP request which triggers the next workflow. Depending on your use case, you can make multiple different workflows for different conditions.
Enriching data
In the main part of this tutorial, InfluxDB acted as the source and trigger of the workflow by sending an alert. InfluxDB can also be used as an intermediate step of a workflow. One example of this would be something like gathering and transforming data from an external source before storing it in InfluxDB.
A practical example of this would be using Pipedream’s Twitter Search trigger step to pull in tweets for whatever query you are interested in. Let’s use your company’s name as an example you could store these Tweets in InfluxDB to track trends over time and set alerts based on the number of tweets in the last hour and notify your marketing team with another Pipedream workflow if there is a sudden increase compared to historical numbers. This can be done with any of the built-in analysis functions provided by Flux which fit your use case.
You can also use Pipedream to create an intermediate step to check for the sentiment of the Tweet to determine whether it’s positive or negative and customize the workflow accordingly and store the additional data with InfluxDB for more accurate analysis.
Scheduled Tasks
Pipedream also has a Scheduled Task trigger available for workflows you want to run at a regular interval. This could be used to scrape websites, process the data, and then trigger additional actions based on that data.
Next steps
The biggest takeaway from this article and working with Pipedream should be that you are really only limited by your imagination. Having easy access to hundreds of different tools and services gives you an almost infinite number of ways you can combine them. Hopefully you can take what you learned in this article and make something awesome with it. I’ll leave you with some links to additional resources to check out if you want to go a bit more in-depth on some of the topics mentioned in this article.