Getting Started with the InfluxDB 2.0 API and Postman
By
Anais Dotis-Georgiou
updated December 14, 2025
Product
Use Cases
Developer
Navigate to:
Whether you’re using InfluxDB Cloud or InfluxDB OSS, the InfluxDB API provides a simple way to interact with your InfluxDB instance. The InfluxDB v2.0 API offers a unified approach to querying, writing data to, and assessing the health of your InfluxDB instances. Today we want to share a Postman project to help you use the API easily. Postman is “an API platform for building and using APIs”.
Importing the Postman project and setting up
In order to use the Postman project, you’ll need to first create a Postman account. Next you’ll need to either create a new workspace or import the InfluxDB API v2.0 Postman project to your default workspace, “My Workspace”. Today, we’ll just import the project to “My Workspace”.
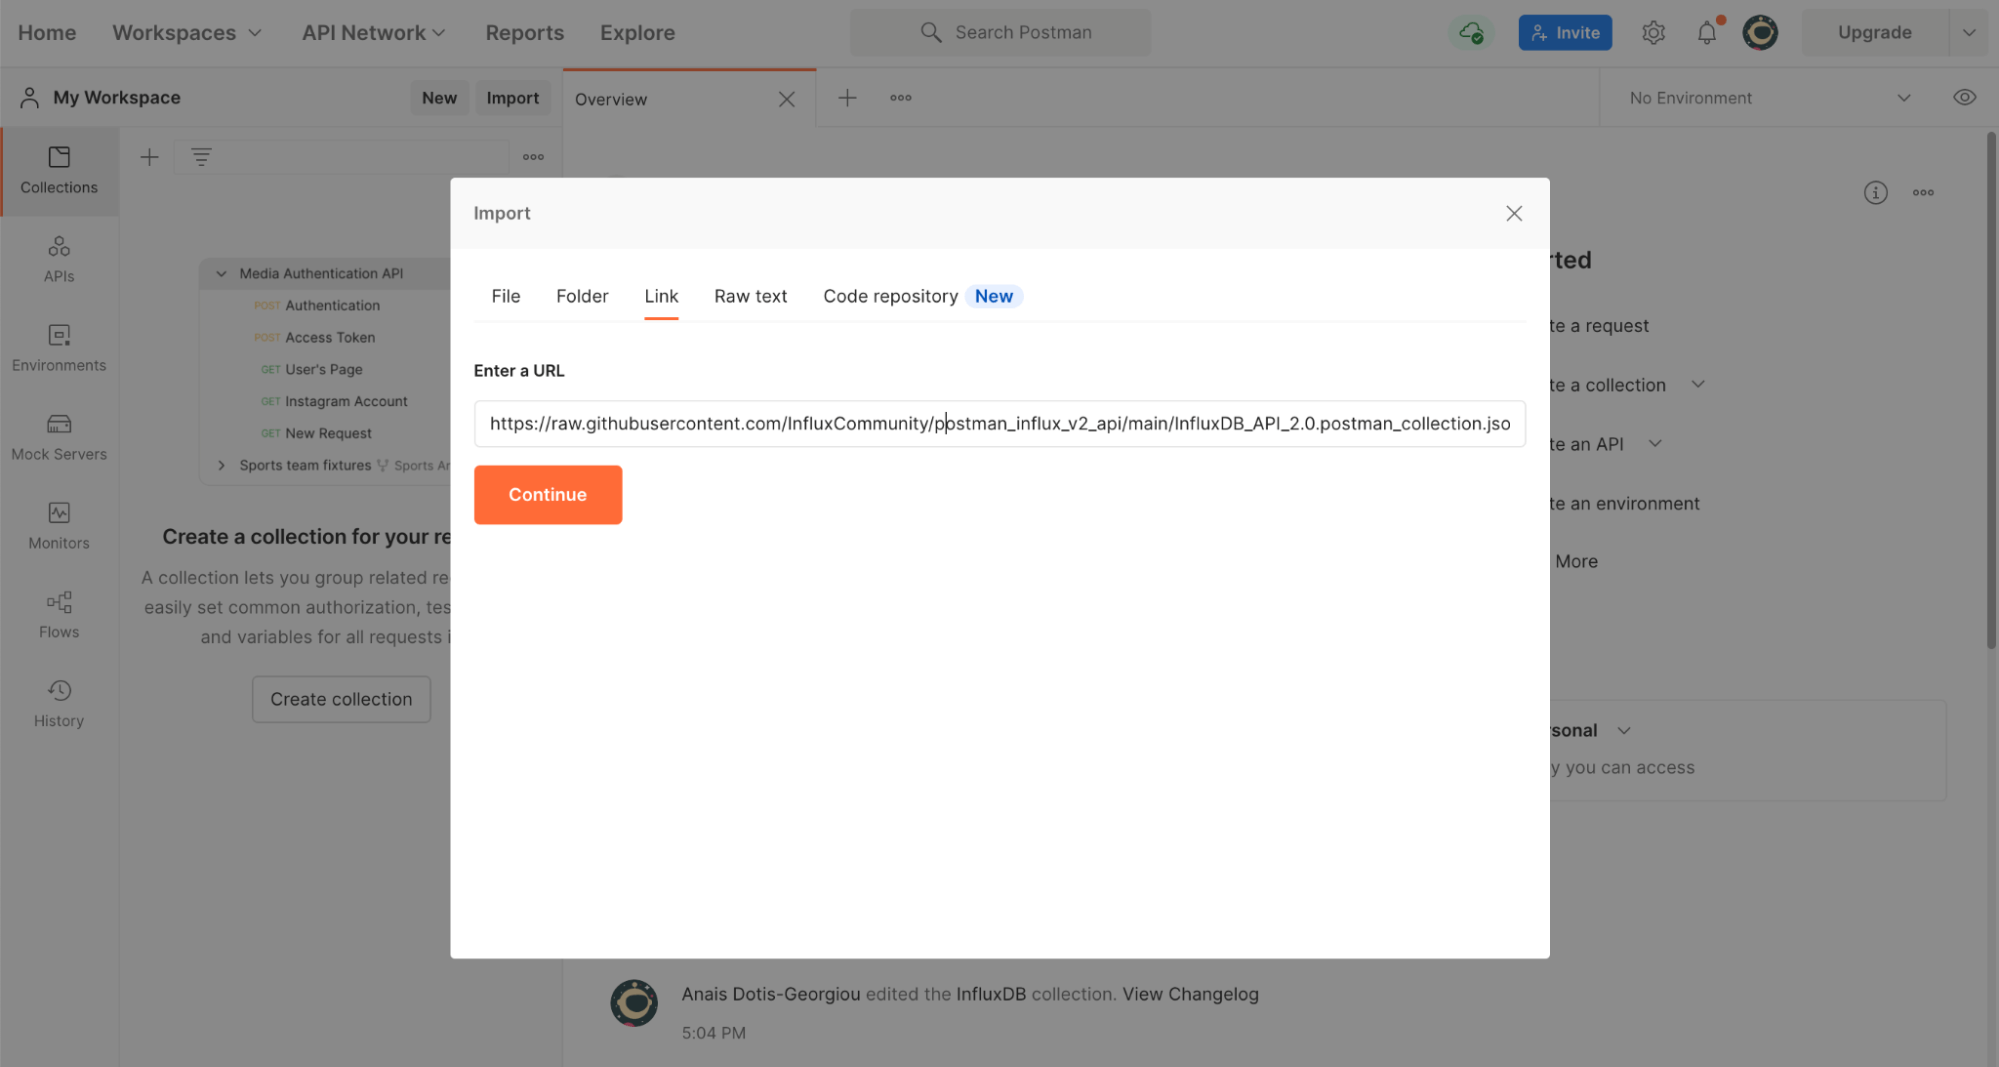
Make sure you’re in the appropriate workspace, by observing the workspace in the top left corner. Next to your workspace name, click Import to import the InfluxDB API v2.0 Postman project. Copy and paste the URL for the InfluxDB v2.0 API Postman project and click Continue.
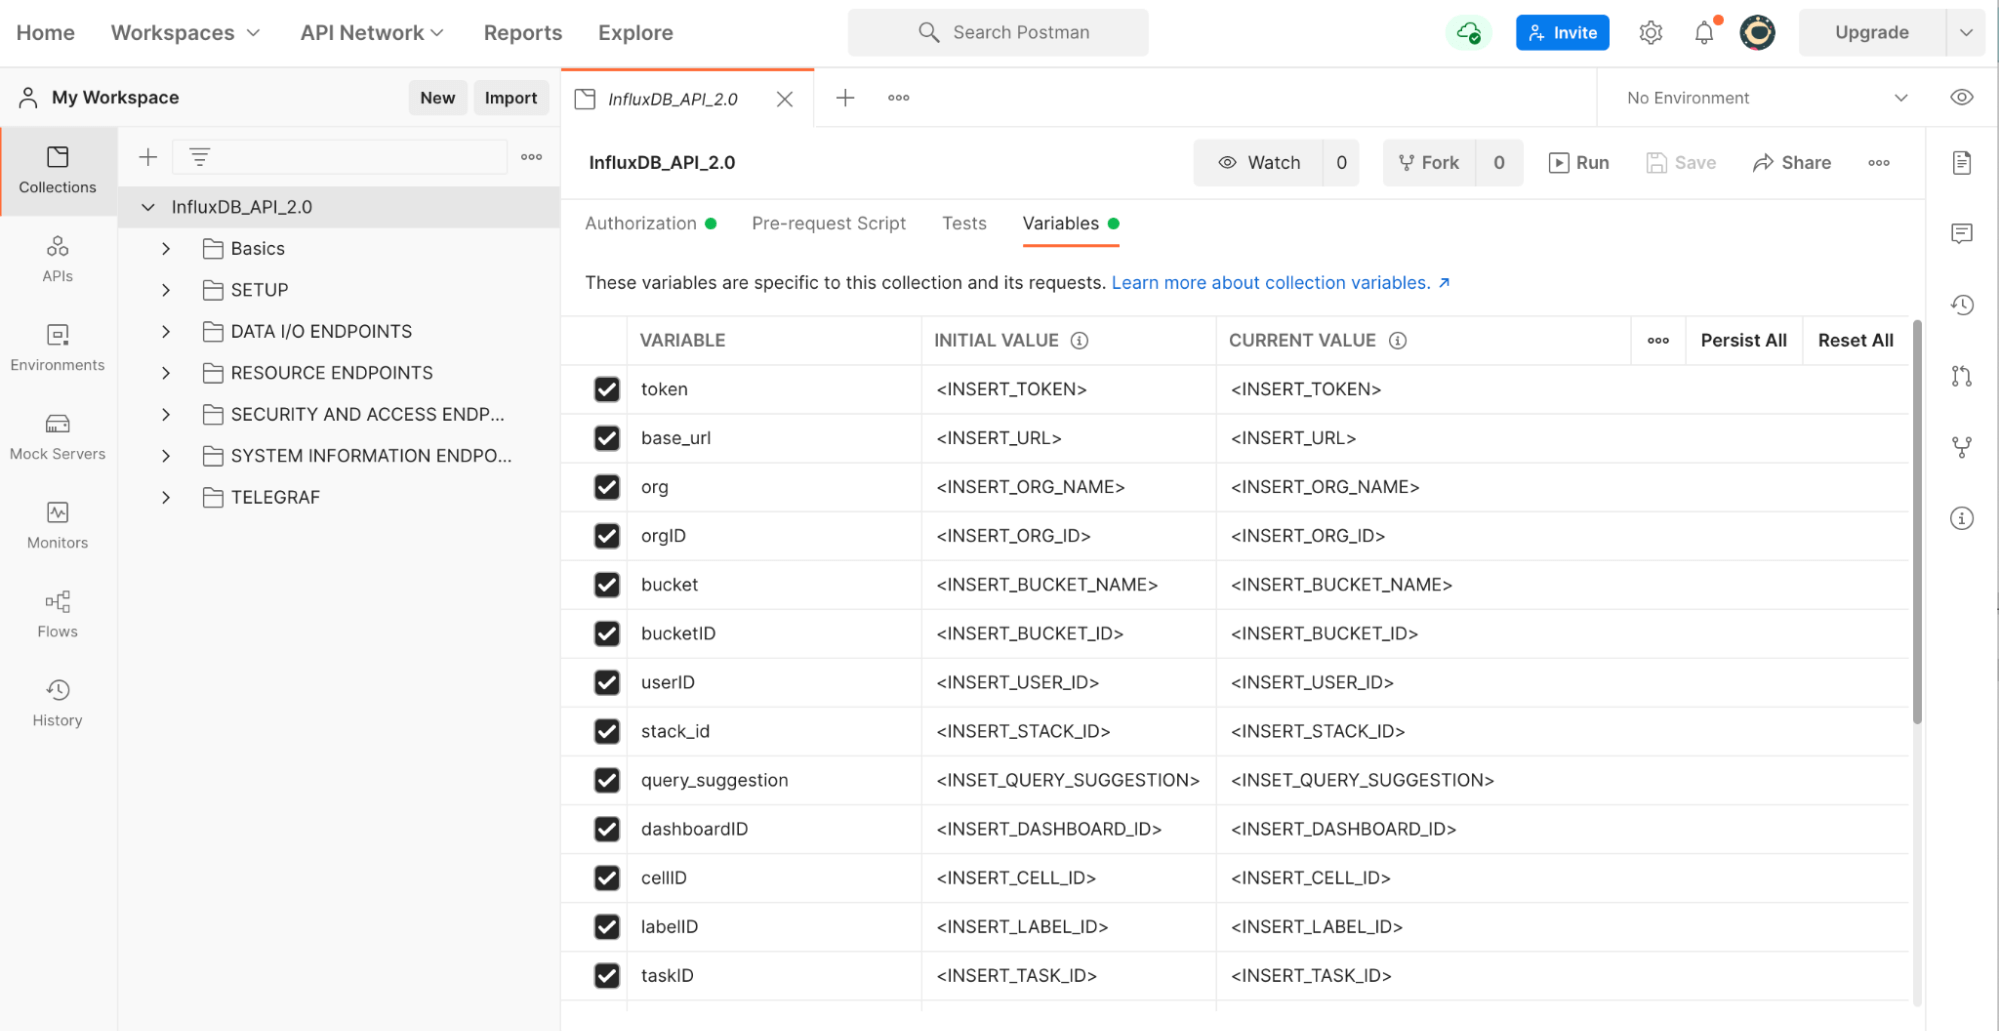
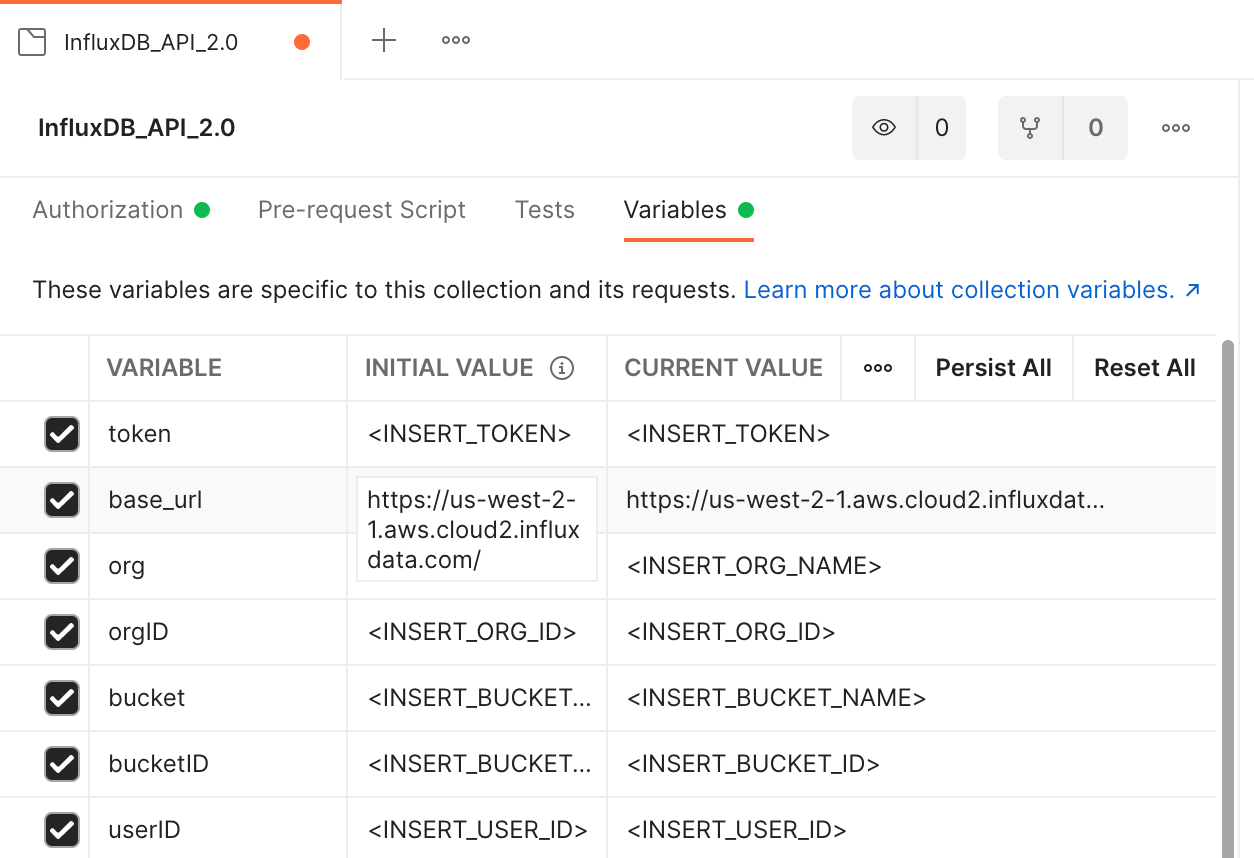
Now you can see a list of API calls from basic requests like writing and querying InfluxDB to assigning labels to individual tasks. In order to send a request, we first need to configure the variables for this project. Navigate to the Variables tab under the Collection name, “InfluxDB_API_2.0”.
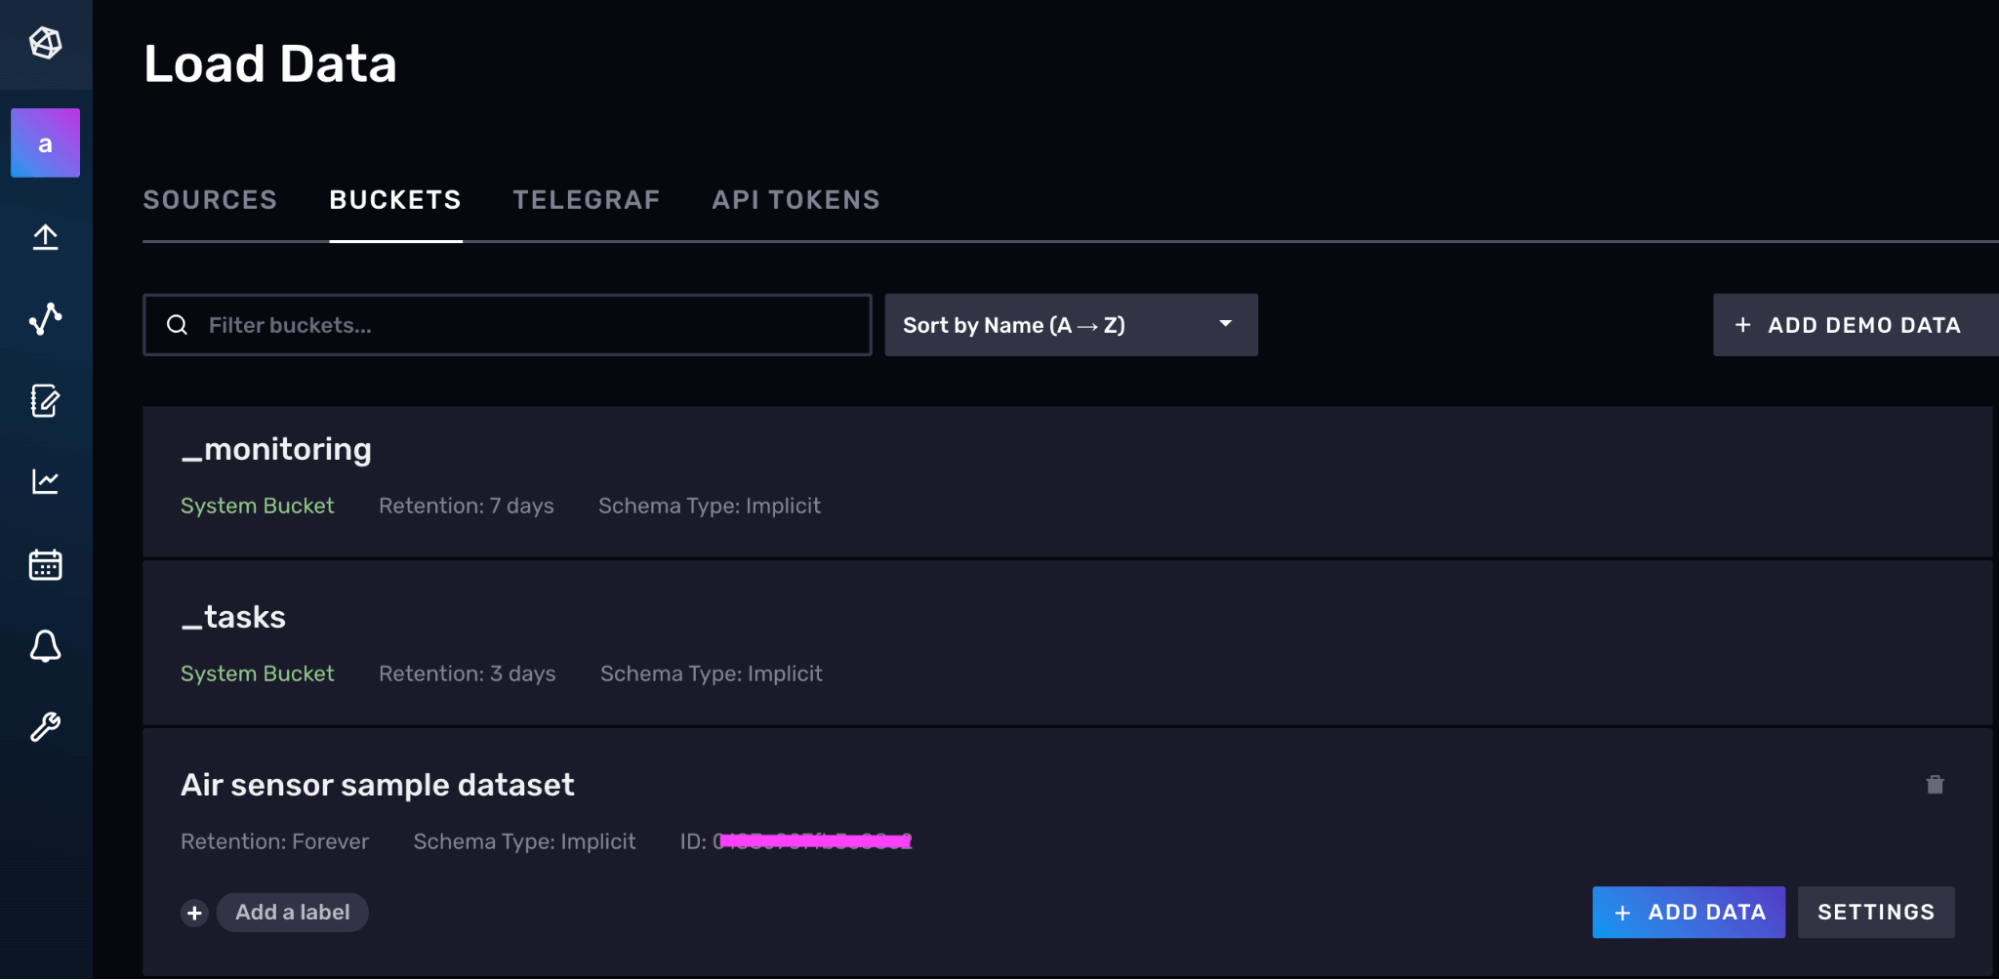
While you can manage InfluxDB entirely through the API, most likely you’ll want to start by using the InfluxDB UI or CLI to create some basic resources first. To get started you’ll need to have created the following resources and their associated IDs:
The Bucket ID can easily be found in the InfluxDB UI under the Buckets page. You can also use the CLI or API to gather that after you create a bucket.
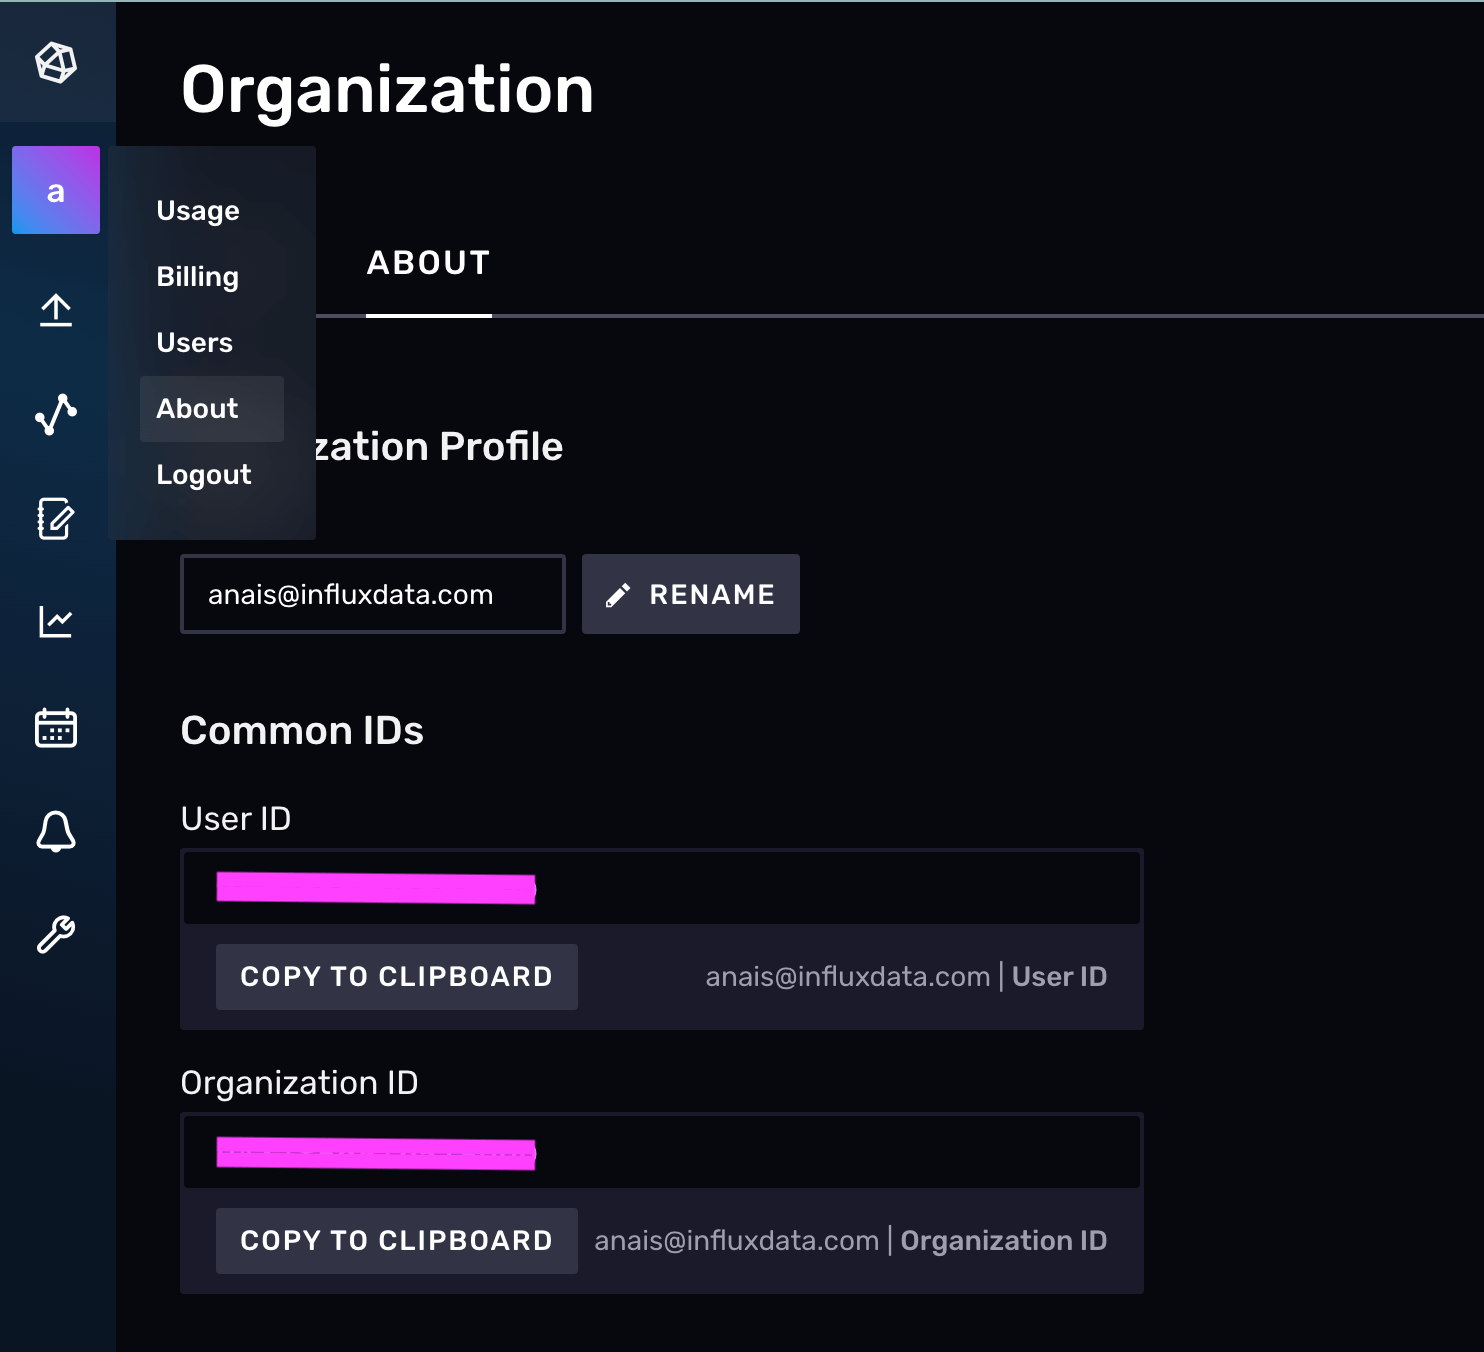
The Org and Org ID can easily be found in the About Me page in the InfluxDB UI.
Finally you’ll also need the URL associated with your Cloud or OSS account. You can find the URL by logging into the InfluxDB UI and looking at the URL or by taking a look at the complete list of InfluxDB Cloud regions. For an OSS account, your InfluxDB OSS URL should be http://localhost:8086/ by default.
Next you’ll want to replace the variables in the collection with your values. The initial value is shared when you share a collection with others. Current values will override initial values and are used to prevent sharing sensitive values with the rest of your team. Click Persist All to make your initial value match your current value. Click Reset All for the inverse.
Submit a request
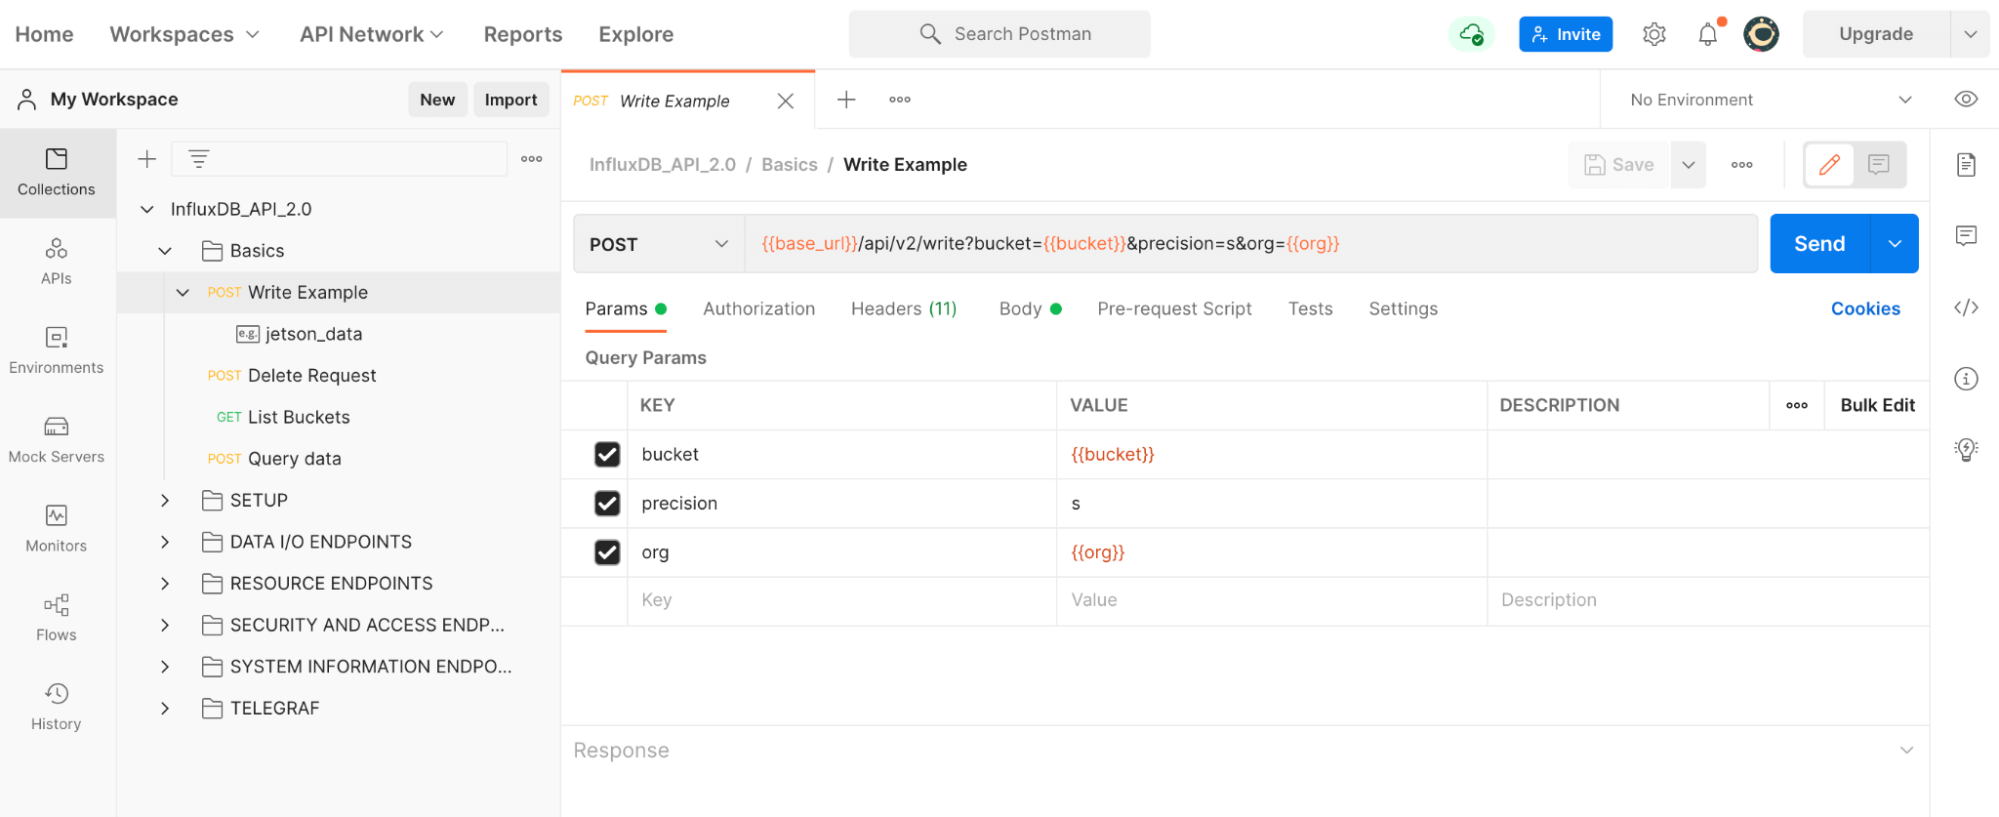
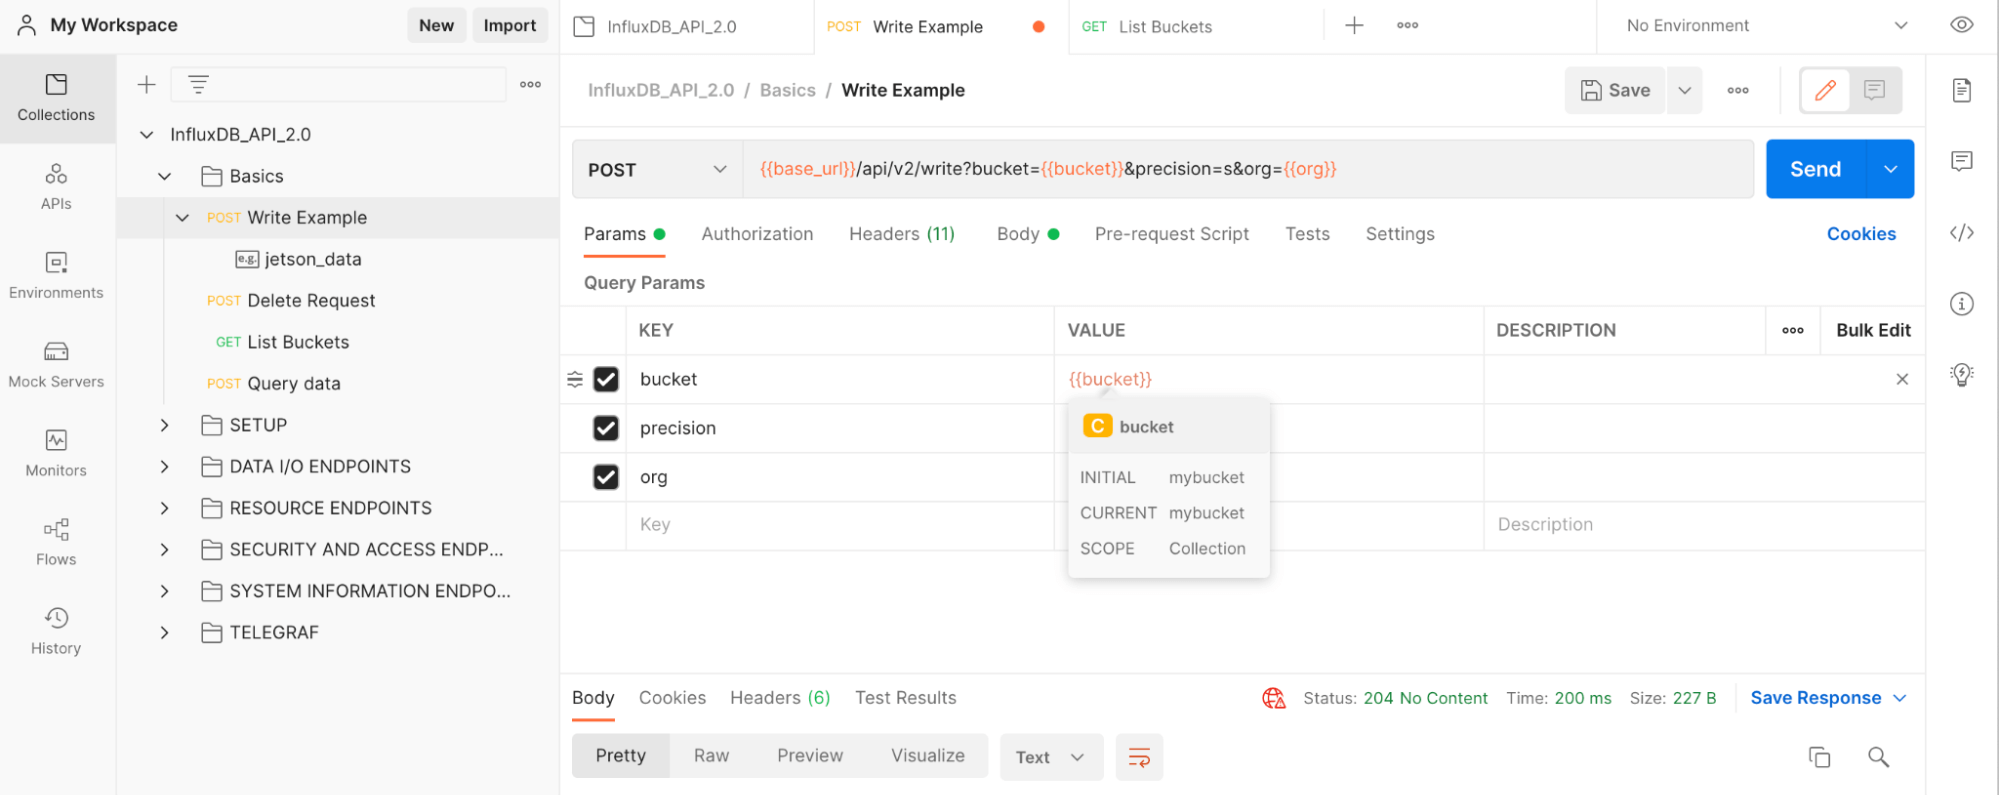
Once you’ve added your variables, then you can hit submit to send a request. In the example below, we’re using the Write Example request that writes the following line protocol, found in the body of the request, to the bucket “mybucket”. You can verify that your variables are being correctly inherited by hovering over the variable. A 204 status code indicates that our write was successful.
Final thoughts on using the InfluxDB API v2 Postman collection to get started with the InfluxDB API v2
I hope this InfluxDB Tech Tips post inspires you to take advantage of the InfluxDB v2 API to manage and use your InfluxDB instance. If you are creating an IoT application or using the API for another reason, please ask us for help and share your story! Share your thoughts, concerns, or questions in the comments section, on our community site, or in our Slack channel. We’d love to get your feedback and help you with any problems you run into!
