Getting Started with the InfluxDB API
By
Community
updated December 14, 2025
Product
Use Cases
Developer
Getting Started
Navigate to:
This article was written by Nicolas Bohorquez. Scroll below for the author’s picture and bio.
Time series databases, like InfluxDB, index data by time. They are very efficient at recording constant streams of data, like server metrics, application monitoring data, sensor reports, and any data containing a timestamp.
Data in a time series database is always written with the most recent data values but with the previous values not updated. In a traditional transactional approach, you mutate the information of the entities model, but in a time series database you can save all the data points generated through time.
Telegraf is the preferred way to collect data for InfluxDB, but in some cases, you may want to use an application program interface (API) to develop your solution; for example, if you need to preprocess data prior to putting it in your time series database or if you don’t find an input plugin for Telegraf compatible with your source system).
InfluxDB includes API clients for the most popular programming languages (Python, Java, Go, Ruby, etc.) and can also be used directly used with the REST API.
In this tutorial, you’ll learn how to authenticate through the API, read a data stream, store it as a time series into InfluxDB, and run queries over the data using InfluxDB’s HTTP API.
Before you begin, you will need to install InfluxDB 2.x on your operating system and an HTTP client, like curl, httpie, or Postman. This tutorial will show how to use a local InfluxDB instance on your machine, but you can also use InfluxDB Cloud to get started faster and without having to install anything on your machine.
What is a time series database?
A time series database is a new class of specialized data stores that require the data models to include a time-based dimension.
A few examples of this type of data are the temperature in a specific geographical point at a certain time of day, the number of people crossing a street at rush hour, or the number of sign-ups in an application per week.
Cumulative data, with small data points and more time granularity, is the preferred type of data to be stored in a time series database. The following are some examples of time series data:
- Data from sensors: Small devices that can register specific actions provide a good source for time series data.
- Financial data: Stock prices or values of financial assets change over time and provide a classic example of time series data.
- Computational infrastructure monitoring data: As cloud infrastructure grows, the number of monitoring tools increases as well, providing many data points for the performance of each component.
InfluxDB is one of the best tools that you can use for this type of data because it allows you to capture, store, and query the data in a consistent and scalable way.
The InfluxDB API
The InfluxDB API (currently at version 2.x) is a set of HTTP endpoints that provides programmatic access to all the functionality of the InfluxDB system. The API is organized by resources and actions over these resources.
The endpoints cover:
- System information: Endpoints can check the status of an instance, the readiness of an instance at startup, the health of an instance, and the top-level routes available.
- Security and access: Endpoints manage organizations, users, and authorizations that provide tokens for API access. This token-based security approach provides self-contained objects (tokens) that give access and permissions to manage organizations.
- Resource access: Endpoints can manage buckets, dashboards, tasks, and other resources.
- Data I/O: Endpoints perform read and write actions for the data in a bucket.
- Other resources: Endpoints allow you to execute backup operations and manage other InfluxDB resources, like cells, checks, labels, and notification rules.
In this tutorial, you will use the Data I/O endpoints to write and query the API, but before you begin, you need to understand the different authentication methods you can use to invoke the InfluxDB API endpoints.
Types of authentication
There are three types of authentication methods to be used with InfluxDB:
_user/password_ combination, also known as_Basic Authentication_, in which you send an encoded_user:password_string_query string_ methoduses two URL-encoded parameters (_uandp_)- Token-based authentication, which is preferred
For the first two options, you are required to generate a username and password; but for this tutorial, you’ll be using the token-based authentication, which you can generate from the InfluxDB UI or with the /api/v2/authorizations API endpoint.
Making a connection
The token-based approach is preferred because the Basic and QueryString authentication methods do not support the token scheme.
Once you have a running InfluxDB installation, you’ll be prompted to create an organization, user, and bucket.
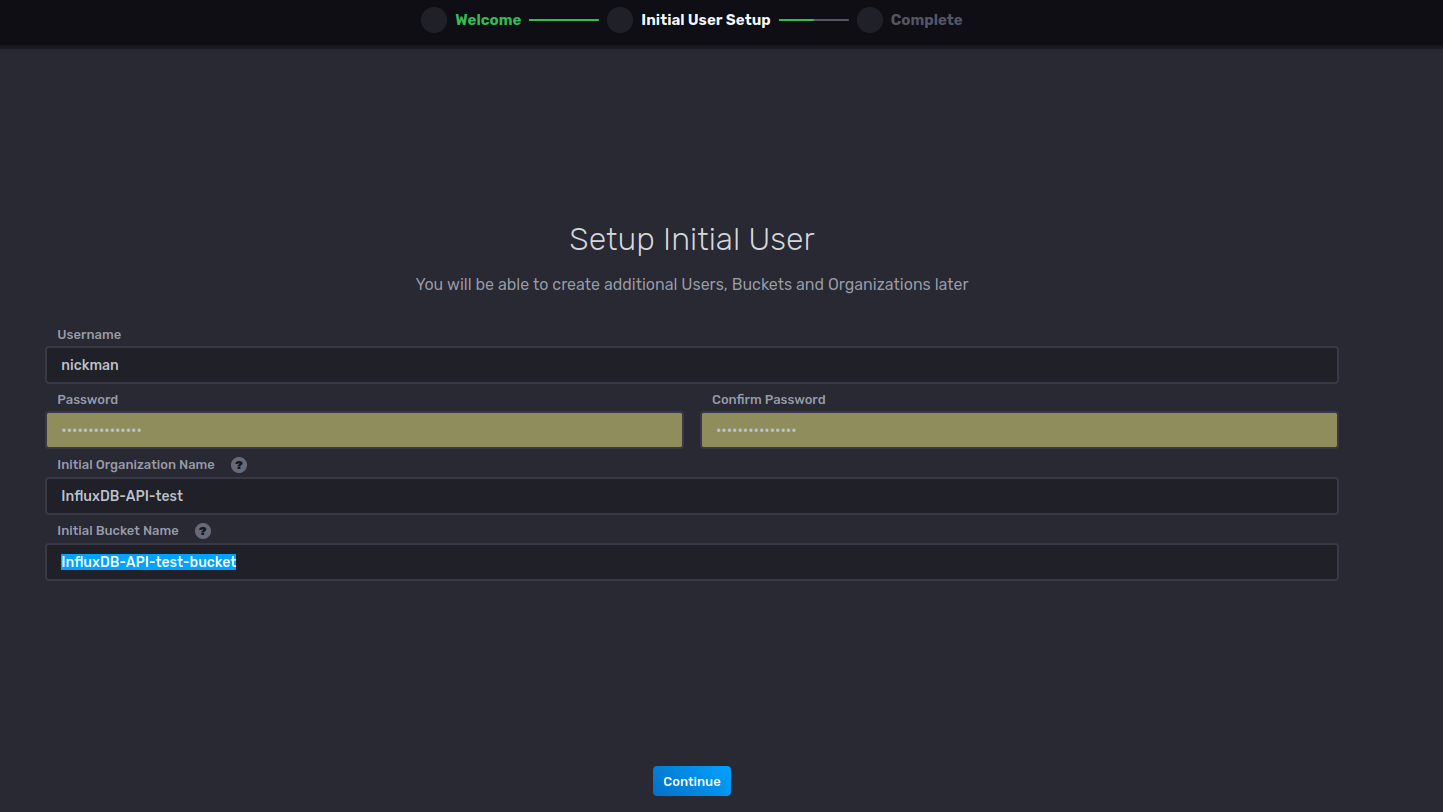
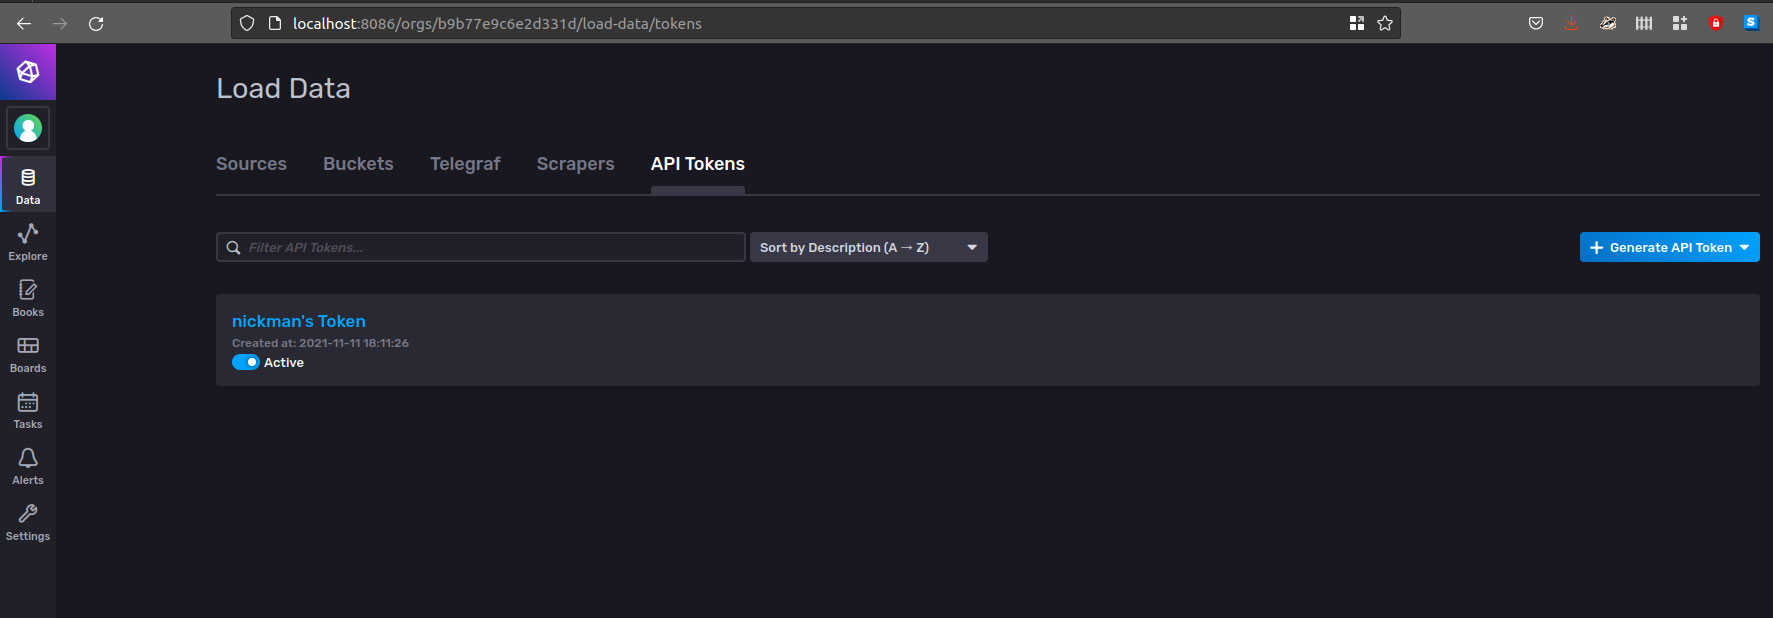
After creating your organization, user, and bucket, check the automatically created API token at the Load Data > API Tokens tab in the web user interface.
In this interface, you can also create new tokens by selecting the Generate API Token button. There, you can name the token and assign permissions.
For this example, the token used has full access, but you should apply the principle of least privilege in production environments.
To test the status of your access to the InfluxDB instance, use the _/ping_ endpoint. For example, use the _curl_ client over the terminal below:
$ curl localhost:8086/health
You will obtain a JSON response payload that includes the status and version of the local server:
{
	"checks": [],
	"commit": "657e1839de",
	"message": "ready for queries and writes",
	"name": "influxdb",
	"status": "pass",
	"version": "2.1.1"
}
Enabling TLS/SSL encryption
Like any other resource open to external access, you need to try and minimize the potential security risks that arise when you expose data, even in a controlled environment.
You can use SSL/TLS to encrypt the communication between the API and the consumers, by getting a certificate (self-signed or signed by a certificate authority) and configuring InfluxDB to use the certificate to encrypt data.
You can follow influxdata’s security and authorization instructions to enable TLS/SSL encryption which allows clients to verify the authenticity of the InfluxDB server.
Inserting data
To insert data using the API, you will need the destination organization and bucket. For this tutorial we will use this dataset containing global CO2 data. Make sure you download the file and store it in the same folder you are using for this tutorial. The scripts below will expect the CSV file to be located in the same directory.
Let’s use the API to check all available buckets invoking the _/api/v2/buckets_ endpoint:
curl http://localhost:8086/api/v2/buckets --header "Authorization: Token your_api_token"
The JSON response contains at least three buckets. The setup screen shown previously, _InfluxDB-API-test-bucket_, is the one that was initially configured and the destination for our test.
{
	"id": "81fef1d4510e235d",
	"orgID": "b9b77e9c6e2d331d",
	"type": "user",
	"name": "InfluxDB-API-test-bucket",
	"retentionRules": [
        	{
                	"type": "expire",
                	"everySeconds": 0,
                	"shardGroupDurationSeconds": 604800
        	}
	],
	"createdAt": "2021-11-11T23:11:26.588182068Z",
	"updatedAt": "2021-11-11T23:11:26.588182158Z",
	"links": {
        	"labels": "/api/v2/buckets/81fef1d4510e235d/labels",
        	"members": "/api/v2/buckets/81fef1d4510e235d/members",
        	"org": "/api/v2/orgs/b9b77e9c6e2d331d",
        	"owners": "/api/v2/buckets/81fef1d4510e235d/owners",
        	"self": "/api/v2/buckets/81fef1d4510e235d",
        	"write": "/api/v2/write?org=b9b77e9c6e2d331d\u0026bucket=81fef1d4510e235d"
	},
	"labels": []
}|
Save the orgID value to use as an argument in the following requests.
Now, use an open data set to write data into the bucket: the global CO2 emissions from fossil fuels since 1751. This bucket contains 266 years of carbon emissions compiled by the Carbon Dioxide Information Analysis Center. With a simple bash script, you can read the file, print each year’s most interesting values, and write the data into the InfluxDB bucket.
To start, let’s create a simple write.sh bash script:
#! /bin/bash
#1. iterates over the global_emissions.csv file and reads each comma-separated column
while IFS="," read -r Year Total GasFuel LiquidFuel SolidFuel Cement GasFlaring PerCapita
do
	echo "Year: $Year , total: $Total , Per capita $PerCapita"
	#2. Converts the value of the year into a UNIX timestamp
	ts=`date "+%s" -u -d "Dec 31 $Year 23:59:59"`

	#3. Inserts the total value of co2 per year
	curl -i -XPOST "http://localhost:8086/api/v2/write?precision=s&orgID=$1&bucket=$2" \
    	--header "Authorization: Token $3" \
    	--data-raw "total_co2,source=CDIAC value=$Total $ts"

	#4. Checks if there is a value per capita
	if [ -z "$PerCapita" ]; then
    	PerCapita=0
	fi

	#5. Inserts the per capita value of co2 emissions per year
	curl -i -XPOST "http://localhost:8086/api/v2/write?precision=s&orgID=$1&bucket=$2" \
    	--header "Authorization: Token $3" \
    	--data-raw "per_capita_co2,source=CDIAC value=$PerCapita $ts"

done < <(tail -n +2 global_emissions.csv)
The script above does the following:
- Iterates over the
global_emissions.csvfile and reads each comma-separated column - Converts the value of the year into a UNIX timestamp
- Inserts the total value of CO2 per year
- Checks if there is a value per capita
- Inserts the per capita value of CO2 emissions per year
You can call this script using the terminal, passing three space-separated arguments: the organization ID (the orgID saved earlier), the bucket’s name, and the API token used earlier.
Note that the preceding script looks for the global_emissions.csv file in the same folder as the script.
Once you get the source file and the script together, you can run it with this:
./write.sh b9b77e9c6e2d331d InfluxDB-API-test-bucket your_api_token
The output should look like the following code, which is an HTTP 204 response code per each API invocation.
HTTP/1.1 204 No Content
X-Influxdb-Build: OSS
X-Influxdb-Version: 2.1.1
Date: Fri, 12 Nov 2021 00:05:44 GMT
Pay attention to the invocation of the InfluxDB /api/v2/write endpoint. As documented, it requires the precision, organization, and bucket query parameters, and expects a payload that follows the InfluxDB line protocol.
This protocol is a text-based data representation that contains four components:
- Measurement: What you are measuring
- Tag set: How to identify the measurement
- Field set: A set of values associated with the measurement (in this case, only one)
- Timestamp: When the last measurement was taken
Using this format, you can express complex time series data. In this example, only the total co2 and per capita co2 measurements were written into the bucket.
Querying data
Similar to the write operation, there is a query endpoint that accepts a query in the Flux language (which is a concise and functional language designed for querying, analyzing, and acting on data) as payload. You will also use the orgID value previously saved as a query parameter in order to call the endpoint.
A query then generates a CSV result with the mean of the total co2 every five years, from 2000 to 2015:
curl --request POST \
  http://localhost:8086/api/v2/query?orgID=your_org_id  \
  --header 'Authorization: Token your_api_token' \
  --header 'Accept: application/csv' \
  --header 'Content-type: application/vnd.flux' \
  --data 'from(bucket:"InfluxDB-API-test-bucket")
    	|> range(start: 2000-12-31T00:00:00Z, stop: 2015-01-01T00:00:00Z)
    	|> filter(fn: (r) => r._measurement == "total_co2")
    	|> aggregateWindow(every: 5y, fn: mean)'
The /api/v2/query can compress the results using an additional header in the request.
You could also include a set of key/value pairs that represents parameters to be injected into the query or even get the results as a specific CSV dialect. This makes extracting data a simple task, in which your creativity and knowledge of the Flux language are the driving forces.
If you have an InfluxDB v1.x database you can also query your data using the InfluxDB v2.x API. First, be sure to verify that the database and retention policy are mapped to a bucket using the /api/v2/dbrps endpoints to list and create the necessary mappings, and then launch the query using the API:
curl --request GET \
  http://localhost:8086/api/v2/query?orgID=your_org_id  \
  --header 'Authorization: Token your_token' \
  --header 'Accept: application/csv' \
  --header 'Content-type: application/json' \
  --data-urlencode "q=SELECT mean(*) FROM example-db.example-rp.total_co2"
Given that this tutorial uses an InfluxDB v2.x database, you cannot test this InfluxQL sample directly with the current setup. But it’s useful for compatibility testing with previous versions.
A common mistake you may encounter with a time series database like InfluxDB is trying to design your solution following the relational paradigm. InfluxDB’s documentation provides best practices for schema design in time series use cases that you should review before starting to model.
Conclusion
In this tutorial, you learned what the usage basics are for InfluxDB HTTP API, how you can authenticate and test the availability of the API in an InfluxDB instance, and how to use the write endpoint to send data using the line protocol.
You also learned how to read data by querying using the Flux language. The script and data used are available as a GitHub Gist.
The InfluxDB HTTP API provides you with a myriad of resources and actions that can be used in a programmatic way, adding flexibility and compatibility with any programming language. You can deploy the InfluxDB HTTP API locally using any of the InfluxDB installation methods, or you can try the InfluxData platform to get all the benefits from a managed environment.
Remember that you can also use the API clients available for many popular languages.
About the author:

Nicolas Bohorquez is a data architect at Merqueo, has been part of development teams in a handful of startups, and has founded three companies in the Americas. He is passionate about the modeling of complexity and the use of data science to improve the world.
