A Guide to Installing Node-RED
By
Community
updated October 20, 2023
Use Cases
Developer
Navigate to:
Node-RED is an innovative open-source visual programming tool that has gained immense popularity for its ability to simplify the development of event-driven applications, automation workflows, and seamless integration of various services and devices. Leveraging the power of Node.js, Node-RED offers a browser-based flow editor, providing users with an intuitive interface where they can connect nodes to create flows by effortlessly dragging and dropping elements on the canvas. With its versatility and applicability in diverse domains such as the Internet of things (IoT), home automation, data processing, and integration projects, Node-RED has become a preferred choice for developers worldwide.
Features and Benefits of Node-RED
-
Visual programming for easy development: Node-RED’s greatest strength lies in its visual interface, which makes it equally accessible to developers and non-developers alike. This user-friendly approach enables users to construct complex workflows without delving into extensive coding, thereby reducing the learning curve and facilitating rapid development.
-
Rich node library for enhanced functionality: Another significant advantage of Node-RED is its vast library of prebuilt nodes. Ranging from nodes for data manipulation, hardware integration, cloud services, and more, this extensive collection significantly simplifies the process of integrating with various platforms and devices, saving valuable time and effort.
-
Flow-based programming for flexibility: Adopting a flow-based programming paradigm, Node-RED allows developers to visually connect nodes, defining the flow of data and interactions. This approach empowers developers to build dynamic and flexible systems, making it easier to modify and adapt applications as requirements evolve.
-
Accelerated prototyping and proof-of-concept development: With Node-RED’s intuitive interface, developers can quickly prototype and test ideas, fostering agile development practices. The ability to iterate on designs before committing to full-scale development allows for efficient problem-solving and reduces the risk of costly mistakes.
-
Optimized for event-driven architectures: Node-RED excels in handling real-time events and data streams, making it an ideal choice for IoT applications and event-driven systems where responsiveness is crucial. This capability ensures smooth and efficient handling of events, even in highly dynamic environments.
-
Active community support for a thriving ecosystem: Node-RED enjoys a vibrant and supportive community that actively contributes to its growth. The community regularly shares new nodes, offers insights and solutions to common challenges, and provides valuable assistance to users, ensuring a rich ecosystem of resources.
System Requirements for a Successful Node-RED Installation
Before diving into the installation process, it’s vital to ensure that your system meets the requirements for a smooth Node-RED experience.
-
NodeJS: Since Node-RED is built on top of Node.js, having it installed on your system is a prerequisite. It’s highly recommended to use the latest LTS (long-term support) version of Node.js as it offers stability, support, and access to the most recent features.
-
npm: npm (node package manager) is a crucial component for installing and managing Node-RED. Fortunately, npm comes bundled with Node.js, which means that if you have Node.js installed, you should already have npm at your disposal.
-
Modern web browser: To access the Node-RED editor, you’ll need a modern web browser, such as Google Chrome, Mozilla Firefox, or Microsoft Edge. These browsers provide optimal compatibility and performance when working with Node-RED.
Do I Need to Have Node.js Already Installed to Use Node-RED?
Yes, having Node.js installed is an essential prerequisite for utilizing the functionalities of Node-RED. Node-RED leverages Node.js as its runtime environment for executing JavaScript code outside of a web browser. Node.js serves as the foundation that allows Node-RED to interact with the system, access files, manage dependencies, and execute server-side logic.
The installation process for Node-RED takes into account this dependency, and when you install Node-RED, it automatically installs Node.js as well if it’s not already present on your system. This seamless installation process ensures that Node-RED operates smoothly without any additional steps from the user.
Next, we’ll explore the comprehensive step-by-step process to install Node-RED on various operating systems, including Windows, Mac, and Linux:
Installing Node-RED on Windows
Below are the steps to install Node-RED on Windows:
Step 1: Install Node.js
Start the installation process by downloading the latest LTS version of Node.js for Windows from the official website. Run the installer and follow the on-screen instructions to complete the installation.
Step 2: Open command prompt
To open the command prompt, press Win + R, type “cmd,” and press Enter.
Step 3: Install Node-RED
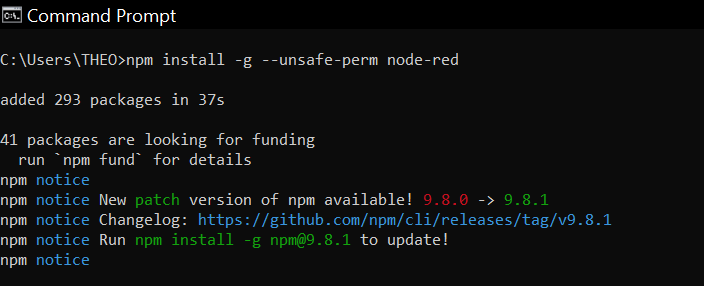
In the command prompt, type the following command and press Enter:
npm install -g --unsafe-perm node-redThe output below is what you should see when you run that command:

Step 4: Wait for the Installation
npm will proceed to download and install Node-RED and its dependencies globally on your system. The duration of this process may vary depending on your internet speed.
You should see the output below once the installation is completed:
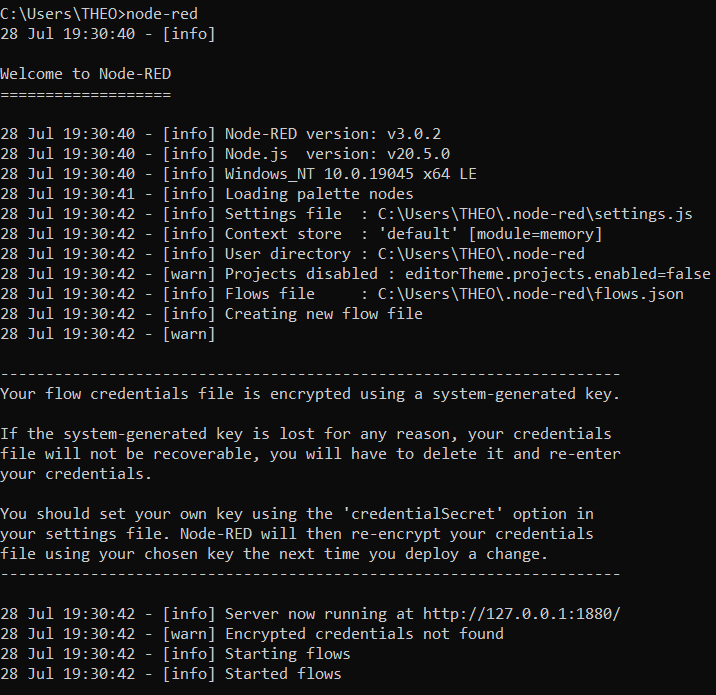
Step 5: Run Node-RED
After the installation completes, type the following command in the command prompt and press Enter:
node-redYou should see the output below after running that command:
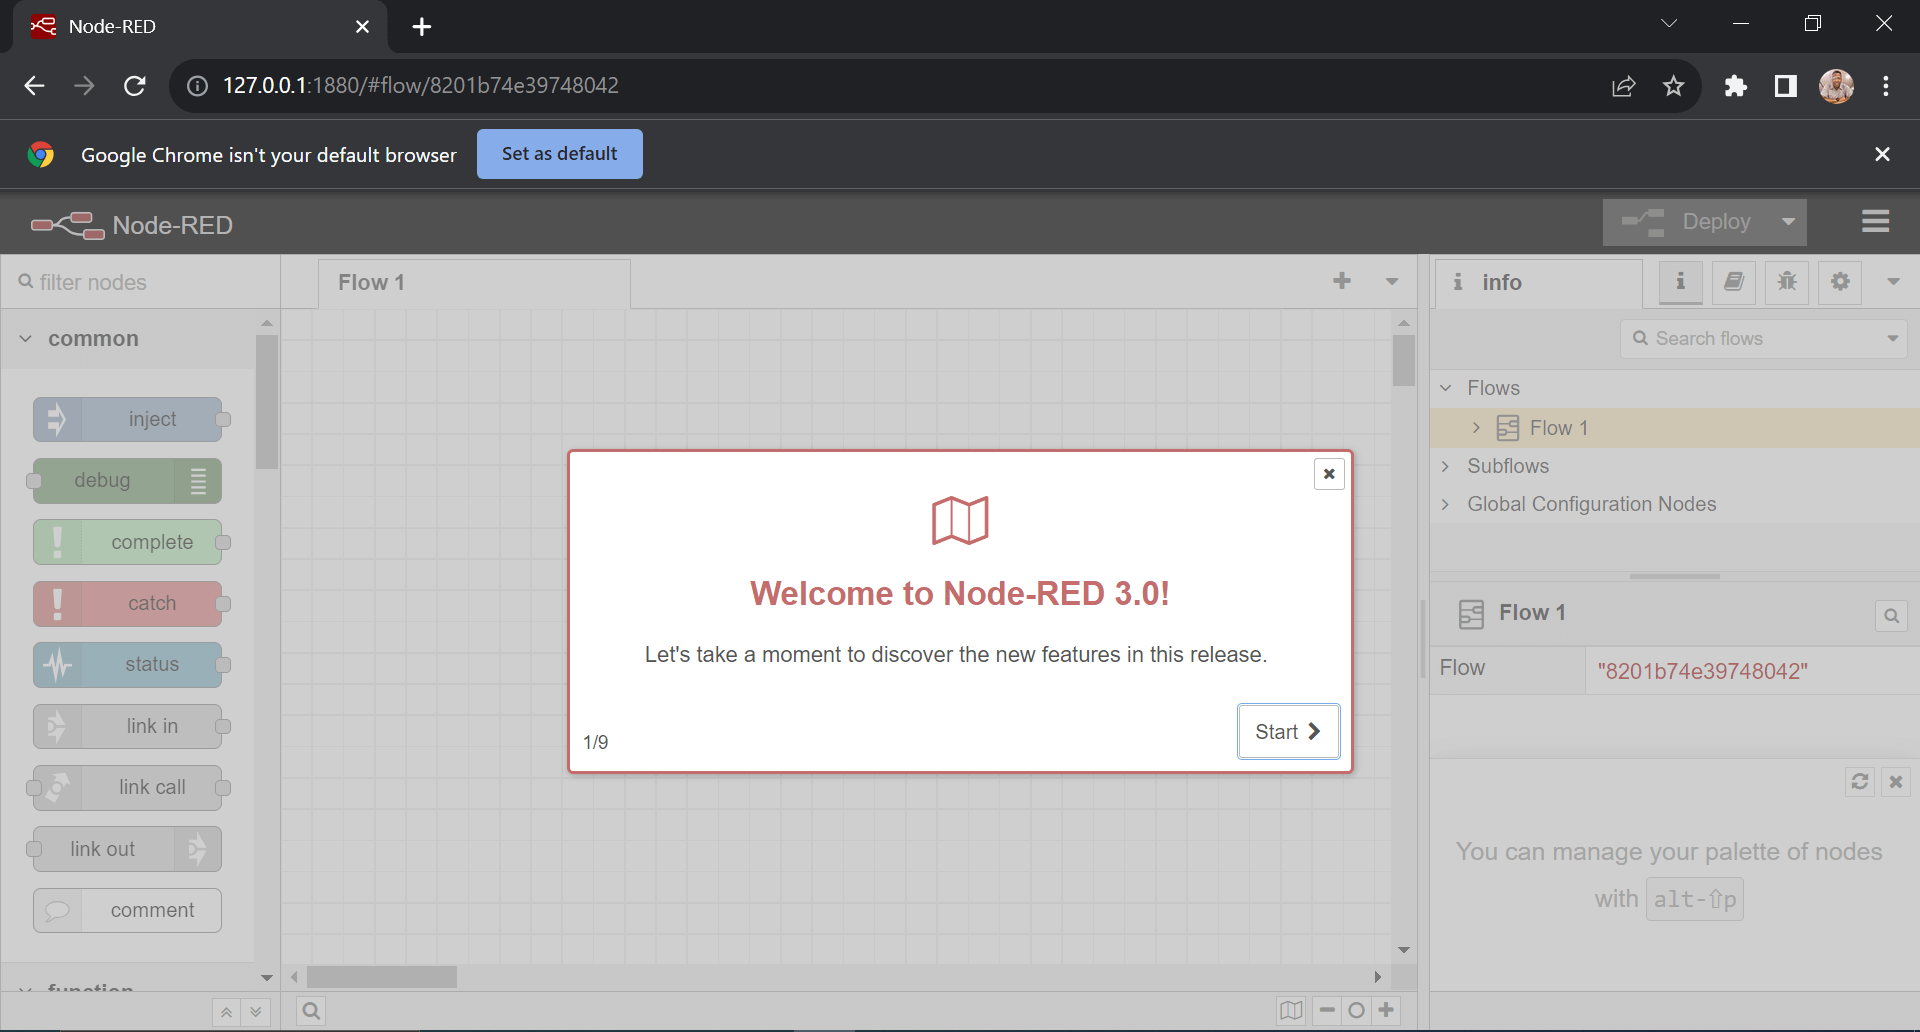
Step 6: Access Node-RED editor
Open your preferred web browser and navigate to http://localhost:1880 to access the Node-RED editor.
This is what you should see:
Installing Node-RED on Mac
Below are the steps to install Node-RED on Mac:
Step 1: Install Node.js
Begin by downloading the latest LTS version of Node.js for Mac from the official website. Run the installer and follow the on-screen instructions to complete the installation.
Step 2: Open Terminal
To open the terminal, go to Applications > Utilities > Terminal. The terminal application will launch, providing you with a command-line interface.
Step 3: Install Node-RED
In the terminal, enter the following command and press Enter:
sudo npm install -g --unsafe-perm node-redStep 4: Wait for the Installation
As you initiate the installation, you’ll be prompted to enter your macOS password. Once you provide the password, npm will proceed to install Node-RED and its dependencies globally on your system.
Step 5: Run Node-RED
After the installation is complete, type the following command in the terminal and press Enter:
node-redStep 6: Access Node-RED editor
Open your preferred web browser and go to http://localhost:1880 to access the Node-RED editor.
Installing Node-RED on Linux
Below are the steps to install Node-RED on Linux:
Step 1: Install Node.js
As Node-RED relies on Node.js, it’s necessary to install it using your Linux distribution’s package manager. For example, on Debian/Ubuntu-based systems, use the following command:
sudo apt-get install nodejs npmStep 2: Install Node-RED
Once Node.js is installed, open a terminal and enter the following command:
sudo npm install -g --unsafe-perm node-redStep 3: Wait for the Installation
npm will proceed to install Node-RED globally on your Linux system.
Step 4: Run Node-RED
After the installation is complete, type the following command in the terminal:
node-redStep 5: Access Node-RED editor
Open your preferred web browser and go to http://localhost:1880 to access the Node-RED editor.
Common Installation Problems and Troubleshooting
While the Node-RED installation process is generally smooth, you may encounter some common issues. Below are a few troubleshooting tips to resolve them.
Issue 1: Port conflict
You may encounter a port conflict with Node-RED, which could result in a message like the following:
Error: listen EADDRINUSE: address already in useTo address this, you can change the default port by providing a different port number when running Node-RED. For example, you could use the following:
node-red -p 1881This will enable Node-RED to run on port 1881.
Issue 2: Permissions Issue
On certain systems, you may encounter permissions-related issues when installing Node-RED globally. In such cases, you might need to use sudo to install Node-RED. However, exercise caution while using sudo and ensure you understand the implications. If appropriate, you can also consider fixing the permissions in the npm global directory.

Issue 3: Firewall or antivirus blocking connections
Firewalls and antivirus software might block Node-RED’s connections, leading to connectivity issues. To mitigate this, ensure that Node-RED has the necessary permissions to access the internet through your firewall or antivirus settings.
Post-Installation Setup and Testing
Now that you’ve successfully installed Node-RED, it’s time to set up your environment for optimal usage and conduct some tests to make sure that everything is functioning as expected. In this section, we’ll explore the essential steps for post-installation setup and guide you through a simple testing process.
Understanding the Node-RED User Interface
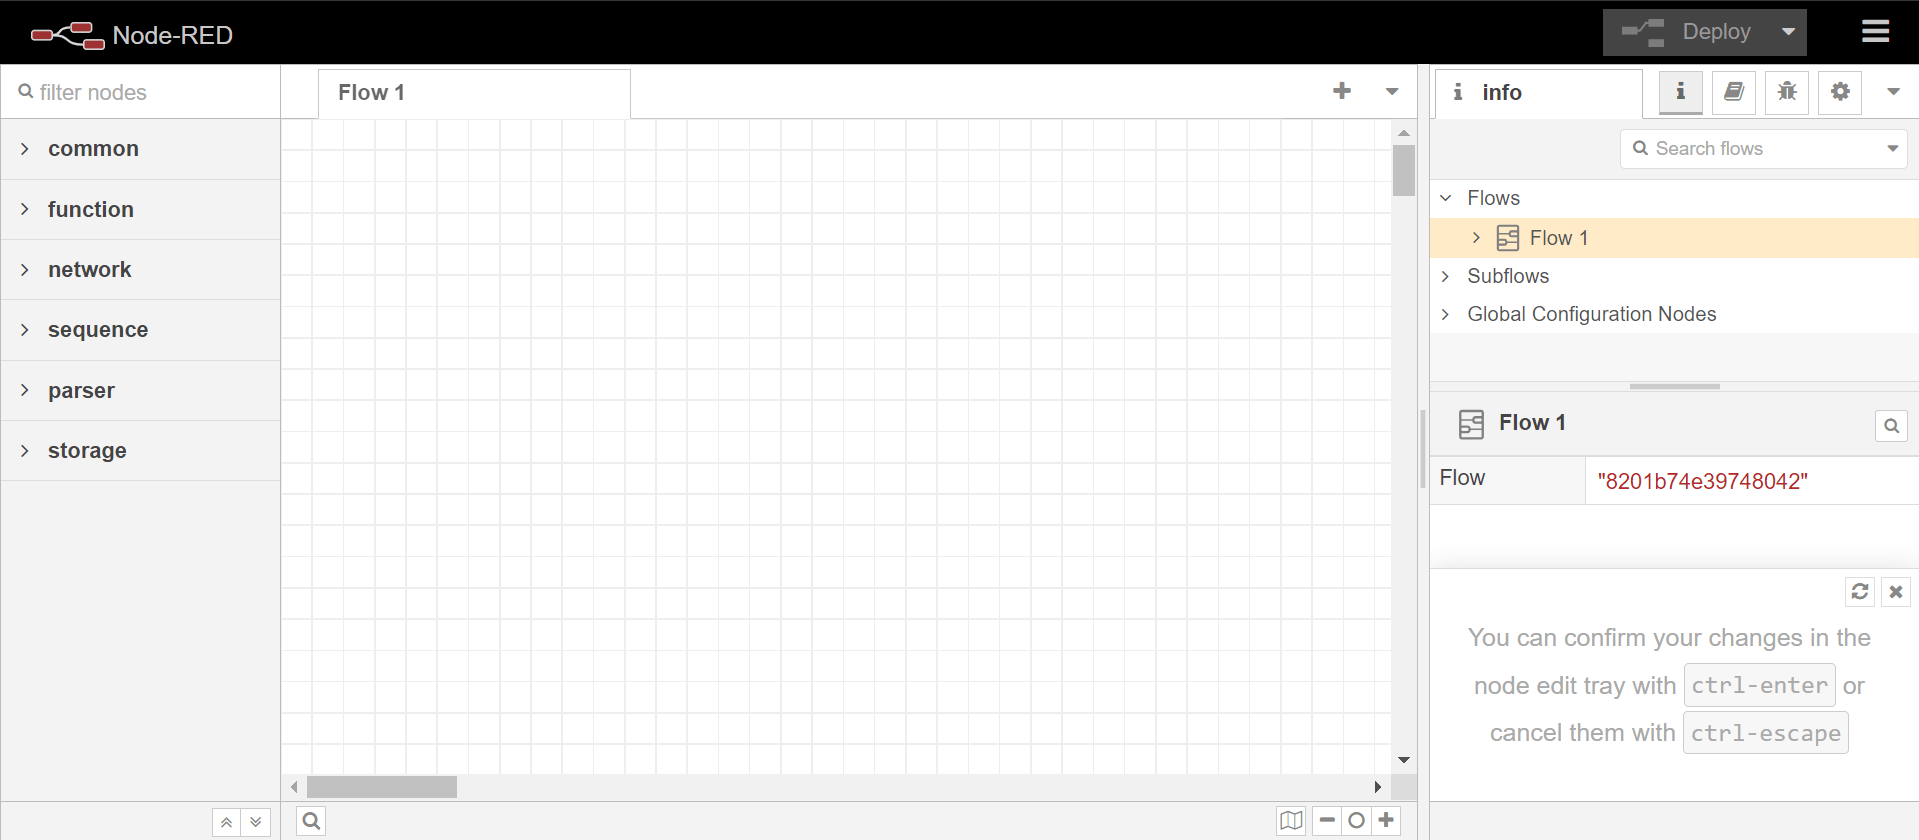
The Node-RED editor includes an intuitive user interface that comprises a sidebar on the left, the workspace canvas in the center, and a menu bar at the top. Users can easily interact with the interface, dragging nodes from the sidebar to the workspace, connecting them, and configuring their properties to create functional flows.
-
Sidebar: Located on the left side of the editor, the sidebar houses a variety of nodes that you can use to construct your flows. These nodes represent different functionalities, such as “Common” (nodes with frequently used utilities), “Function” (nodes for custom JavaScript functions), “Network” (nodes for network communication), “Sequence” (nodes for controlling message flow), “Parser” (nodes for data parsing), “Storage” (nodes for data storage), and more.
-
Workspace canvas: This is the central area of the editor where you will create and design your flows. You can drag and drop nodes from the sidebar onto the workspace canvas and connect them to define the data flow and interactions.
-
Menu bar: Situated at the top of the editor, the menu bar provides access to various options, including saving, deploying, importing, and exporting flows, and managing the Node-RED runtime.
Below is the user interface of the Node-RED editor.
Take some time to explore the available nodes in the sidebar and understand their purposes. By grasping the basics of the user interface, you’ll be better equipped to design efficient and functional flows.
Updating Node-RED
To be sure that you benefit from the latest improvements and features, it’s crucial to keep Node-RED up to date. The process of updating Node-RED to the latest version is straightforward. Simply use the following npm command:
sudo npm install -g --unsafe-perm node-red@latestUpon updating, remember to restart Node-RED for the changes to take effect.
Testing Node-RED
The best way to confirm that Node-RED is functioning correctly after installation is to conduct a simple test. Create a basic flow by connecting an inject node to a debug node. Once the flow is deployed, click on the inject node to trigger it and observe the output in the debug sidebar. This rudimentary test ensures that Node-RED is running as expected and allows you to verify its functionality.
Conclusion
Node-RED is a powerful visual programming tool that simplifies event-driven application development, automation workflows, and seamless integration. Understanding the user interface and keeping Node-RED updated is essential for maximizing its capabilities. With successful installation and testing, you are now equipped to unleash the potential of Node-RED for transformative innovation. Happy flow building and coding!
This post was written by Theophilus Onyejiaku. Theophilus has over 5 years of experience as data scientist and a machine learning engineer. He has garnered expertise in the field of Data Science, Machine Learning, Computer Vision, Deep learning, Object Detection, Model Development and Deployment. He has written well over 660+ articles in the aforementioned fields, Python programming, data analytics and so much more.
