Table of Contents
This article was written by Tyler Nguyen. Scroll down for his photo and bio.
For the summer of 2022, I joined InfluxDB on their Developer Relations Team as one of their interns, eager to learn more about the expansive industry of computer science in the real world, reach new horizons as a programmer, and build upon InfluxDB’s already well-established foundation. During this most recent fall quarter at the University of California, Irvine, I completed a data structures and algorithms course, which greatly piqued my interests and made InfluxDB a clear candidate for a company I wanted to spend my summer with. As I delve further and further into the InfluxDB ecosystem, in both the open source and software as a service sides, I discover that InfluxDB has done an outstanding job in fostering a tight knit community of customers and contributors, something I quickly learned to appreciate. In the little time I have spent with InfluxDB, I have found myself on a team of some of the most hardworking, passionate, and down-to-earth people I have ever worked with, each person being an embodiment of the core values of InfluxDB: teamwork, humility, and embracing failure. Being surrounded by people who never stop pushing their own limits of learning is incredibly contagious and is a prime source of motivation for my own personal growth.
My first task at InfluxDB as an intern was to familiarize myself with the essentials of InfluxDB through a crash course presented by InfluxDB University, a series of videos and presentations tailored to everyone in the community to act as a sort of textbook for InfluxDB products. InfluxDB 101, the course I took, went over everything I needed to know to get started, including writing data to InfluxDB, creating queries for my data with Flux, and configuring plugins for Telegraf. Having completed the course, my mentor tasked me with completing a newly released InfluxDB challenge for all new users to deploy their newly acquired skills. The challenge goes as follows:
1. Sign up for InfluxDB Cloud
The first step of the challenge is simple enough: InfluxDB provides sign-up options through already existing Google or Microsoft accounts for quick access to the InfluxDB service, or you can take a few extra seconds to create a new account manually.

2. Load data into the Cloud platform
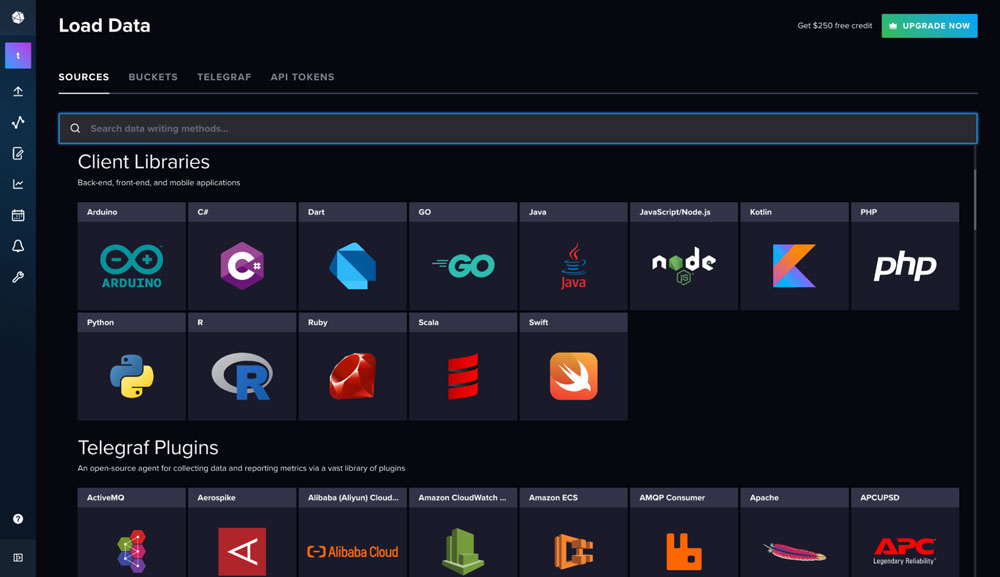
Given the countless different types of sensors, IoT devices, and file formats, data comes in all sorts of varieties. Fortunately, InfluxDB built their products to be flexible and easy to use and provides different tools to work around all forms of data.
- Write to InfluxDB using client libraries: InfluxDB provides support for a large range of different client libraries from more popular languages like Python or Java to more specialized languages like GO, PHP, or Arduino. All it takes is a simple import or inclusion of the library after installing the appropriate packages and issuing the “write()” function. Though I did not take this approach to complete this challenge, the Python client library is an integral part of my project for the intern hackathon that InfluxDB is hosting this summer.

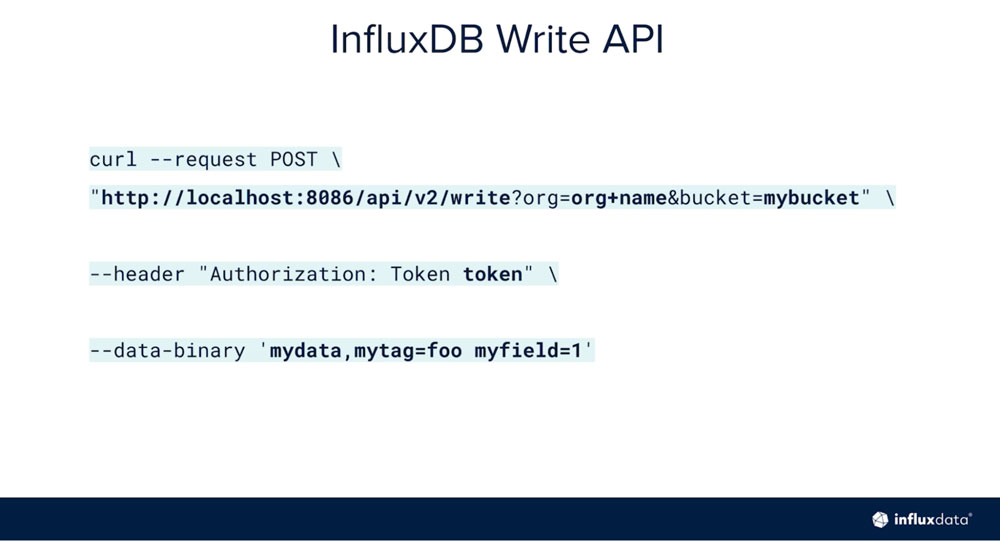
- Write to InfluxDB using the InfluxDB API: The InfluxDB write API is a standard HTTP API that works off curl POST requests in conjunction with the host name of the InfluxDB instance concatenated with the API endpoint specifier. This was not a method I used for this challenge either.

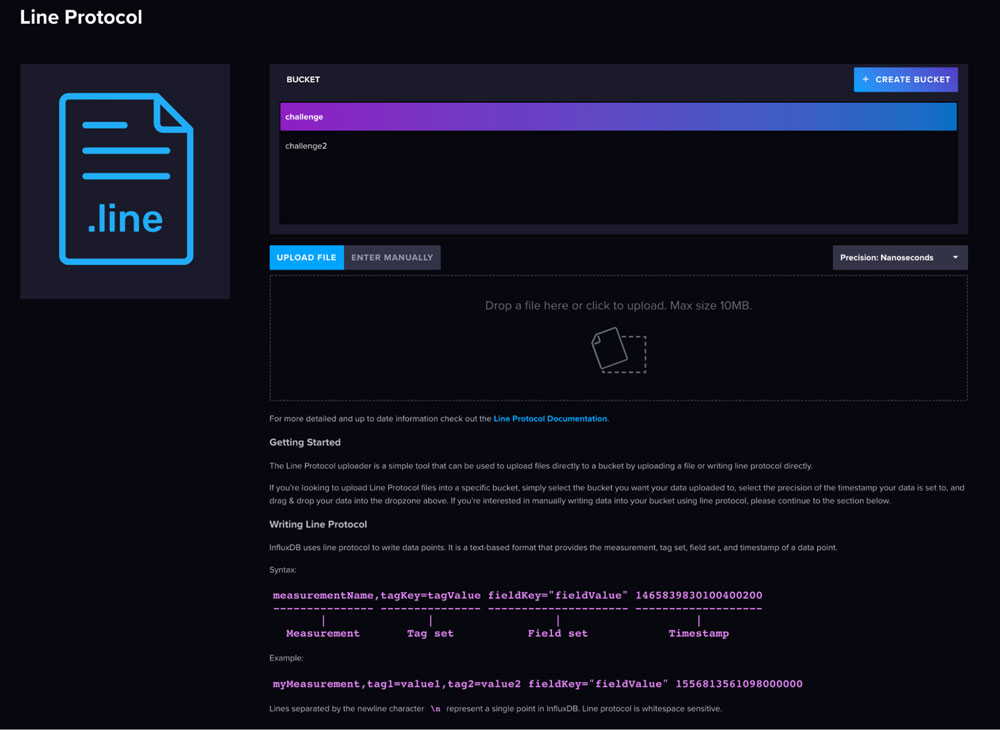
- Write to InfluxDB using the InfluxDB CLI: The InfluxDB CLI is a command line interface tool. After specifying the correct line protocol for the data, issue the write command and specify the file as a parameter or write from STDIN. I did not deploy this ingest method for this challenge.

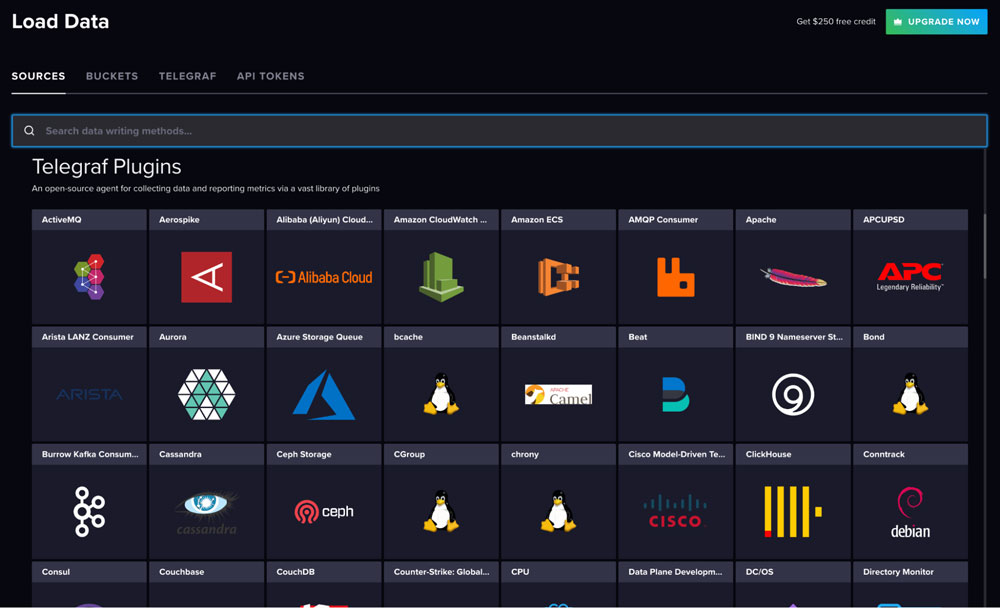
- Write to InfluxDB using Telegraf plugins: Telegraf is a plugin-based data collection agent, meant to streamline data from all formats into InfluxDB Cloud. To use Telegraf, you need to choose an output plugin to specify the destination of the converted data — if the destination is InfluxDB Cloud, you will need to use the Influx V2 plugin — and an input plugin to specify where the data is coming from.

This internship is all about learning and absorbing all the experience and opportunities that come from InfluxDB, and I was eager to get my hands on this new tool, which is why I attempted to use this approach first. Unfortunately, I ran into several problems at the start of this endeavor: my installation would not work, I could only issue the “telegraf” command from PowerShell if I was navigated in the directory of the executable file, and by the time I got it to half work, I would get strange errors. Everything made sense after I talked to my mentor: he informed me that many of InfluxDB’s clients deploy their products on Linux or MacOS ecosystems, so Windows machines don’t get much support… which is exactly what I was using. After switching to MacOS all my issues were solved, and everything worked smoothly. I was able to write a Telegraf config file using the Influx V2 output plugin and a standard file input plugin for annotated CSV files.

3. Create a task in the Cloud platform
Perhaps the most interesting part of the entire challenge, the requirement for making automated tasks was to make the task send a notification to a third-party endpoint when your data either stopped reporting or crossed a certain threshold. The InfluxDB Cloud UI makes setting up tasks a breeze by choosing a few options and clicking “create.” In this step, we created a deadman check to ensure our data did not cut out and a threshold check to monitor the values.
The part that I found more interesting was the third-party notification configuration. I decided to push notifications to Slack messenger using a webhook and the Slack API because Slack is a service that I use everyday. Alerts were set to every hour depending on whether a threshold was crossed or data stopped reporting.

4. Create a custom dashboard to visualize your data
At this step, the challenge itself was already complete, and it is time to take a step back and admire the work that was put into the challenge. In the InfluxDB UI, there is the ability to create a dashboard to visualize the inputted data. The requirement was to make it unique, while maintaining practicality and understandability.

Overall, I believe that the InfluxDB Challenge was a fantastic learning experience. It stimulated my critical thinking and memorization skills from the course I just completed, and as a learning-by-doing type of person, tackling the challenge after learning the skills cemented those newly acquired skills into my mind for further use. Though the conclusion of the challenge was very satisfying, the process of it all was equally memorable.
About the author

Tyler is currently attending the University of California, Irvine and graduates in 2024. He’s on the Developer Relations team at InfluxData, joining as a Summer 2022 Intern. Since he’s joined, Tyler has enjoyed working on Flux code. In his free time, Tyler enjoys cinematography, mountain biking and automotive racing.

