Introducing Community InfluxDB Templates
By
Michael Hall
updated December 14, 2025
Product
Use Cases
Developer
Navigate to:
With InfluxDB 2.0 we added the ability to export a configuration of your entire stack, and import it again into another instance of InfluxDB. This includes your InfluxDB buckets, dashboards, queries, alerts and even Telegraf configurations.
Since many people have the same or similar use cases, we wanted to provide a way for you to share your configurations with other users, and work together to enhance and improve them over time, just like you would any other open source project. So we’re launching a Community InfluxDB Templates project where you can publish your templates, see what other InfluxDB users have built, and try their templates yourself!
We’ve made using a Template as easy as possible, with just a few commands you’ll have everything you need up and running. You can try it now on either the InfluxDB Cloud or by downloading and running InfluxDB 2.0 yourself.
Setting up your environment
In this article I’ll be using the InfluxDB Cloud free tier to walk through using a Template. Using this hosted service is identical to using a self-hosted InfluxDB 2.0 instance, with just a couple of exceptions. First, the hosted service gives you a default Organization name, which will be the email address you used to sign up. Second, the hosted service doesn’t create an All Access token for you at the start, and you’ll need one in order to apply and use a Template.
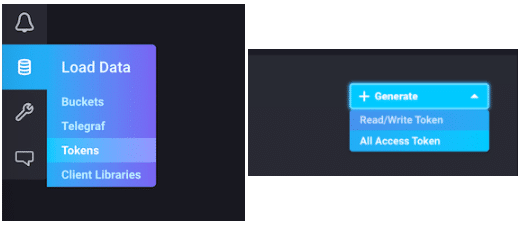
To create a token, log into your InfluxDB Cloud instance and go to the Load Data section, and then click the Tokens tab. From there you can create a new All Access token. Be sure not to share this token with anybody you don’t want to have full access to your account! The token I’ll be showing in this article was created just for this demo, and has already been deleted so that it can no longer be used.
Next you’ll want to create some environment variables. This isn’t strictly necessary, as you can pass the same information as parameters to the influx command-line we’ll be using later, but it’ll save you some typing and make it easier to follow along if we set them at environment variables instead. Here’s what mine look like:
export INFLUX_HOST=https://us-west-2-1.aws.cloud2.influxdata.com
export [email protected]
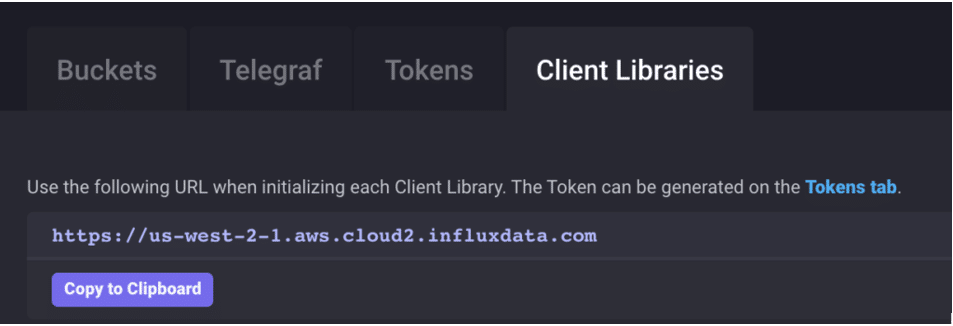
export INFLUX_TOKEN=MEMHwunGerdCRFG1_9Yi_GLpvGC3sr03DV1lUuvevhHJ88mqS5I7JmkyjlpMVpCDFv8Lf7rNq6MhUiavNw7Ceg==Notice that my INFLUX_HOST is the us-west-2 zone on Amazon AWS. When you sign up for InfluxDB Cloud, you’ll be asked to pick where you want to run it. You can use any of the available options, and can find the proper value for this variable under the Load Data > Client Libraries section of the UI.
Pick your Template
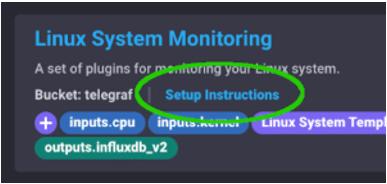
The Community InfluxDB Templates repository provides a list of the available template. One of the simplest ones to start with is the Linux System Monitoring template, which will gather a number of system resource metrics from a Linux machine and display them all for you in a nice dashboard.

Apply the Template
Since we’ve already set our environment variables, the only thing we need to specify on the command-line is the location of the Template file. If you’ve cloned the Git repository with all of the Templates in it, you can point to the manifest file like this:
influx pkg --file ~/Projects/community-templates/linux_system/linux_system.ymlBut an even easier way is to skip cloning, and just point directly to the manifest file on Github using the –url parameter like this:
influx pkg --url https://raw.githubusercontent.com/influxdata/community-templates/master/linux_system/linux_system.ymlThis will read the Template file and present you with a list of changes it will make to your InfluxDB setup before applying it. This gives you the chance to review what the Template is going to do before it makes any changes.
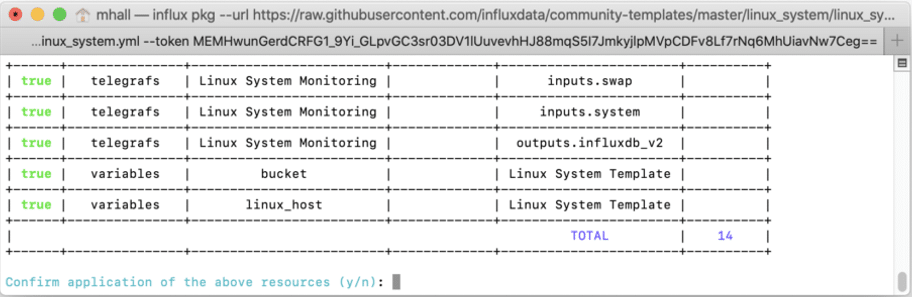
Once you confirm that you want to make those changes, it will create all the specified resources for you. That’s all you need to do!
Running Telegraf configurations
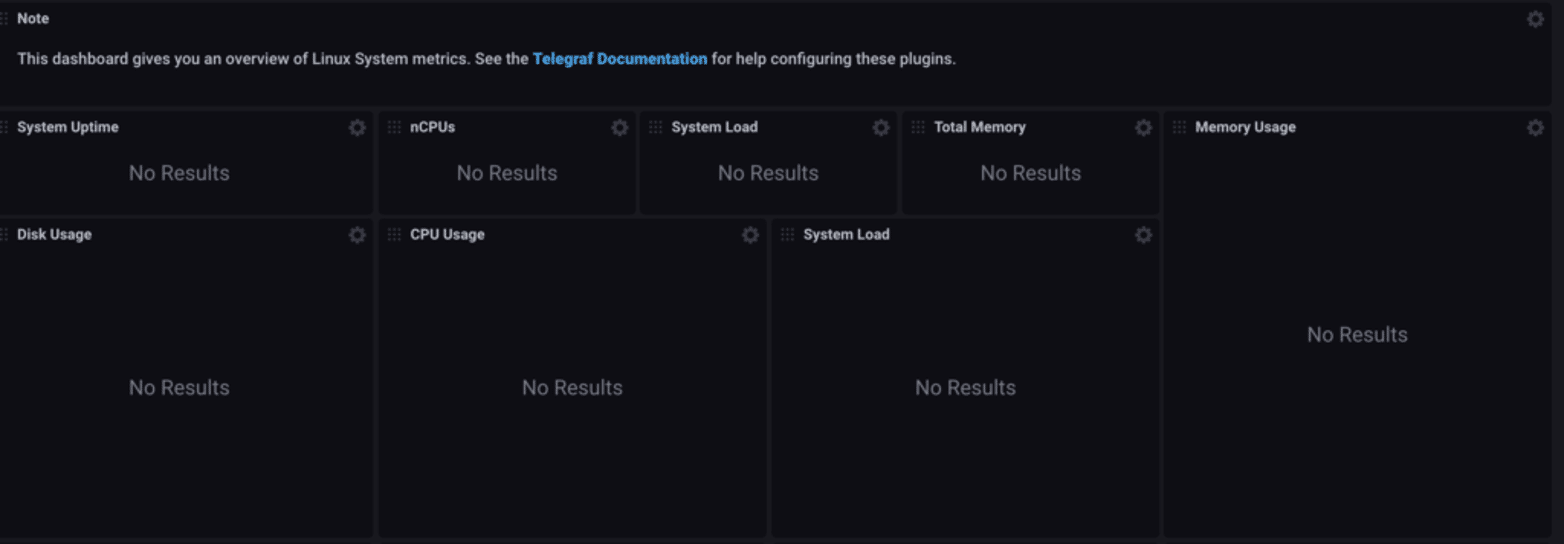
While the above instructions created your dashboard and supporting resources, you’ll notice that there’s no data there yet. That’s because the Linux System Monitor Template, like most Templates, uses Telegraf to read data from some source and write it into InfluxDB. But running Telegraf from a Template is easy too, because the configuration is part of it!
So far you could have run these instructions on any machine you liked. But you’ll need to install run Telegraf on the Linux host you want to monitor.
Each Template will provide instructions for how to setup and run any additional resources, such as Telegraf. The Linux System Monitor, for example, first tells you to setup your environment variables (the same ones we set above, but this time on the Linux host we’ll be monitoring), and then tells you to get the Telegraf configuration from Load Data > Telegraf as follows:
Because the Telegraf configuration is already in your InfluxDB instance, using them is simply a matter of pointing Telegraf to it. This command will connect to your InfluxDB instance using the credentials in your environment variables, download the Linux System Monitoring configuration, and start Telegraf running with it.
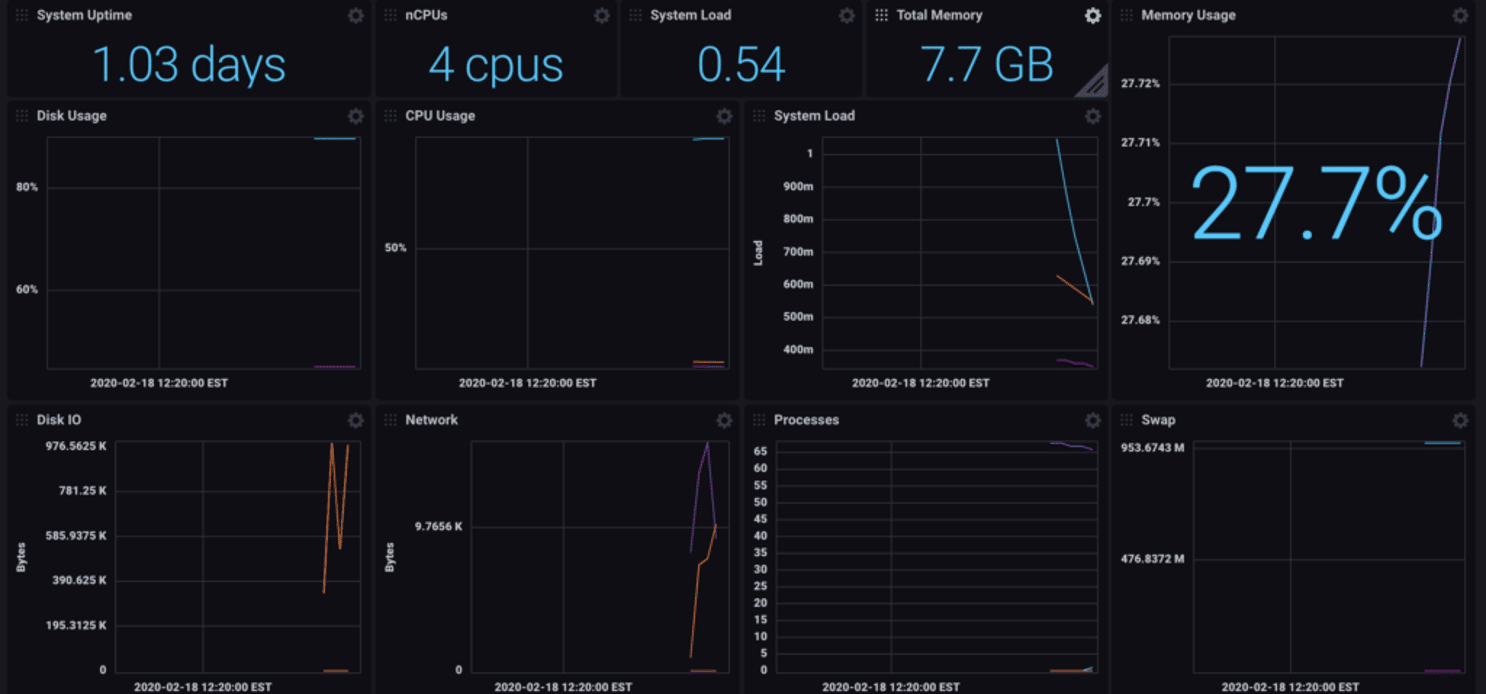
telegraf --config https://us-west-2-1.aws.cloud2.influxdata.com/api/v2/telegrafs/05423ced3db76000Now when you view your Linux System dashboard, you’ll start to see data appearing in your graphs! Be sure to check that your filters at the top are using the right bucket (telegraf) and linux_host (this will come from the host itself). Because the dashboard lets you filter by host, you can run the same Telegraf command on multiple Linux machines and monitor them all through the same dashboard!
Join the InfluxDB Community
To learn more about InfluxDB Templates and other community projects, join the InfluxDB Community Slack and Forums. There you will find InfluxData engineers and InfluxDB users working together, sharing ideas, and supporting each other.
