Securing Chronograf with OAuth 2.0 in Microsoft Azure Active Directory
By
Craig Hobbs
Developer
Dec 17, 2018
Navigate to:
While we typically receive questions on how to secure access to the backend datastore, in some cases it’s more practical to place the security on the front door application.
If your organization uses an identity provider that includes support for OAuth2, the Chronograf application can be easily configured to add support for user authorization and authentication. In this example, we will show how to quickly configure Chronograf with the proper metadata from Microsoft Azure Active Directory (Azure AD).
Azure AD is built on top of the OAuth2 protocol which defines several methods of authentication that ultimately end with users obtaining an access token for authenticating against a given resource.
In this workflow, users will be redirected from the Chronograf application to their Microsoft Azure login screen. There, individuals will be prompted to enter an email and password before gaining access to the application resource.
Create Azure AD Application:
Let’s begin by creating a new application within the Azure Active Directory. You can find a detailed description outlining the process here: Create an Azure Active Directory application.
Once you’ve provisioned the Chronograf app, you can assign users and groups to the application or choose to make it accessible to all users within your tenant.
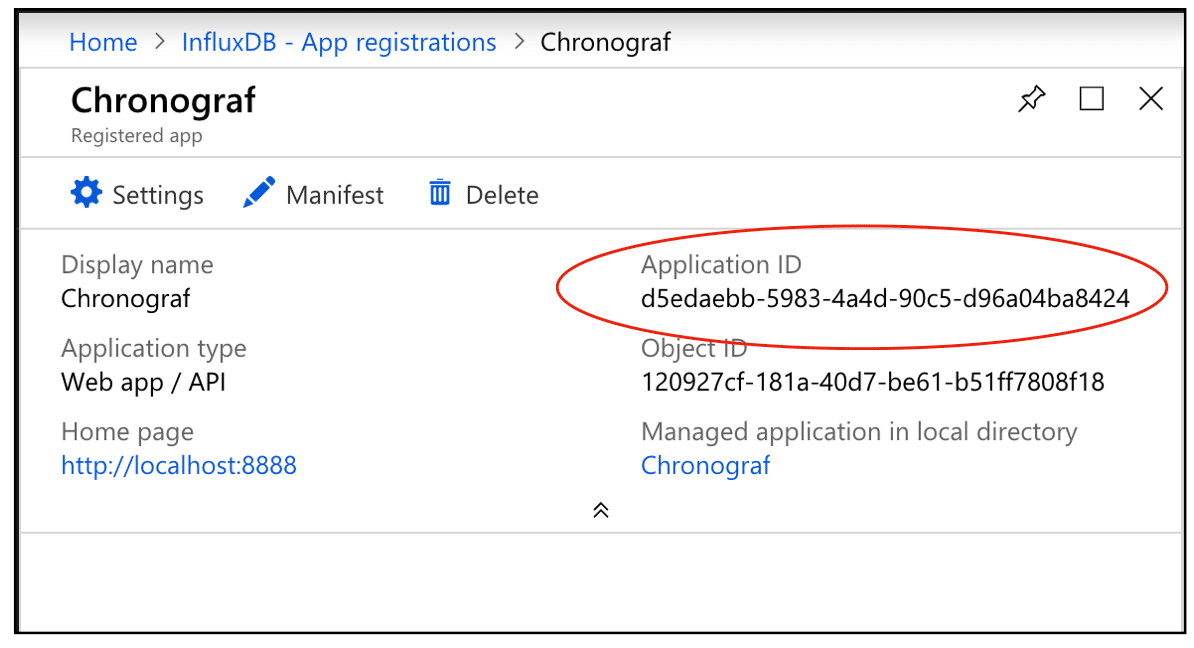
You will next want to note down the following metadata information: <APPLICATION-ID>, <TENANT-ID> and <APPLICATION-KEY>. These values will be used to define your Chronograf environment and successfully authenticate user with access.
Get Tenant ID:

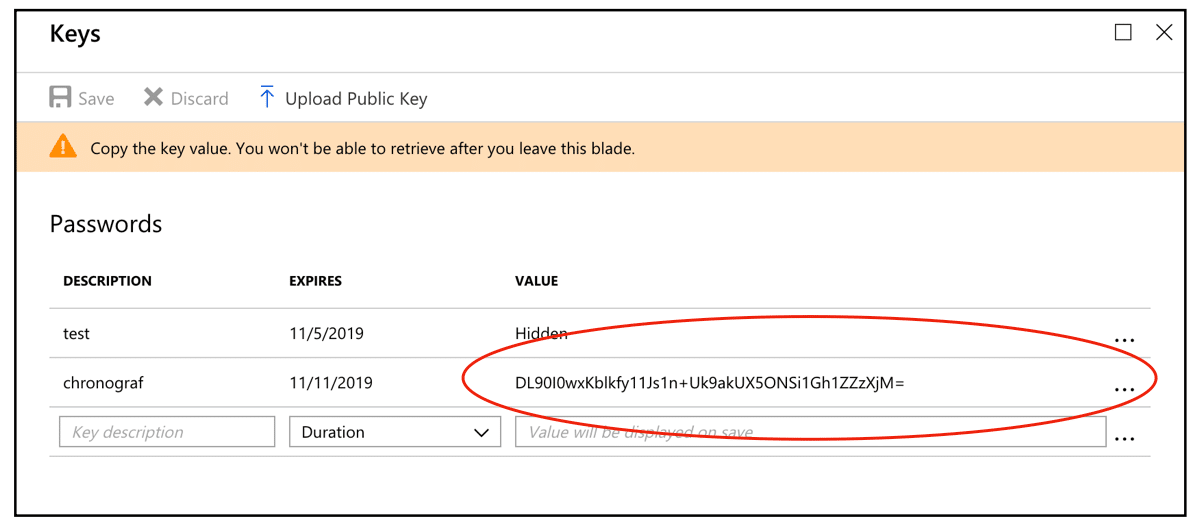
Get Application ID and Application KEY:
After saving the key, the value of the key is displayed. Copy this value because you aren’t able to retrieve the key later.
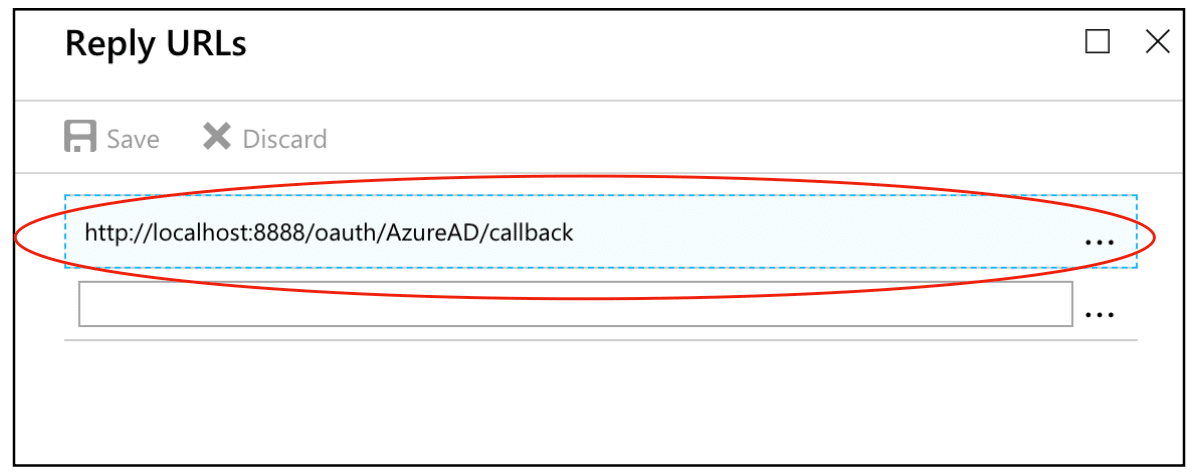
Register Callback URL:
Be sure to register a reply URL in your Azure application settings. This should match the calling URL from Chronograf. Otherwise, you will get an error stating no reply address is registered for the application. For example, if Chronograf is configured with a <GENERIC_NAME> value of AzureAD, the reply URL would be http://localhost:8888/AzureAD/callback:
Note: If you’ ve additionally configured TLS/SSL security for Chronograf, you will need to modify the protocol to make sure you have https:// protocol (not http://).
Chronograf Configuration:
After completing the application provisioning within Azure AD, you can now complete the configuration with Chronograf. Using the metadata from your Azure AD instance, proceed to export the following environment variables:
Exports for Chronograf (e.g. in /etc/default.chronograf):
- GENERIC_TOKEN_URL=
https://login.microsoftonline.com/<<TENANT-ID>>/oauth2/token - TENANT=<<
TENANT-ID>> - GENERIC_NAME=
AzureAD - GENERIC_API_KEY=
userPrincipalName - GENERIC_SCOPES=
openid - GENERIC_CLIENT_ID=<<
APPLICATION-ID>> - GENERIC_AUTH_URL=
https://login.microsoftonline.com/<<TENANT-ID>>/oauth2/authorize?resource=https://graph.windows.net - GENERIC_CLIENT_SECRET=<<
APPLICATION-KEY>> - TOKEN_SECRET=
secret - GENERIC_API_URL=
https://graph.windows.net/<<TENANT-ID>>/me?api-version=1.6 - PUBLIC_URL=
http://localhost:8888
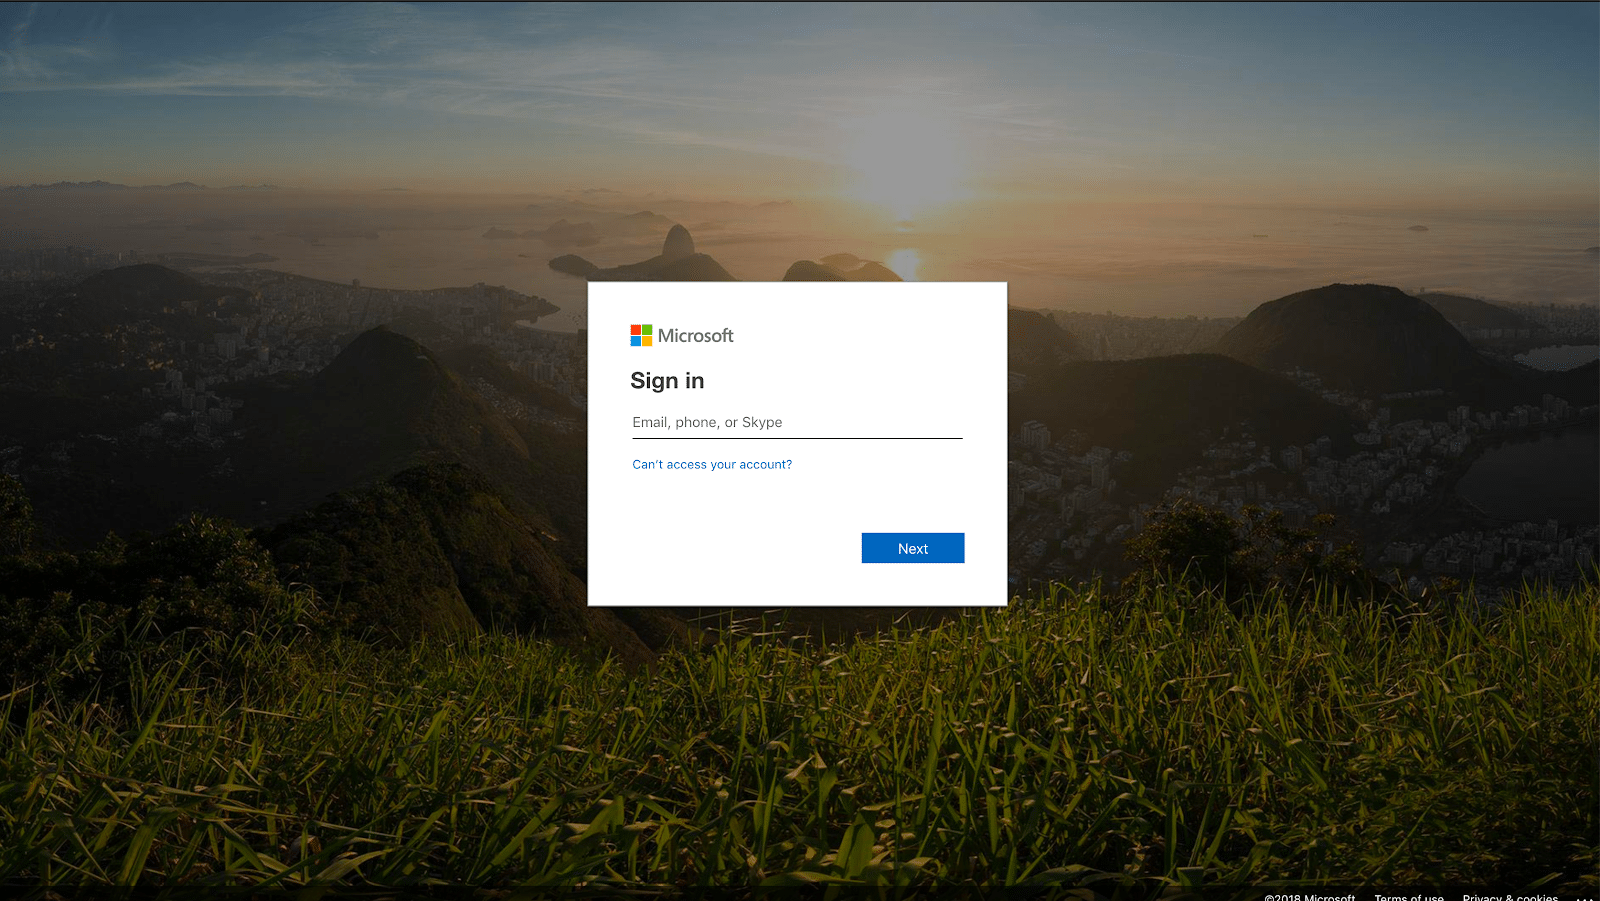
User Login:
Now, start Chronograf and navigate to the Web UI ( localhost:8888 ). You will be presented with a new screen that will include an option to use the newly configured authentication type.
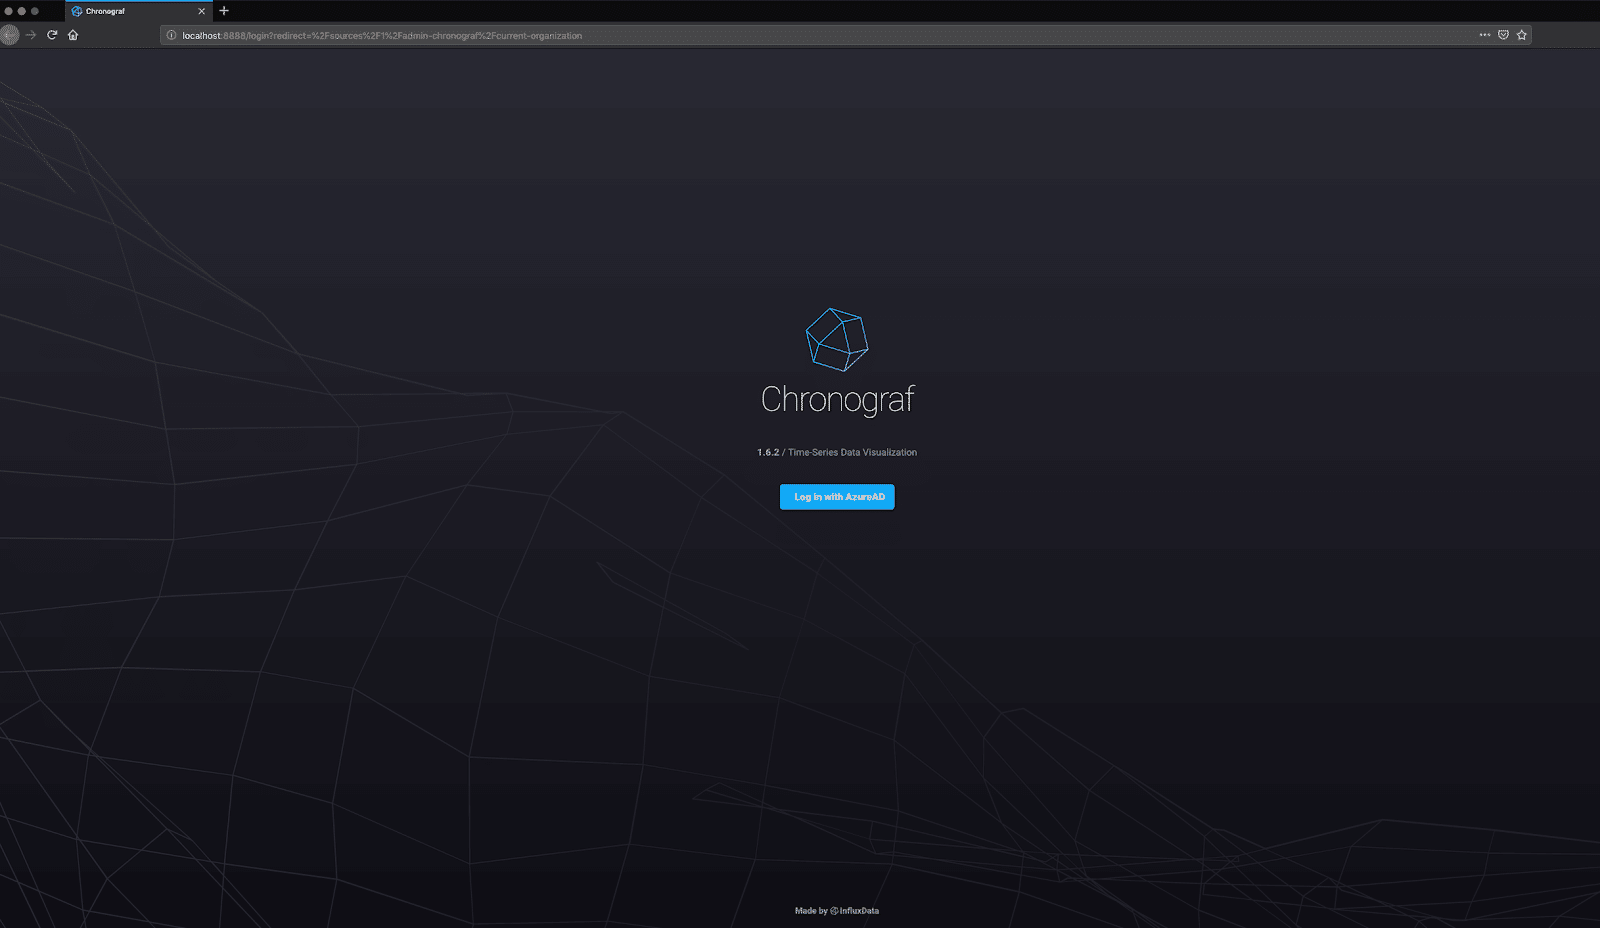
The user will be redirected to the authorization endpoint where they will enter their email and password for authentication with Azure AD.
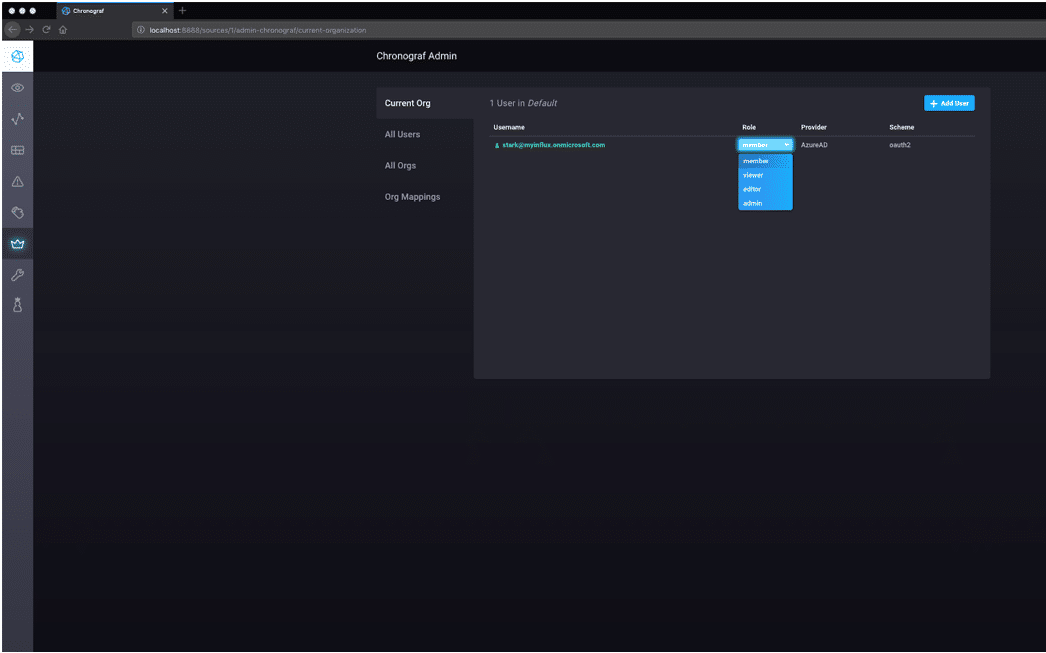
Users who login successfully will get the authorization code proving they just logged-in. The user is now authenticated and will be taken into the Chronograf Web-UI with role access maintained by their Azure AD profile or default set by the Chronograf administrator.
Conclusion:
For those of you who just need to restrict access to the Web-UI, leveraging your Microsoft Azure Active Directory can be a quick and easy way to add a centralized layer of user security.
