Table of Contents
With InfluxDB you can create notifications to make the most out of your alerts. Notifications enable you to send check statuses to the endpoint of your choice. In this TL;DR we set up a Slack Notification Rule and Endpoint through the InfluxDB UI.
Notifications Endpoint Options
This TL;DR assumes that you’ve already used the InfluxDB UI to create a threshold check to maintain the focus on how to send those check statuses to a notification endpoint. All Notification Rules and Notification Endpoints configured through the UI are executed by a Flux task that’s generated behind the scenes. You can create the following notification endpoints with the InfluxDB UI which uses the following Flux packages:
However, you can also send alerts to many other destinations by writing a custom notification and using one of the following Flux packages to do so:
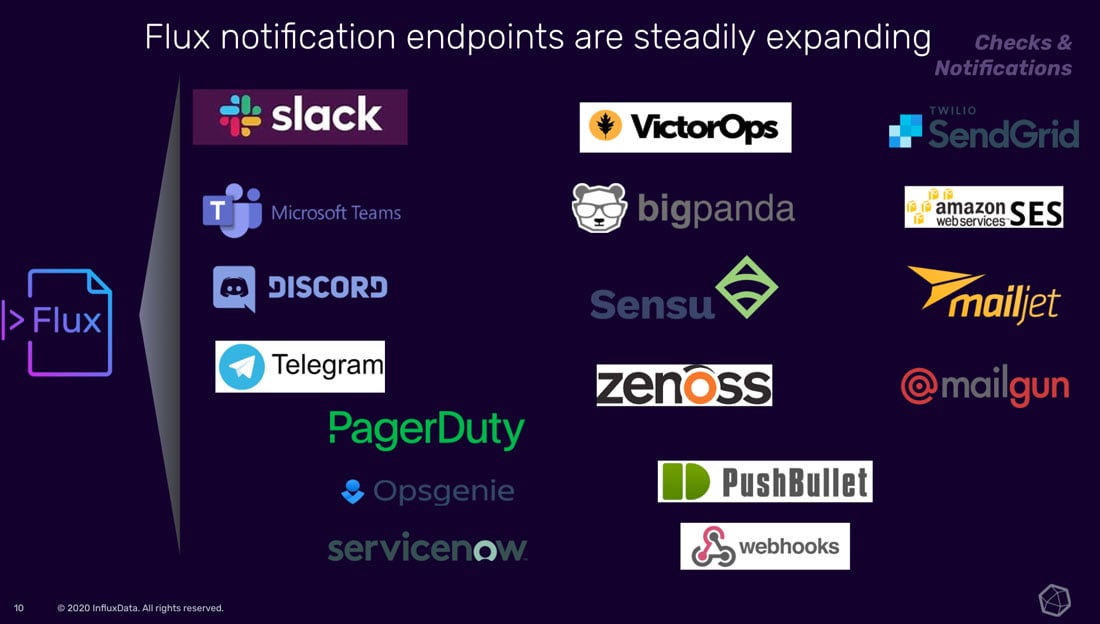
As shown above, you can create custom alerts with notification endpoints including PushBullet, Discord, OpsGenie, Sensu, Microsoft Teams, Telegram, BigPanda, VictorOps…and many more!
To learn more about how to write a custom notification with Flux, please watch the following Flux Telegram Package tutorial.
Creating a Slack Notification Endpoint
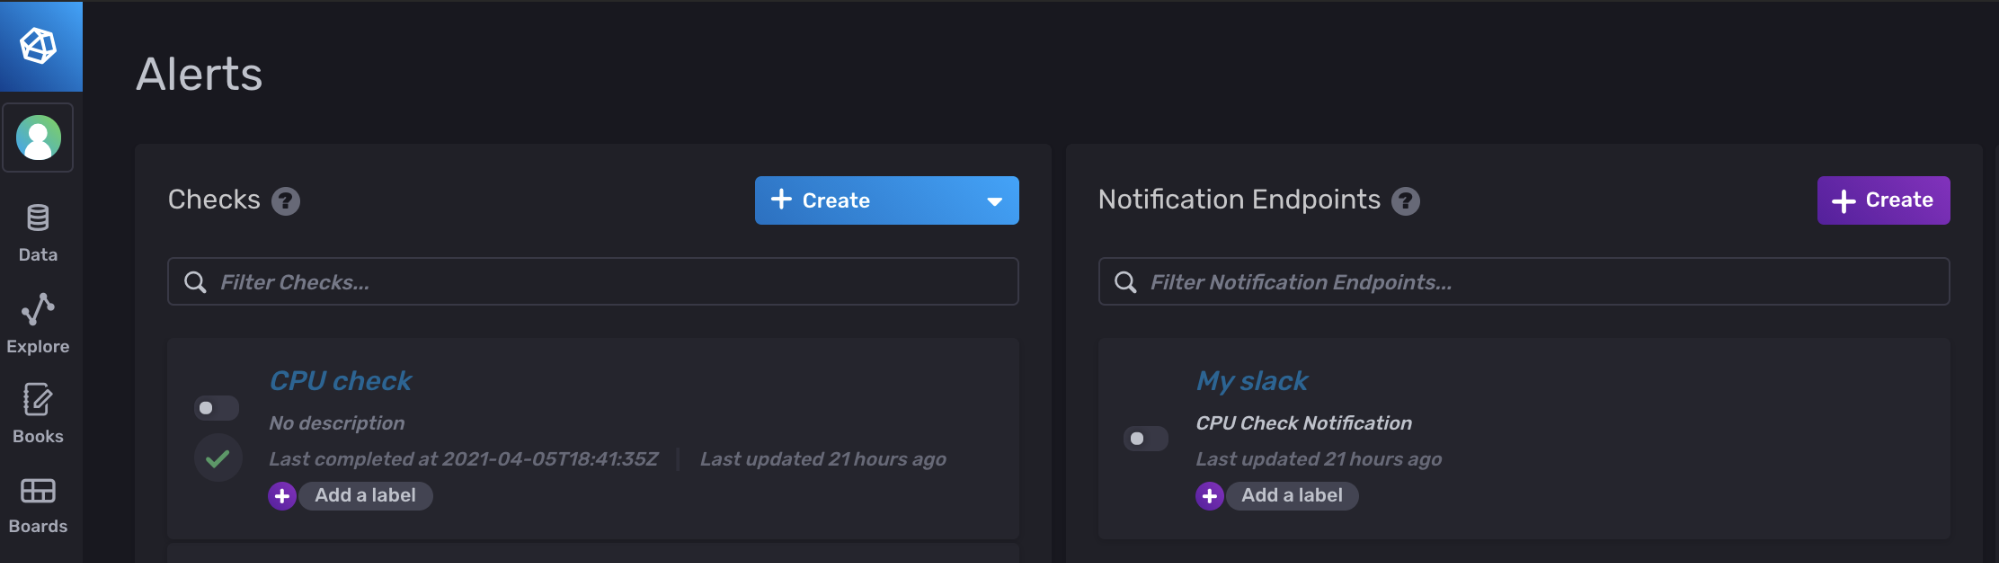
A Notification Endpoint is the destination that an alert is sent to. The first step in creating a Slack Notification Endpoint is to navigate to the Alerts page and click + Create under the Notification Endpoints panel.
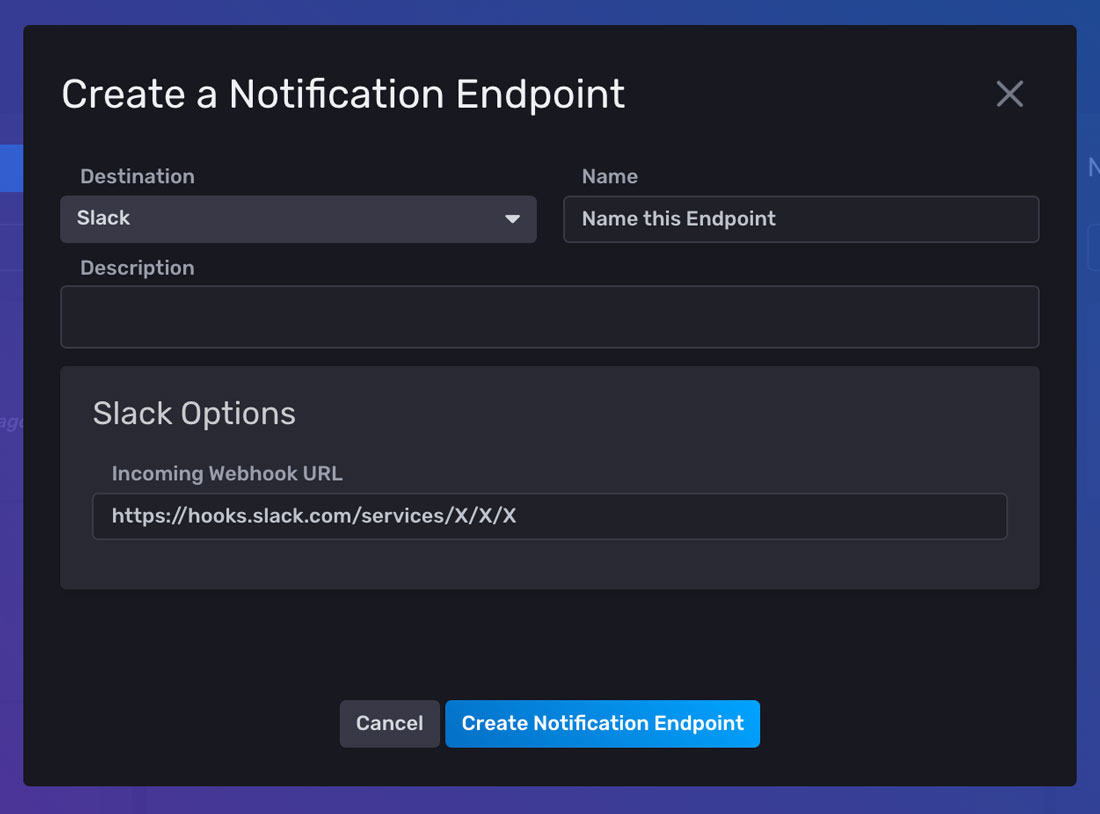
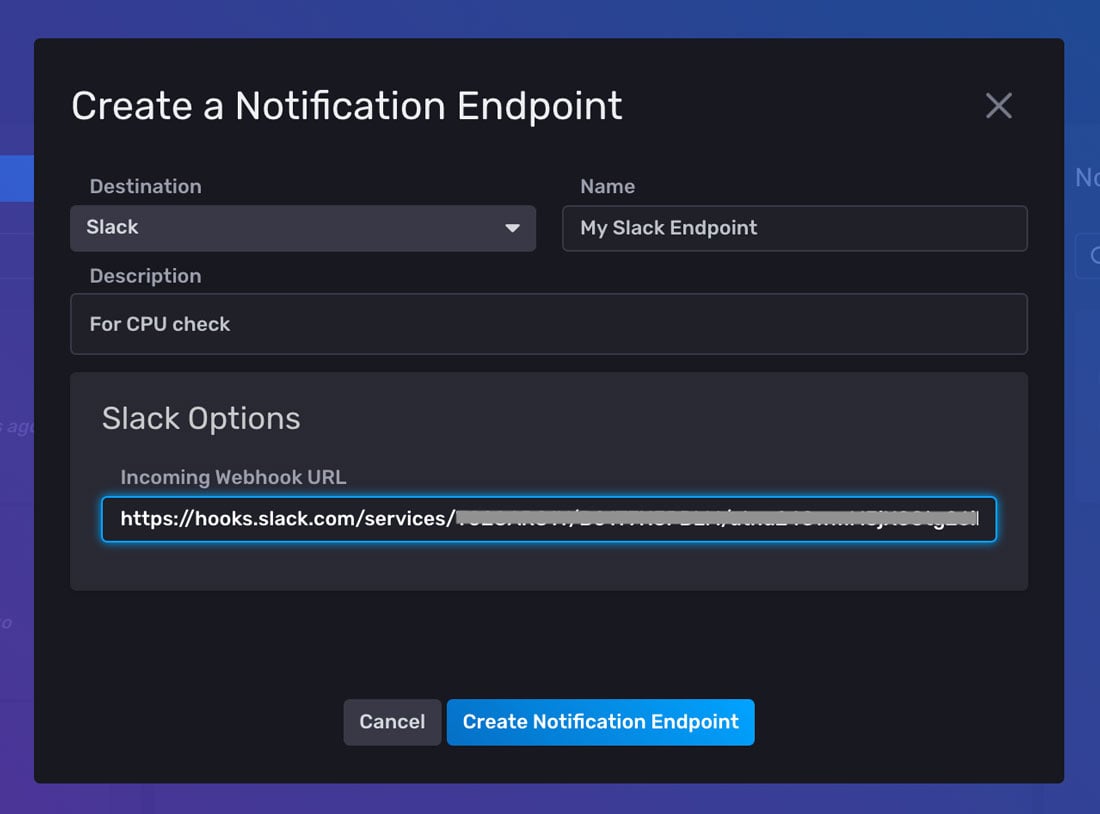
Next, select the destination you wish to send your alert status to – or Slack for this example. After you’ve named and described your notification, you must include the Incoming Webhook URL.
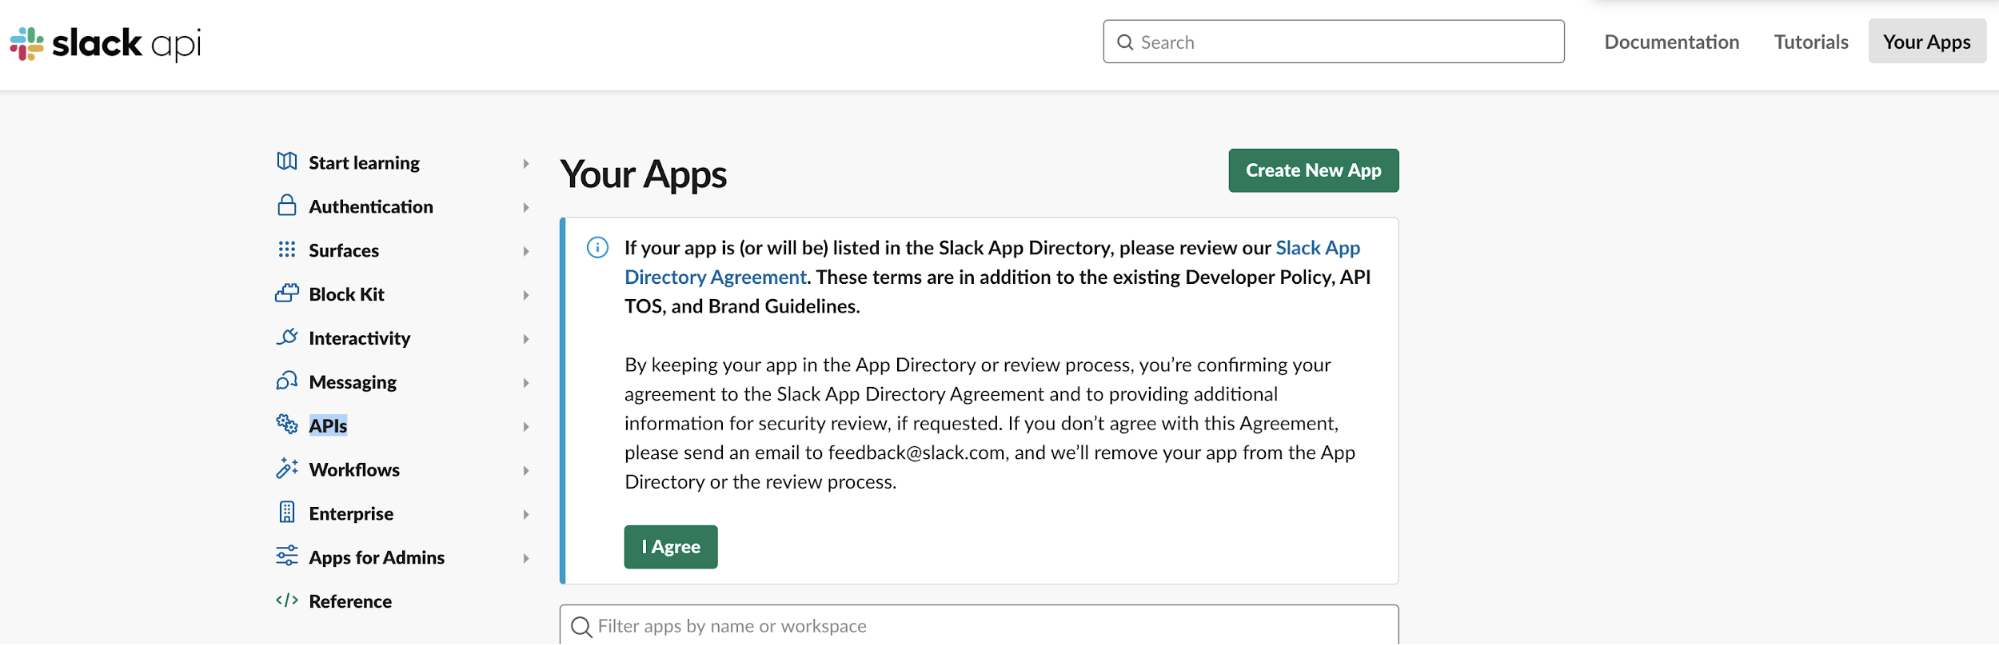
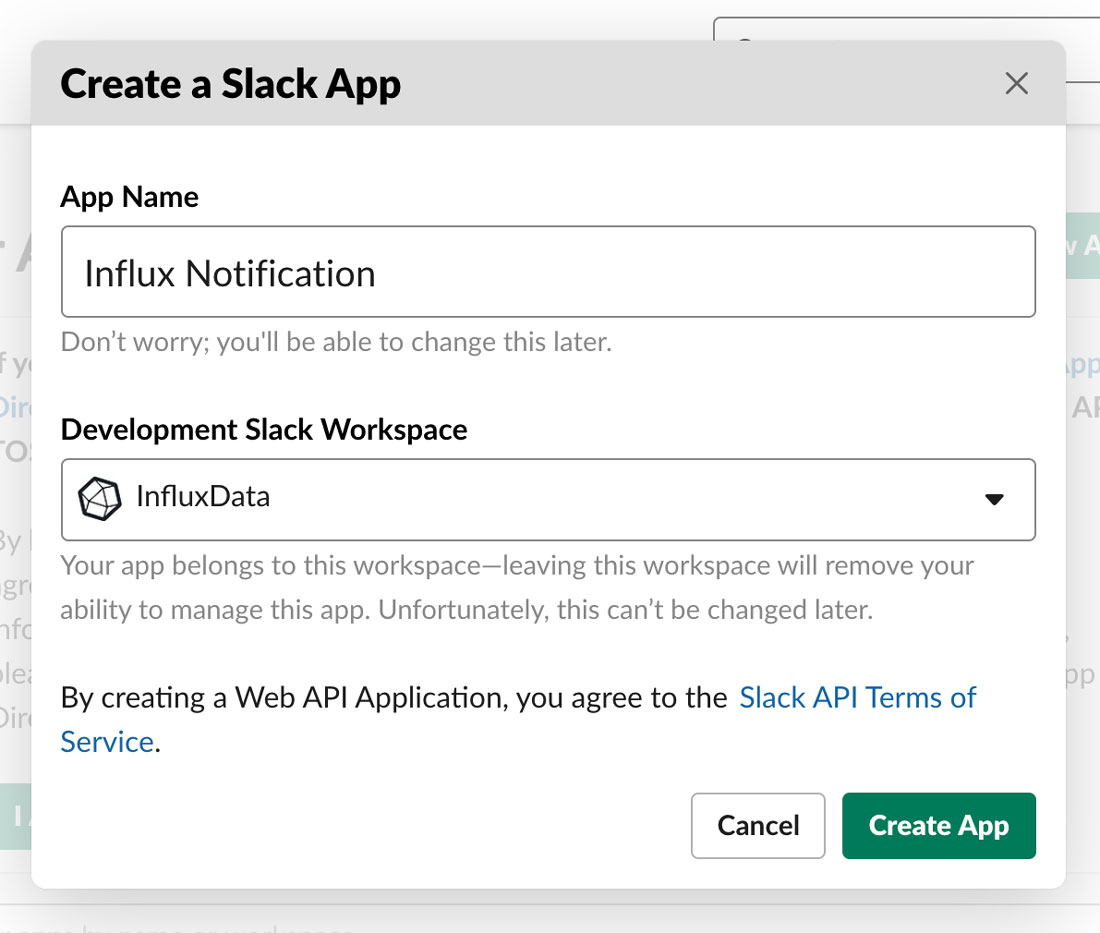
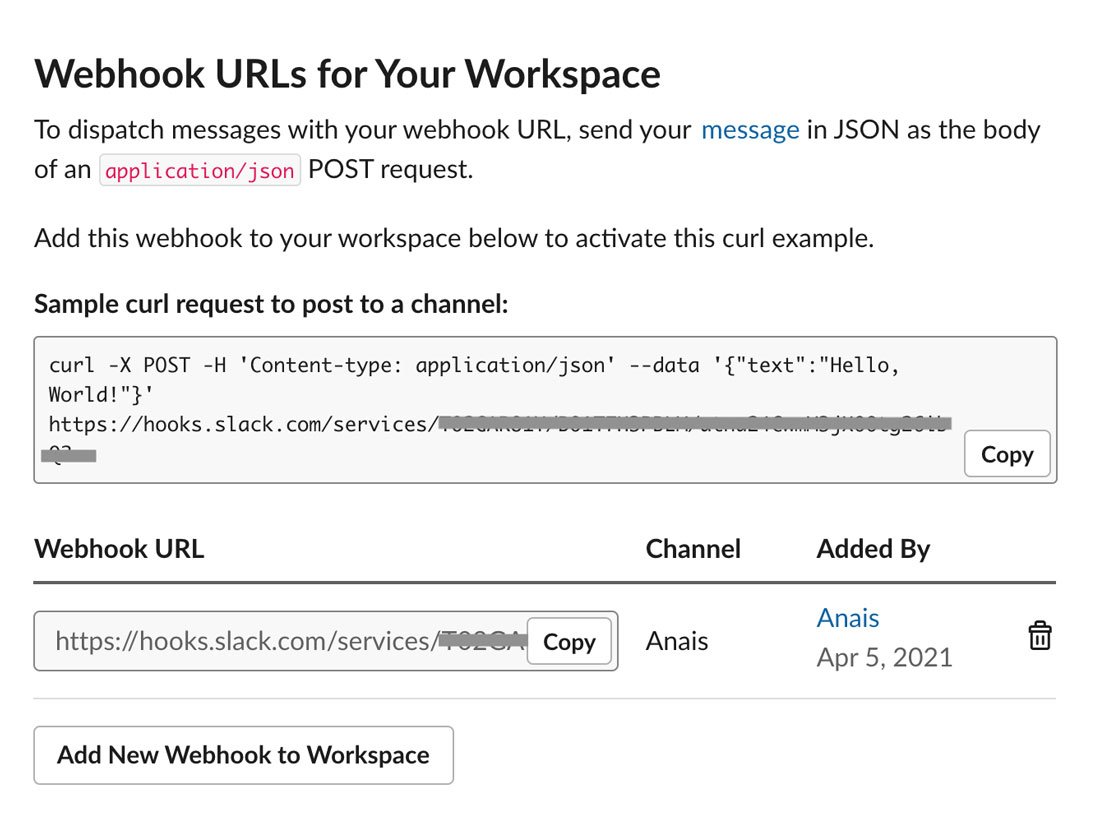
To find your Slack Incoming Webhook URL, visit https://api.slack.com/apps. Then Create a New App.
Specify the App Name you want to give your app and the Development Slack Workspace that you want to use.
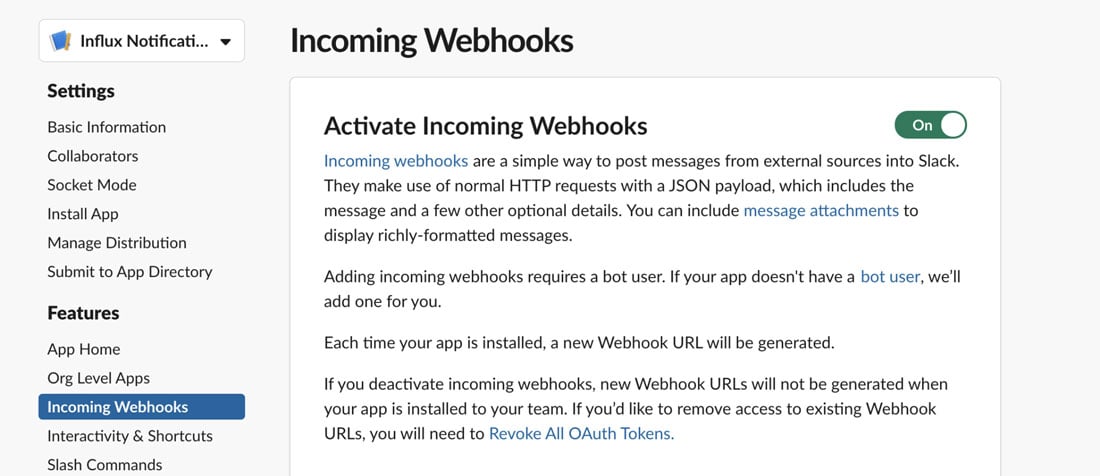
Next, Activate Incoming Webhooks with the toggle on the Incoming Webhooks page.
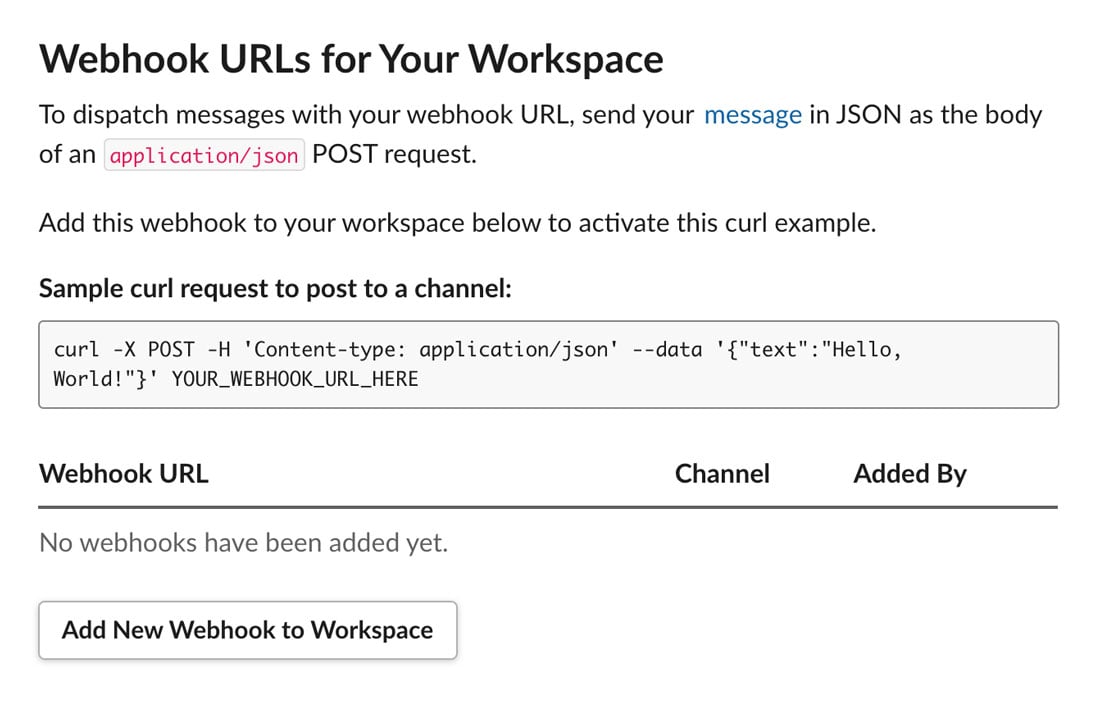
Now you are ready to Add a New Webhook to Workspace.
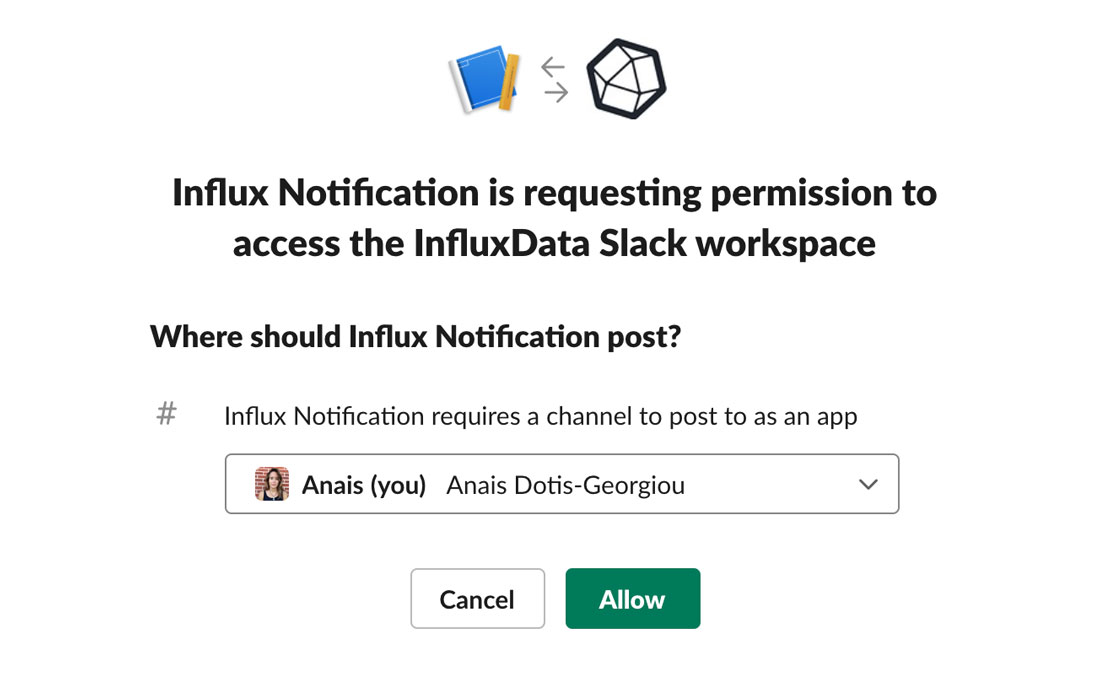
At this point, Slack will request permission to access your Slack workspace and require you to select a channel to post to.
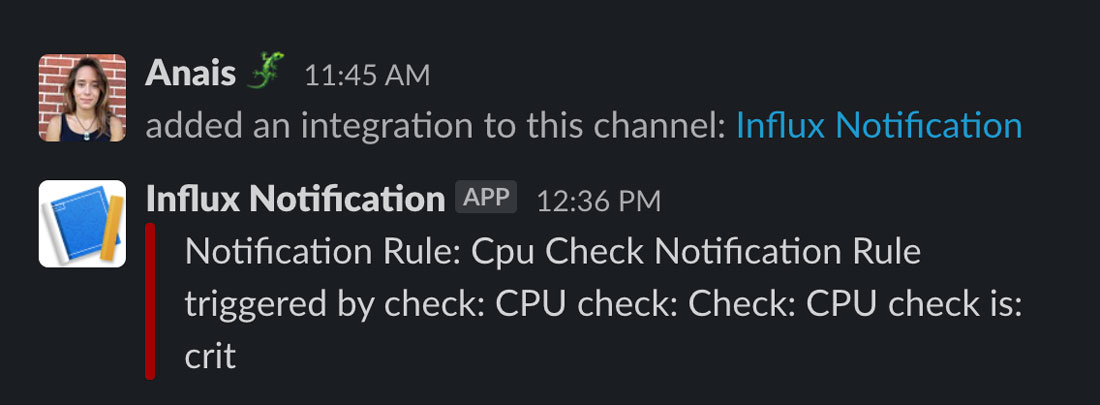
At this point you should be able to see this permission access and Webhook integration reflected in your Slack channel.

Finally, you generated a Webhook URL for your workspace. You’ll use this URL when you create a Notification Endpoint through the InfluxDB UI.
Include this Webhook URL in the Slack Options and click Create Notification Endpoint.
Creating a Slack Notification Rule
A Notification Rule specifies the conditions of a check so that an alert is sent to your Notification Endpoint. The first step in creating a Notification Rule is to navigate to the Alerts page and click + Create under the Notification Rules panel.

Finally you can configure your Notification Rule:
- Name your Notification Rule.
- Specify the frequency that you want your Notification Rule to be triggered in the Schedule Every field.
- Specify an Offset. It's generally a good idea to include a small offset to avoid read and write conflicts.
- Specify the conditions of your check status. In the example below, I'll receive alerts when the status has a level of "CRIT".
- Finally, specify which Notification Endpoint you want to send your Notification Message to and what you want your Notification Message to contain.

Finally, you should be receiving notifications to your Notification Endpoint.
Final thoughts on configuring a Slack notification with InfluxDB
I hope this InfluxDB Tech Tips post inspires you to take advantage of InfluxDB to set alerts and create notifications capabilities. Share your thoughts, concerns, or questions in the comments section, on our community site or in our Slack channel. We’d love to get your feedback and help you with any problems you run into! And as always, we encourage you to share your story and let us know about the cool projects you’re developing with or on top of InfluxDB.
Want even more InfluxDB tips? Join us for InfluxDays EMEA on May 18-19. Register for free.
