TL;DR InfluxDB Tech Tips How to Use the CLI Locally to Access the Flux REPL and Write a Regular CSV to InfluxDB Cloud
By
Anais Dotis-Georgiou
updated December 14, 2025
Use Cases
Product
Developer
Navigate to:
In this post we share how to use the InfluxDB CLI with InfluxDB Cloud. This TL;DR assumes that you have registered for an InfluxDB Cloud account – registering for a free account is the easiest way to get started with InfluxDB.
Q: What do I need to use the CLI on my machine to connect to InfluxDB Cloud? A: You need to install InfluxDB 2.0 CLI locally. Please follow the documentation to install and configure the Influx CLI. Obtain the following authorization parameters for your InfluxDB Cloud Account:
- URL: The URL of your InfluxDB Cloud Account. For example It might be
https://us-west-2-1.aws.cloud2.influxdata.comif you are in the US West region. - Org: The org is the email account you use to register for your InfluxDB Cloud account.
- Token: Create a token by logging into your InfluxDB Cloud account, navigating to the "Data" tab, and generating a new token. You can choose to either scope your token to specific buckets or create an all access token.

After navigating to the “Data” tab on the vertical left navbar, access the “Tokens” page and select “Generate” to name and generate a new token.
Q: How do I connect my local CLI to InfluxDB Cloud? A: After installing the local Influx CLI, create an influx config with the authorization settings for your InfluxDB Cloud Account.
# Set up a configuration profile
   influx config create -n Cloud\
     -u https://us-west-2-1.aws.cloud2.influxdata.com\
     -o [email protected]\
     -t $INFLUX-TOKEN\
     -a
This will be your default configuration for your CLI.
Q: Can I create multiple InfluxDB CLI configs? A: You can create multiple CLI configuration settings and switch between the influx config command the following command. For example, to switch from an InfluxDB Cloud config to a local config run:
influx config Local
To quickly switch back to the previous config, use the following shortcut command:
influx config -
Q: How can I access the Flux REPL? A: Use this command to access the REPL:
./influx repl
Q: How do I exit the Flux REPL session when I’m done? A: To exit the Flux REPL, press CMD+D on MacOS. Other Linux variants use CTRL+D.
Q: How can I use the InfluxDB CLI to write a regular CSV to InfluxDB Cloud?
A: Use the influx write command to write the the following CSV, animals.csv, to InfluxDB Cloud with the InfluxDB CLI:
Type, Shelter, Age, Description, Date
Cat, A, 1.0, Tabby, 2020-08-01
Cat, A, 3.0, Calico, 2020-08-02
Cat, B, 14.0, Tabby, 2020-08-03
Dog, A, 7.5, Lab, 2020-08-04
Dog, B, 4.0, Pomeranian, 2020-08-05
Dog, B, 5.0, Shiba, 2020-08-06
First create a bucket to write the data to. You can either use the UI or the CLI to create a bucket. To create a bucket with the CLI named “Animals”, run the following command:
influx bucket create -n AnimalData -o [email protected] -r 7d
Include your bucket name, the organization where the bucket will be created, and the retention policy of the bucket to create a bucket with the influx bucket create CLI command. A successful bucket creation returns the following lines:
ID			Name		Retention	Organization ID
064139a738a61000	AnimalData	168h0m0s	04e07adbcd0b6000
Write the csv to the AnimalData bucket with the following command:
influx write -b AnimalData\
  -f  path/to/animals.csv \
  --header "#constant measurement,Animals" \
  --header "#datatype tag,tag,double,string,dateTime:2006-01-02"
Make sure to include constants and specify the datatypes of the headers. In this example, I’m creating a constant measurement, “Animals”. However, you can make constant tags, fields, and dates as well. I’m also creating two fields, “Age” and “Description” of type “long” and “string” respectively. Please refer to this documentation for all of the acceptable field formats.
Here is the output:
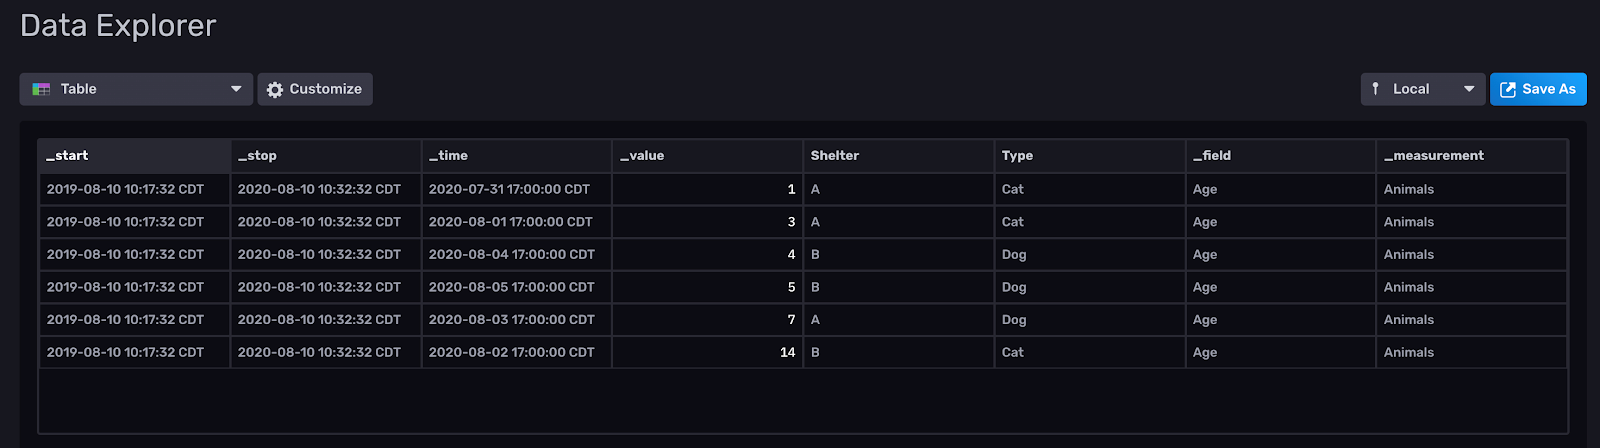
Please note that the timezone defaults to UTC and the hour defaults to 00:00:00UTC. You have to manually change your timestamps to get InfluxDB to write the time in your timezone. Alternatively, you can use a Unix timestamp. Here is a list of the supported timestamp formats. Additionally, please note that the timestamp header should exactly be dateTime:2006-01-02.
I hope this tutorial helps you understand how to use the CLI with InfluxDB Cloud and how to write a CSV to InfluxDB. As always, if you run into hurdles, please share them on our community site or Slack channel. We’d love to get your feedback and help you with any problems you run into.
