TL;DR InfluxDB Tech Tips — the Easiest Way to Use and Create InfluxDB Templates
By
Anais Dotis-Georgiou
updated December 14, 2025
Product
Use Cases
Developer
Navigate to:
If you didn’t already know, one of the perks of InfluxDB 2.0 is having access to templates. InfluxDB templates allow you to easily apply a variety of preconfigured resources including Telegraf configurations, buckets, dashboard, tasks, and alerts to your InfluxDB instance. In this TL;DR we’ll walk through the easiest way to use and create a template.
Use an InfluxDB template – the easiest way
If you’re new to InfluxDB, applying a community template first is the right move. Community templates are a collection of templates developed by the community for a variety of common use cases. I encourage you to browse through the community templates repo to see if one fits your needs. Applying a template couldn’t be faster.
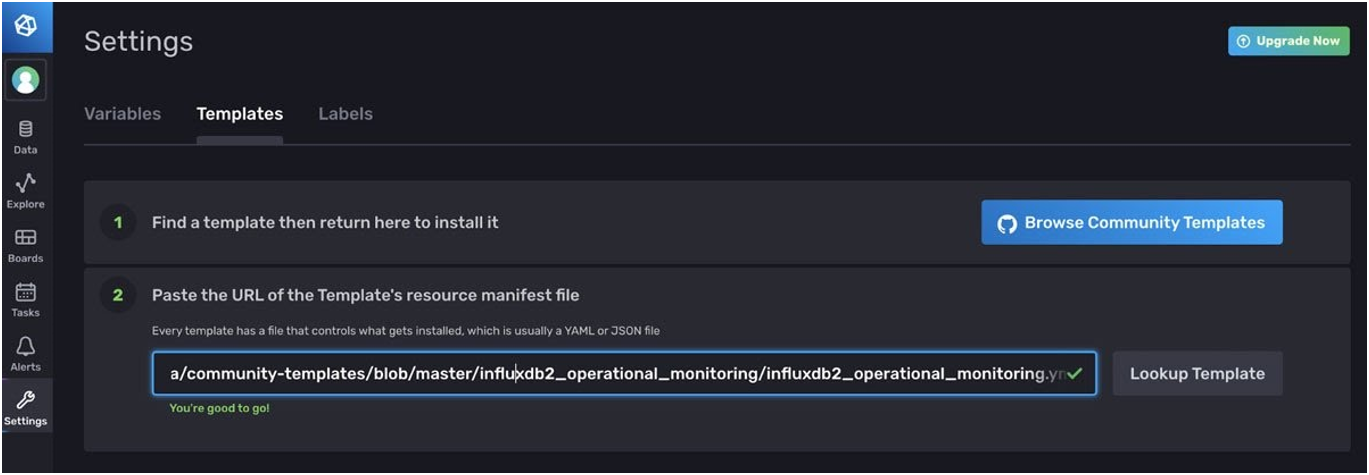
Step One: Select a template from the repository and copy the url of the yml configuration file for the template of your choice.
Step Two: Paste the template url in the InfluxDB UI under the Settings tab. That’s it!
Create an InfluxDB template – the easiest way
If none of the templates meet your needs, I encourage you to build your own template and share it with the InfluxDB community. After you’ve created a combination of dashboards, tasks, alerts, or Telegraf configurations to solve your time series problem and address your use case, it’s time for you to share your knowledge and work with the community.
Step One: If you haven’t done so already, set up an InfluxDB CLI configuration. InfluxDB CLI configurations allow you to manage multiple connection configurations. For example, they allow you to use the InfluxDB CLI locally to access your InfluxDB Cloud account. Specifically, this blog describes how to use a InfluxDB CLI locally to write a regular CSV to InfluxDB Cloud.
influx config create --config-name <config-name> \
--host-url <your url like https://us-west-2-1.aws.cloud2.influxdata.com> \
--org <your-org> \
--token <your-auth-token> \
activeWhen creating a CLI configuration, make sure to use an all access token. If you have set up a CLI config already, make sure that you’re using the right one with influx config list.
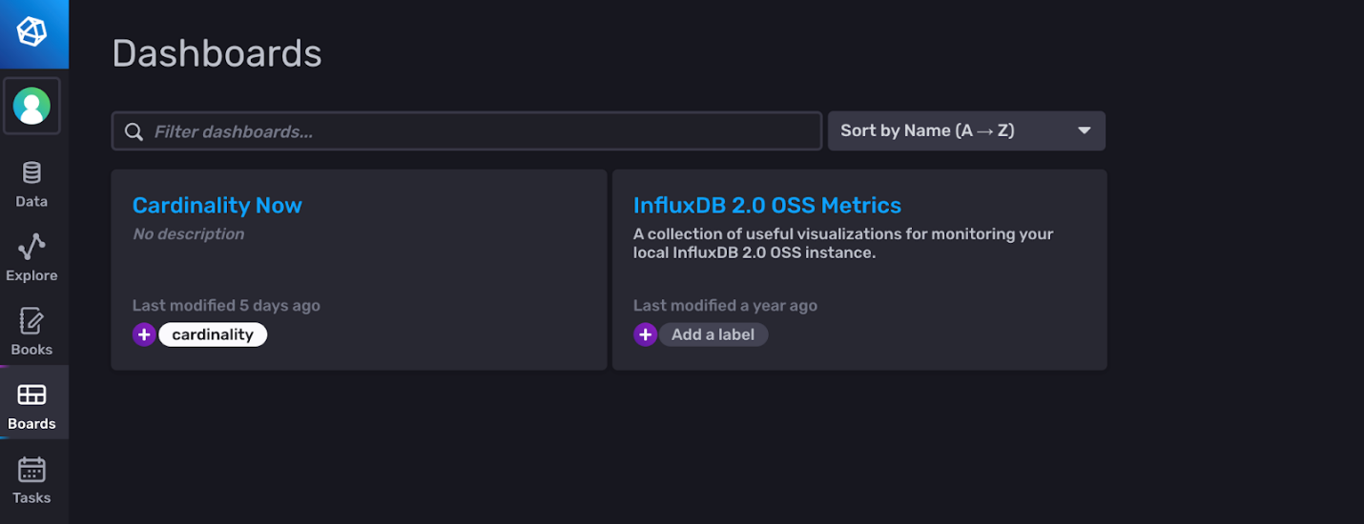
Step Two: Add a label to all the resources that you want to include in your template in the UI. Make sure that this label is unique. For example, I’ve labeled the Cardinality Now dashboard with the label “cardinality”.
Step Three: Export the template by filtering for the resources with the label you just made.
influx export all filter=labelName=<my-template-label> > my_template.yml
And that’s all folks! Now all you have to do to contribute your template is add a readme.md and submit a pull request.
If your template is selected, then we will write a post about it on the InfluxData blog to promote it! See examples of template blog posts we’ve written. Before closing, I’d like to leave you with two additional reference links: the InfluxDB Templates page and the Gallery page showcasing a selection of templates.
As always, I encourage you to share your thoughts, concerns, or questions in the comments section, on our community site, or in our Slack channel. We’d love to get your feedback and help you with any problems you run into!
