Meetup Notifications with InfluxDB Cloud
By
David Flanagan
updated December 14, 2025
Product
Developer
Navigate to:
It was a warm Thursday afternoon, in Scotland, when the familiar chime of Slack woke me from my daydream. It was Thom. Hmm, what does he want?
 <figcaption> Thom asks a simple question.</figcaption>
The mission
It was simple. Thom wanted to publish updates for every user group to our Community Slack. He wants these notifications posted at 1 week before each event, and 24 hours before each event. Now, of course, I could have used one of the many Slack libraries out there and some Python to parse the Meetup API and run it on a cron … but these are events, right? InfluxDB stores events. So I got to thinking … can we parse the Meetup API with Telegraf, store the events in InfluxDB, and then use Flux tasks to send the Slack alerts?
Yes. The answer is yes.
Collecting the events
First, we need to get the events from Meetup.com into InfluxDB Cloud. We got very lucky here, as Meetup.com actually allows reasonable access to their API without authentication. Telegraf can handle authentication for HTTP requests, but it was nice to not have to worry about it.
Using the Telegraf HTTP input plugin, we were able to fetch all meetup information from the Meetup.com API with a simple configuration of the HTTP plugin.
[[inputs.http]]
  name_override = "meetup-events"
  interval = "1h"

  urls = [
    "https://api.meetup.com/pro/influxdb/events"
  ]

  data_format = "json"

  tag_keys = [
    "event_id",
    "event_venue_city",
    "event_venue_localized_country_name",
    "chapter_name"
  ]

  json_string_fields = ["event_name", "event_link"]

  fieldpass = ["event_duration", "waitlist_count", "yes_rsvp_count"]

  json_time_key = "event_time"
  json_time_format = "unix_ms"
With the configuration above, Telegraf will parse Meetup.com every hour and store the events to InfluxDB Cloud (Output configuration omitted). Yes, we’ll be writing the same points every hour; but we’re using the timestamp the event starts and the series key for each event (combination of tags) won’t change so we’re golden.
Confirming the data
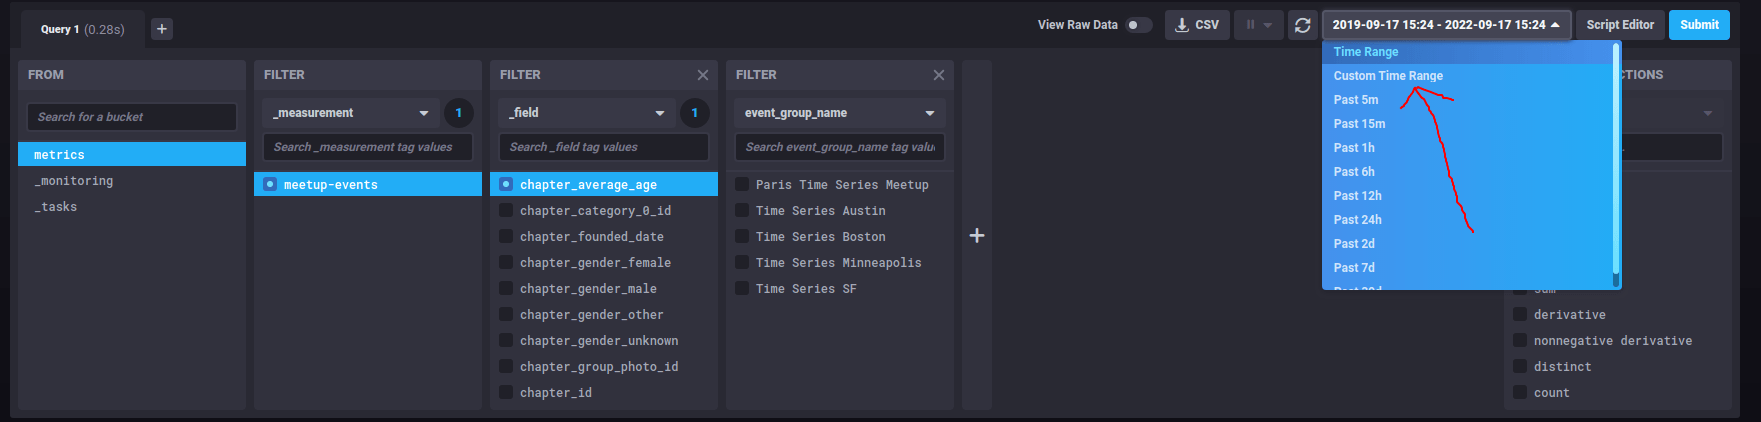
By default, when you use “Explore Metrics” to dig around your data … it assumes your data is in the past. Go figure! In order to confirm your data is there, you need to update the GUI time selector or switch to the script editor. I’ll show you how to do both.
GUI
Select the date drop-down and select “Custom Time Range”. You can either modify the raw date string, or click fast-forward on the month selector a bunch of times.
Script editor
Flux has built-in support for dates, times and duration. This allows us to write the query below, looking for data between now() and 4 weeks (4w) time.
Nice.
from(bucket: "metrics")
|> range(start: now(), stop: 4w)
Sending the alerts
Now that we’ve collected the data and confirmed it’s available. Let’s look at setting up the first notification: 1 week in advance.
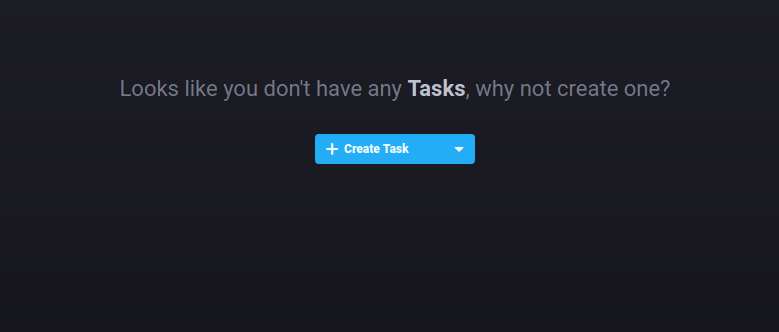
First, go to the Tasks page. If you’ve never been there before, you’ll see an empty page like this. Click “Create Task”.
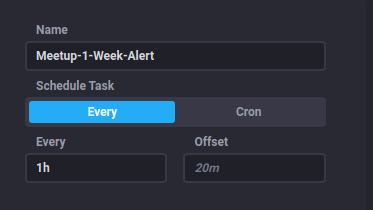
Task configuration
We’re going to run this task every hour, so we’ll need to keep that in mind during our range filter below. We don’t want to send a notification for an event twice, so we need to make sure each query every hour is time scoped correctly.
Range filter
We need a very specific range for this query. We want only the events that are scheduled to start between 1 week and 1 week plus 1 hour. This “plus 1 hour” is important. As we run our task once per hour, we ensure we only fetch events from a 1 hour window; avoiding duplicate notifications.
from(bucket: "metrics")
|> range(start: 1w, stop: 1w1h)
Measurement filter
Now, we don’t want to query every measurement in our bucket. We only want the meetup-events measurements (name configured in Telegraf).
|> filter(fn: (r) => r._measurement == "meetup-events")Group and pivot
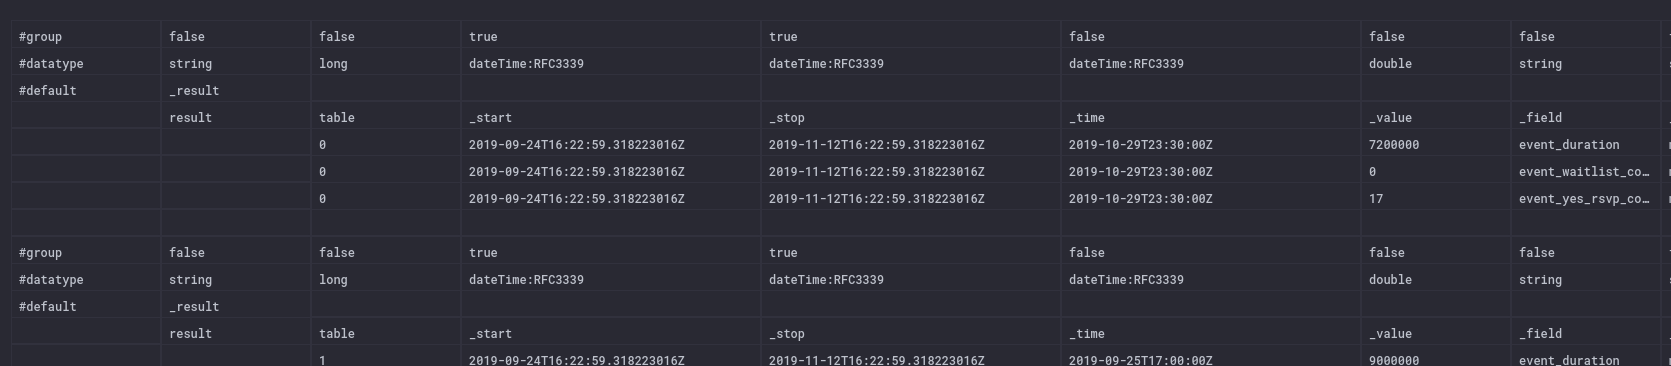
Due to the way data is stored in InfluxDB 2, we need a couple of extra steps to get the data in the format you’d expect. With our current query, we’re not going to have “row” based data; where each row is a single event. Instead, we’re going to get back columnar data that needs to be assembled. It looks like this:
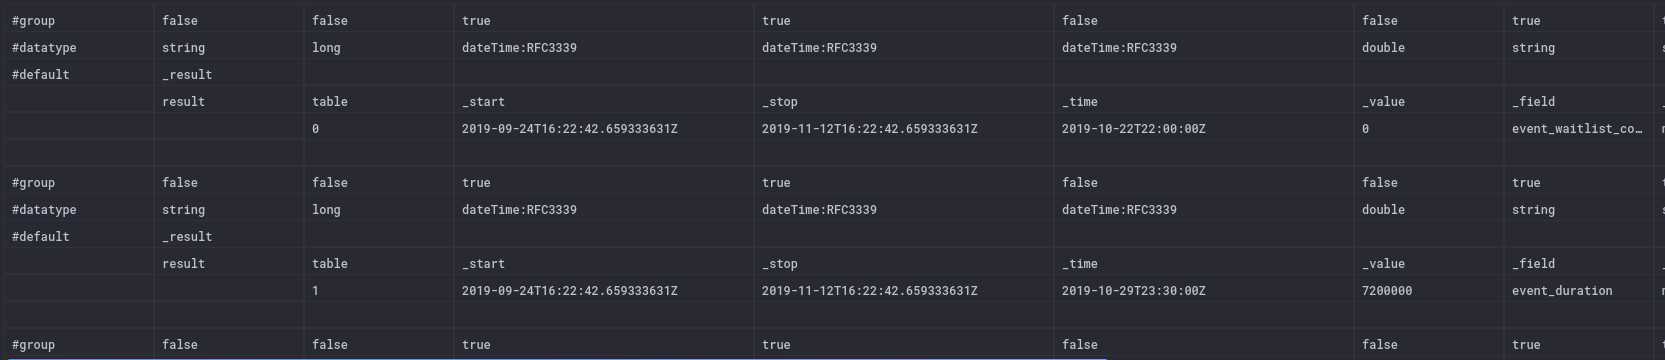
Yikes. Scary! In order to get this into shape, my first thought was to group() by the event_id.
from(bucket: "metrics")
|> range(start: 1w, stop: 1w1h)
|> filter(fn: (r) => r._measurement == "meetup-events")
|> group(columns: ["event_id"], mode:"by")
Hmm. But unfortunately, that isn’t quite right. Now we have a table per event, with a row per column.
OK. Let’s scratch group and use pivot.
from(bucket: "metrics")
|> range(start: 1w, stop: 1w1h)
|> filter(fn: (r) => r._measurement == "meetup-events")
|> pivot(rowKey:["event_id"], columnKey: ["_field"], valueColumn: "_value")
Pivot will return a table for each event; with each table having a single row with all the event fields. Perfect.
Sending to Slack
Flux has 2 methods for interacting with Slack.
- The HTTP package
- The Slack package
The HTTP package allows us to send arbitrary HTTP requests to any endpoint. This allows us to create an incoming webhook with Slack and send the HTTP request to the endpoint.
The Slack package allows us to provision a legacy token and send notifications directly to the Slack API.
The latter allows you to specify the sender/channel and some other details at “send time”, whereas the incoming webhook configures all those details upfront.
As Slack “legacy tokens” could be deprecated at their will, we’ll use the incoming webhook and the HTTP package for this tutorial.
In order to use the HTTP package, we first need to import it. This is nice and simple: import "http".
The API for the HTTP package is pretty simple at the moment:
import "http"

http.post(
  url: "http://localhost:9999/",
  headers: {x:"a", y:"b", z:"c"},
  data: bytes(v: "body")
)
So with this in mind, we can take our Flux code that we’ve been building up and start to put it all together into something useful.
NB: We’re also using the json package to encode the HTTP payload.
import "http"
import "json"

from(bucket: "metrics")
	|> range(start: 1w, stop: 1w1h)
	|> filter(fn: (r) =>
		(r._measurement == "meetup-events"))
	|> pivot(rowKey: ["event_id"], columnKey: ["_field"], valueColumn: "_value")
	|> map(fn: (r) => {
		message = {text: "1 Week Warning! ${r.event_group_name} is meeting this time next week in ${r.event_venue_city}, ${r.event_venue_localized_country_name}, and there's ${string(v: r.event_yes_rsvp_count)} amazing people for you to join and learn with. ${r.event_link}"}
		_ = http.post(url: "https://hooks.slack.com/services/SECRET/SECRET/SECRET", data: json.encode(v: message))

		return r
	})
Oh, shi ... oot!
Yeah, did you spot that too? We’re storing a hard-coded secret inside of our Flux task. Shoot!
Fortunately, InfluxDB 2 provides a secrets API. Sadly, for the moment, there’s no shiny GUI; but we can use the raw API with curl for now.
Let’s add our Slack webhook endpoint to our organization with curl:
curl -XPATCH \
  https://us-west-2-1.aws.cloud2.influxdata.com/api/v2/orgs/${ORG_ID}/secrets \
  -H 'authorization: Token ${TOKEN}' \
  -H 'Content-type: application/json' \
  --data '{"slackWebhook": "${SLACK_WEBHOOK_ENDPOINT}"}'
You’ll need:
- Organization ID (Grab this from your URI when logged into InfluxDB Cloud)
- InfluxDB Cloud token (Grab this from the token page)
- Slack Webhook Endpoint
Things to note
You can use the curl with -XPATCH as many times as you like to add new secrets. You can see the keys, but not the values, of your secrets with a GET request.
curl -XGET \
https://us-west-2-1.aws.cloud2.influxdata.com/api/v2/orgs/${ORG_ID}/secrets \
-H 'authorization: Token ${TOKEN}' \
-H 'Content-type: application/json'
Cleaning up
Now that we’ve created a secret via the API, let’s bring this into our Flux task to clean up the code. Here’s the cleaned up code in full.
import "http"
import "json"
import "influxdata/influxdb/secrets"

webhookUri = secrets.get(key: "slackWebhook")

from(bucket: "metrics")
	|> range(start: 1w, stop: 1w1h)
	|> filter(fn: (r) =>
		(r._measurement == "meetup-events"))
	|> pivot(rowKey: ["event_id"], columnKey: ["_field"], valueColumn: "_value")
	|> map(fn: (r) => {
		message = {text: "1 Week Warning! ${r.event_group_name} is meeting this time next week in ${r.event_venue_city}, ${r.event_venue_localized_country_name}, and there's ${string(v: r.event_yes_rsvp_count)} amazing people for you to join and learn with. ${r.event_link}"}
		_ = http.post(url: webhookUri, data: json.encode(v: message))

		return r
	})
Here’s the output on Slack. A job well done, even if I do say so myself ???? 
Final thoughts
InfluxDB Cloud with Flux, tasks and secrets is a powerhouse of functionality. We hope you enjoyed this tutorial and we can’t wait to see what you build.
Have a rockin’ day.
