Python MQTT Tutorial: Store IoT Metrics with InfluxDB
By
Community
updated December 14, 2025
Product
Use Cases
Developer
Navigate to:
This article was written by Alexandre Couëdelo and was first published in The New Stack. Scroll down for the author’s bio and photo.
MQTT is a standard messaging protocol used for the Internet of Things (IoT) because it requires minimal resources and can be executed by small microcontrollers found in connected devices.
IoT devices have a real need for this type of lightweight protocol because it guarantees fast and reliable communication with minimal hardware requirements, keeping power consumption and manufacturing costs low.
IoT devices like smart temperature sensors regularly transmit information over the internet, but before you can deduce any meaningful information from that measurement, you need to store it in an adequate database. Smart sensor measurements are not complex, but they are highly dependent on the time constant - when the measurement was taken - and as a result, time-series databases, like InfluxDB, offer an efficient option to store and manipulate that kind of data.
In this article, you’ll learn how to create a smart sensor using Python that transmits measurements over the internet using MQTT to store the data in InfluxDB. You’ll also learn about the InfluxDB ecosystem that provides the database and UI tools that can visualize and query your data.
What is MQTT?
MQTT is an event-based (publish and subscribe) communication protocol specifically designed to enable IoT devices to efficiently communicate in high-latency and low-bandwidth environments. High-latency and low-bandwidth environments typically refer to cellular networks, like 2G or 3G. Network cost is one of the major expenses in operating IoT infrastructure. Using a lightweight protocol like MQTT helps decrease expenses for IoT devices.
The essential component in MQTT is the broker, which orchestrates pub/sub (publish and subscribe) communication. This concept is better explained with a diagram:
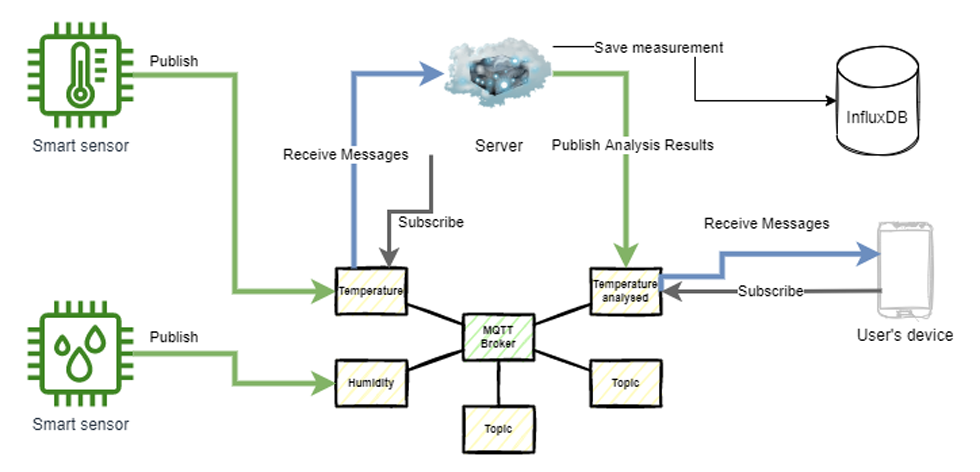
The MQTT broker manages topics when a sensor (publisher) sends its message to a topic; then the broker sends messages back to any application (consumer) that subscribed to the topic. A consumer can be a user’s smartphone or a backend application in the cloud.
The most common pattern is to have topics for raw data (temperature, humidity, etc.) and topics for processed data. The backend application will listen to the temperature, process the data and publish a message to temperature analyzed whenever it’s relevant. This is where InfluxDB comes into play; the backend application needs to store the data somewhere to be able to get the daily temperature average or a temperature forecast that is more relevant to the end user than single-point measurements.
The most popular use cases of IoT sensors are asset tracking (location of trucks and goods around the world), remote-area monitoring (temperature and humidity in a farm, for instance), resource optimization (energy and water consumption) and location/workplace analytics (pollution, noise and air quality).
In this article, you’ll build an example based on the remote-area monitoring use case by creating a fake smart temperature sensor.
Storing IoT metrics with InfluxDB
This tutorial unfolds in three parts. To begin, you create a smart sensor that publishes a temperaturetopic. Then you set up InfluxDB, and lastly, you create a backend application that consumes messages from the temperature topic and stores them in the database.
You can follow along with this tutorial using this GitHub repository.
Create a smart sensor with Python
To begin, you’ll create a simple Python script that sends data to MQTT; this represents the smart temperature sensor. This script will be an MQTT publisher in your system.
Install the paho-mqtt library:
pip install paho-mqtt
Then you’ll need to generate random data. For this task, you’ll be using Faker. If you don’t already have it installed, you’ll need to install it:
pip install Faker
Now create your smart sensor (MQTT publisher). In this example, you’ll use a public test MQTT broker called mqtt.eclipseprojects.io and send random integers (representing temperature) every second to a topic called temperature.
Create a new Python file called smart_sensor.py and use the following code:
"""
MQTT Smart temperature Sensor
"""
import time
import paho.mqtt.client as mqtt
from faker import Faker
# let's connect to the MQTT broker
MQTT_BROKER_URL = "mqtt.eclipseprojects.io"
MQTT_PUBLISH_TOPIC = "temperature"
mqttc = mqtt.Client()
mqttc.connect(MQTT_BROKER_URL)
# Init faker our fake data provider
fake = Faker()
# Infinite loop of fake data sent to the Broker
while True:
temperature = fake.random_int(min=0, max=30)
mqttc.publish(MQTT_PUBLISH_TOPIC, temperature)
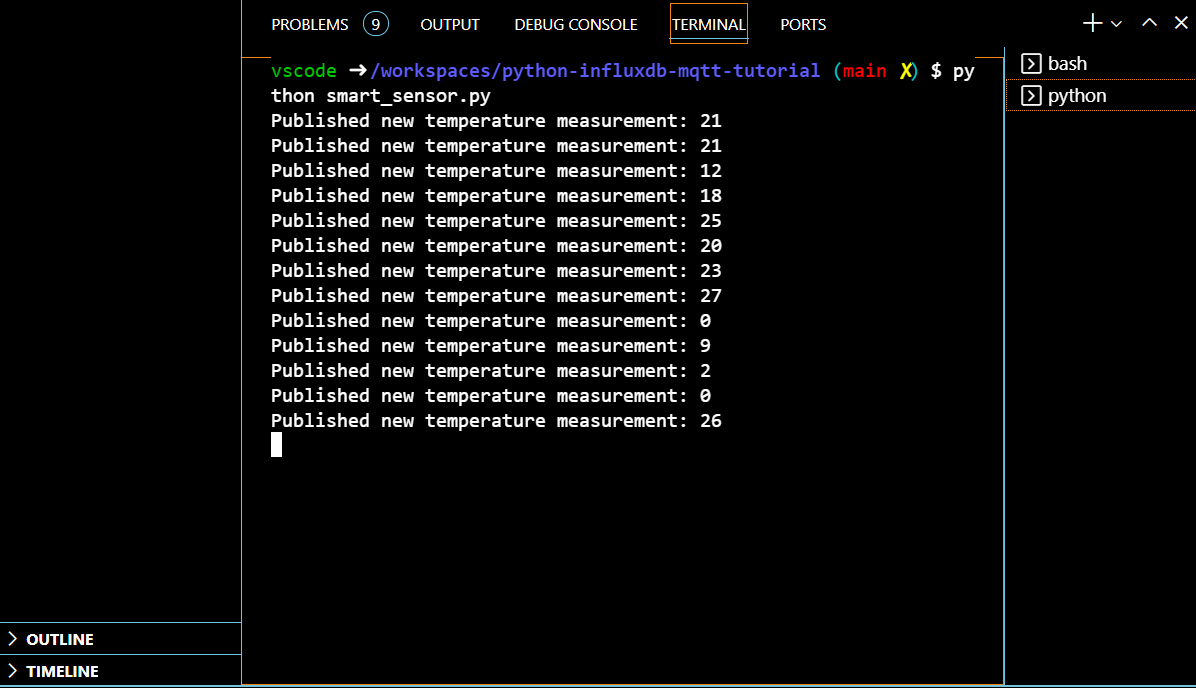
print(f"Published new temperature measurement: {temperature}")
time.sleep(1)Now you can run your script:
python smart_sensor.py
Great! Now you’re sending data to the MQTT broker, so it’s time to get InfluxDB set up and create another script to subscribe to your temperature topic and store data in the database.
Set up InfluxDB
You can use Docker to run InfluxDB, which is well-suited for local development. However, InfluxDB supports many platforms: Linux, macOS, Windows, Docker and Kubernetes. You can select the installation that best suits your needs on InfluxDB’s installation page. You can also use InfluxDB Cloud to get started without needing to install anything on your machine.
To start the setup, you need to define a docker-compose.yml file that defines the following configuration:
version: '3.3'

services:
    influxdb:
        image: influxdb:2.0.7
        environment:
            DOCKER_INFLUXDB_INIT_MODE: setup
            DOCKER_INFLUXDB_INIT_USERNAME: ${INFLUXDB_USERNAME}
            DOCKER_INFLUXDB_INIT_PASSWORD: ${INFLUXDB_PASSWORD}
            DOCKER_INFLUXDB_INIT_ORG: ${INFLUXDB_ORG}
            DOCKER_INFLUXDB_INIT_BUCKET: ${INFLUXDB_BUCKET}
            DOCKER_INFLUXDB_INIT_ADMIN_TOKEN: ${INFLUXDB_TOKEN}
        ports:
        - "8086:8086"
You also need to create an .env file to define the environment variables required in this docker-compose.yml:
INFLUXDB_USERNAME=admin
INFLUXDB_PASSWORD=admin1234
INFLUXDB_TOKEN=F-QFQpmCL9UkR3qyoXnLkzWj03s6m4eCvYgDl1ePfHBf9ph7yxaSgQ6WN0i9giNgRTfONwVMK1f977r_g71oNQ==
INFLUXDB_URL="http://localhost:8086"
INFLUXDB_ORG=iot
INFLUXDB_BUCKET=temperature
Now, get InfluxDB started. You should use --env-file in your docker-compose command to force Docker to take .env into consideration:
docker-compose --env-file .env up
Go to http://localhost:8086 with InfluxDB running locally, and you should land on the InfluxDB UI. You’ll find the credentials in your .env file. As you can see InfluxDB is more than a database; it’s an ecosystem that helps manage and visualize your data. You’ll learn more about this later.
Now it’s time to create an MQTT consumer that receives your temperature measurements and stores them in InfluxDB.
Create an MQTT and InfluxDB Client
To start, you need to install influxdb-client:
pip install 'influxdb-client[ciso]'
It’s also a good idea to keep all your constants in one place. It prevents you from repeating yourself and making mistakes. Since you already stored the most important one in .env, you will need dotenv to load them in your script:
pip install python-dotenv
Now you need to start with the MQTT logic. Subscribing to a topic requires two callback functions: on_connect and on_message.
on_connect is called when your application successfully connects to the broker. You’ll use this function to subscribe to the topic temperature. As a result, whenever your smart sensor publishes a message on that topic, the on_message function will be called. You’ll use the on_message callback to send the temperature measurement to InfluxDB.
Use the code below to create a new Python file called influxdb_consumer.py:
"""
MQTT subscriber - Listen to a topic and sends data to InfluxDB
"""
import os
from dotenv import load_dotenv
import paho.mqtt.client as mqtt
load_dotenv() # take environment variables from .env.
# InfluxDB config
# TODO
# MQTT broker config
MQTT_BROKER_URL = "mqtt.eclipseprojects.io"
MQTT_PUBLISH_TOPIC = "temperature"
mqttc = mqtt.Client()
mqttc.connect(MQTT_BROKER_URL)
def on_connect(client, userdata, flags, rc):
""" The callback for when the client connects to the broker."""
print("Connected with result code "+str(rc))
# Subscribe to a topic
client.subscribe(MQTT_PUBLISH_TOPIC)
def on_message(client, userdata, msg):
""" The callback for when a PUBLISH message is received from the server."""
print(msg.topic+" "+str(msg.payload))
## InfluxDB logic
# TODO
## MQTT logic - Register callbacks and start MQTT client
mqttc.on_connect = on_connect
mqttc.on_message = on_message
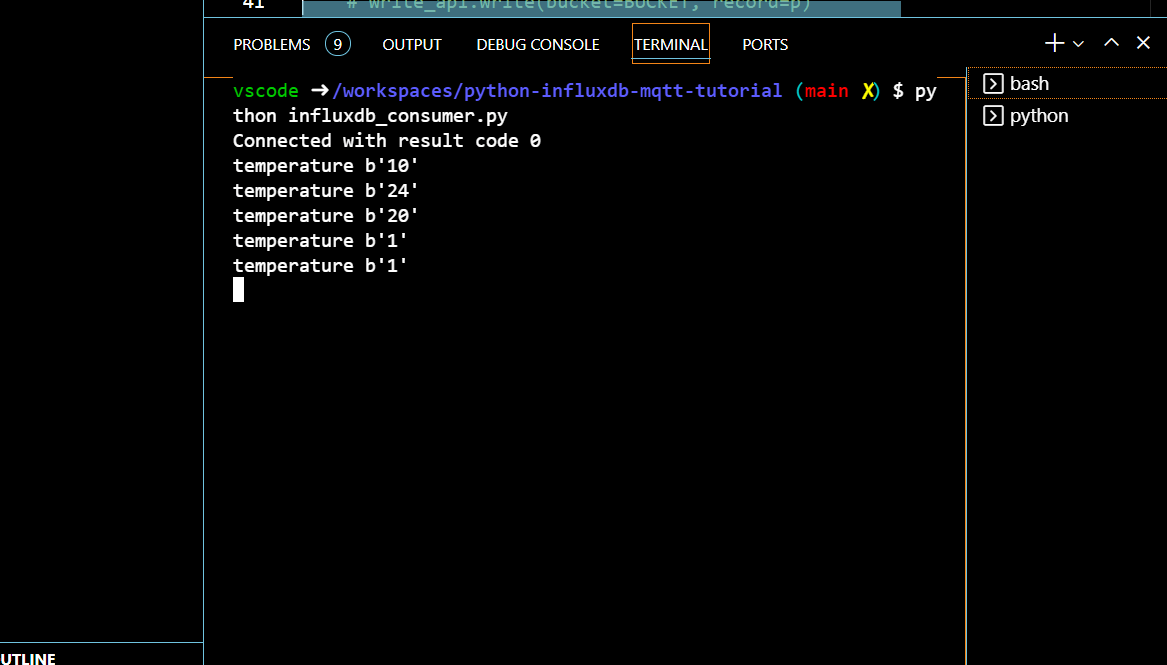
mqttc.loop_forever()The InfluxDB-related code is still missing from the above example, but before you do that, you should test your system to see if the message sent by the smart sensor is received by the consumers. Make sure smart_sensor.py is still running and then run influxdb_consumer.py:
python influxdb_consumer.py
You should see temperature measurements coming in:
Now that you’re able to receive messages from the broker, store them in InfluxDB.
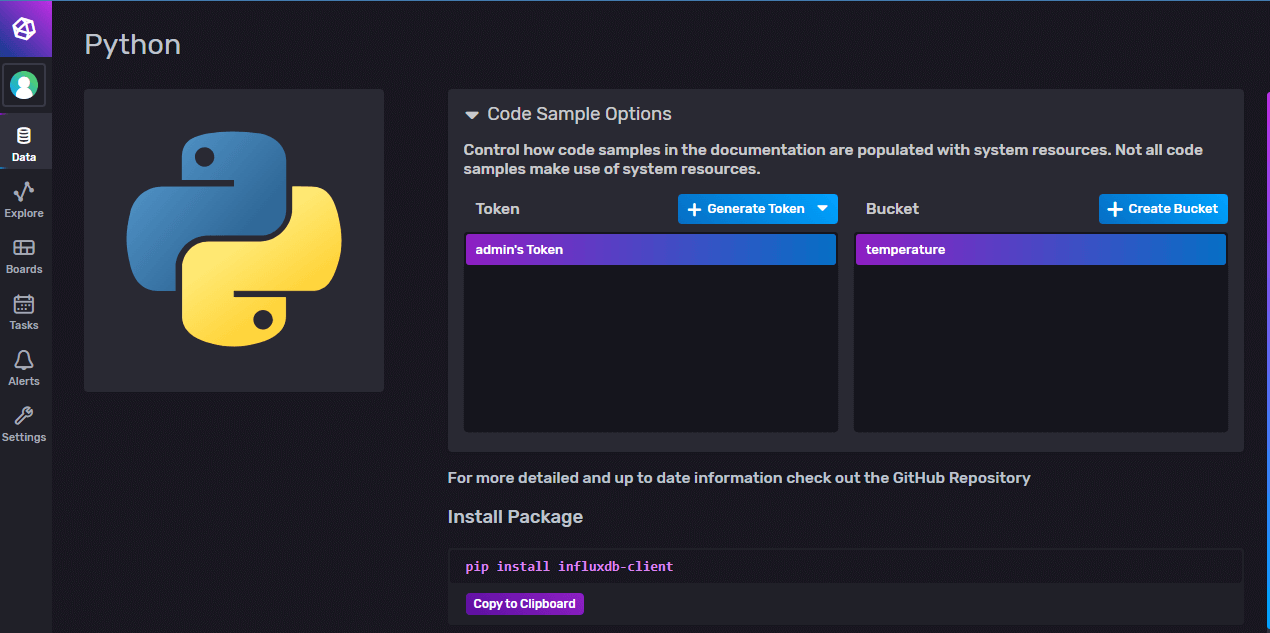
Next, you need to configure the InfluxDB client. You’ll use the preconfigured INFLUXDB_TOKEN, which is convenient for test purposes, but you can also create a new token via the UI. Your instance of InfluxDB should still be running.
Go back to the UI (http://localhost:8086) and generate a new authentication token; then click Data. After that, in Client Libraries, you need to select Python. This section lets you create an authentication token:
import os
from dotenv import load_dotenv
from influxdb_client import InfluxDBClient, Point
from influxdb_client.client.write_api import ASYNCHRONOUS
import paho.mqtt.client as mqtt

load_dotenv()  # take environment variables from .env.

# InfluxDB config
BUCKET = os.getenv('INFLUXDB_BUCKET')
client = InfluxDBClient(url=os.getenv('INFLUXDB_URL'),
                token=os.getenv('INFLUXDB_TOKEN'), org=os.getenv('INFLUXDB_ORG'))
write_api = client.write_api()
An important thing to know about InfluxDB is the difference between fields and tags. Both are key-value pairs, but tags act as indexes for your record. In this case, the field is the measurement and tag could be filtered data, for instance, by location. The other key concepts of InfluxDB are defined on this page.
Now update the on_message callback to a code that writes the measurement to InfluxDB:
def on_message(client, userdata, msg):
    """ The callback for when a PUBLISH message is received from the server."""
    print(msg.topic+" "+str(msg.payload))

    # We received bytes we need to convert into something usable
    measurement = int(msg.payload)

    ## InfluxDB logic
    point = Point(MQTT_PUBLISH_TOPIC).tag("location", "New York").field("temperature", measurement )
    write_api.write(bucket=BUCKET, record=point)
Make sure both influxdb_consumer.py and smart_sensor.py are still running. If they are, the new data point should be added to the database every second so you can visualize your data in InfluxDB UI.
Visualize the data in the InfluxDB Web UI
Go to http://localhost:8086 and click on Data; then select Buckets. You should see your temperature bucket:
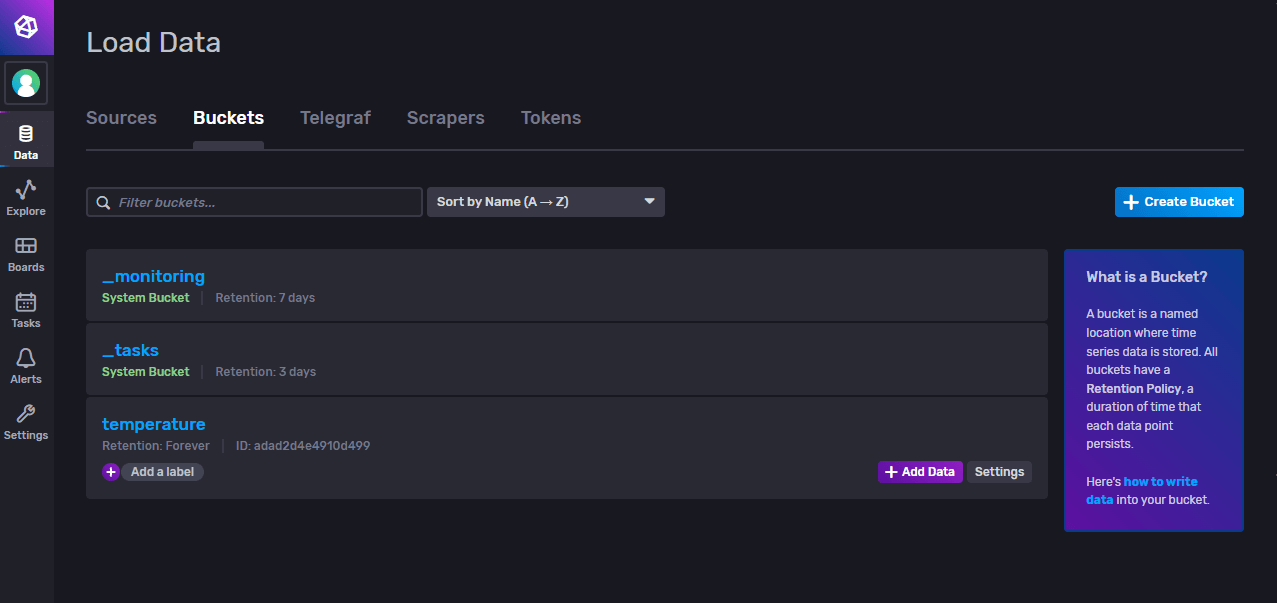
Select the temperature bucket. Now you should have landed on Data Explorer, where you can query your data and visualize it:
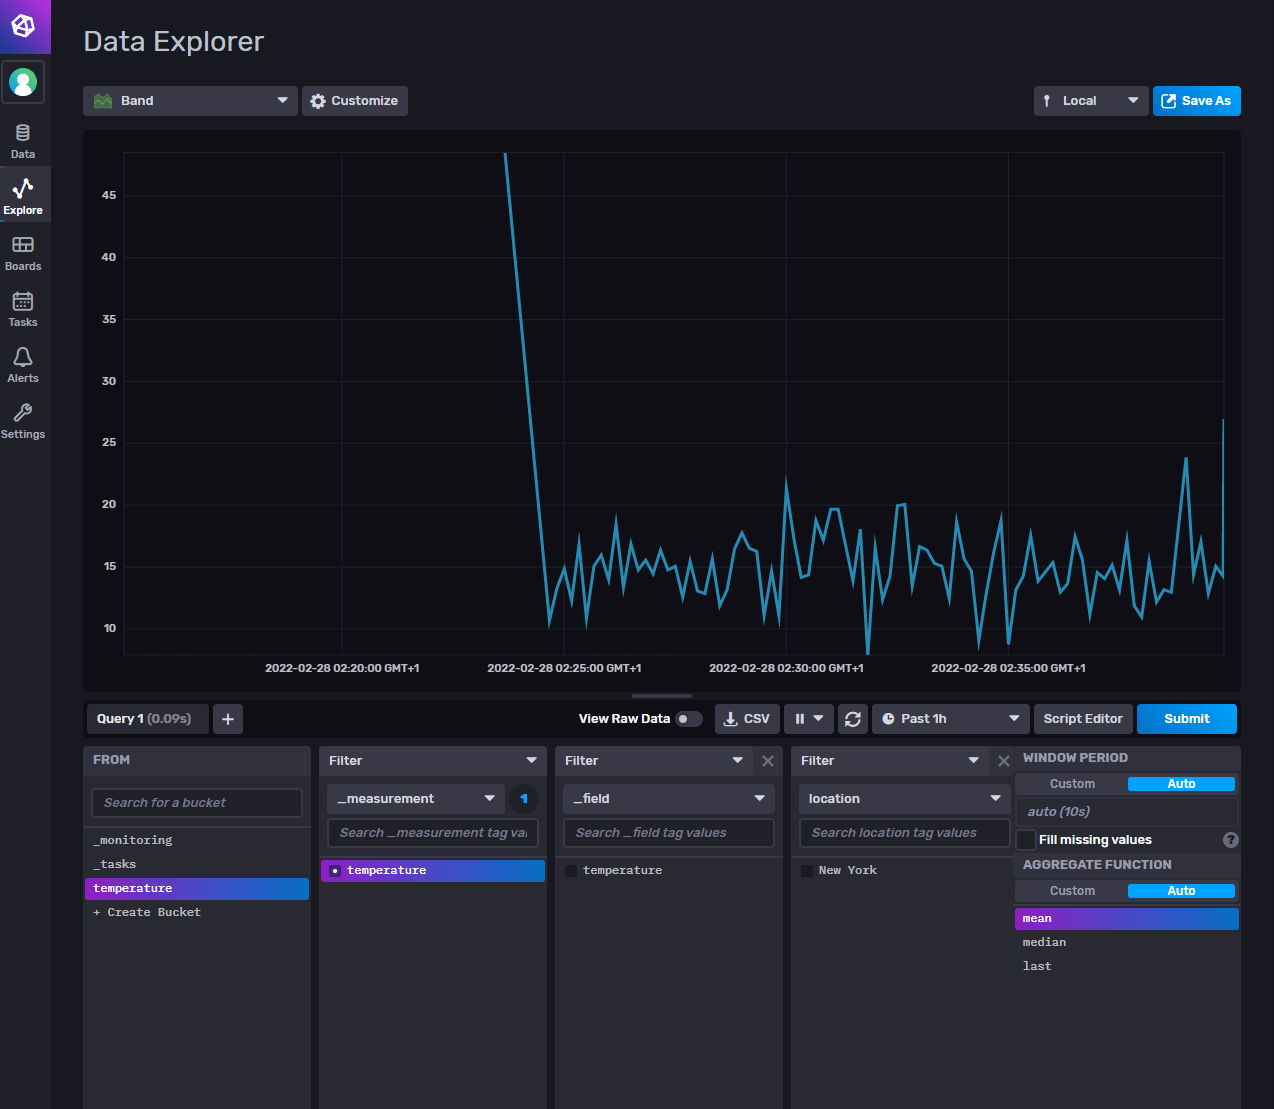
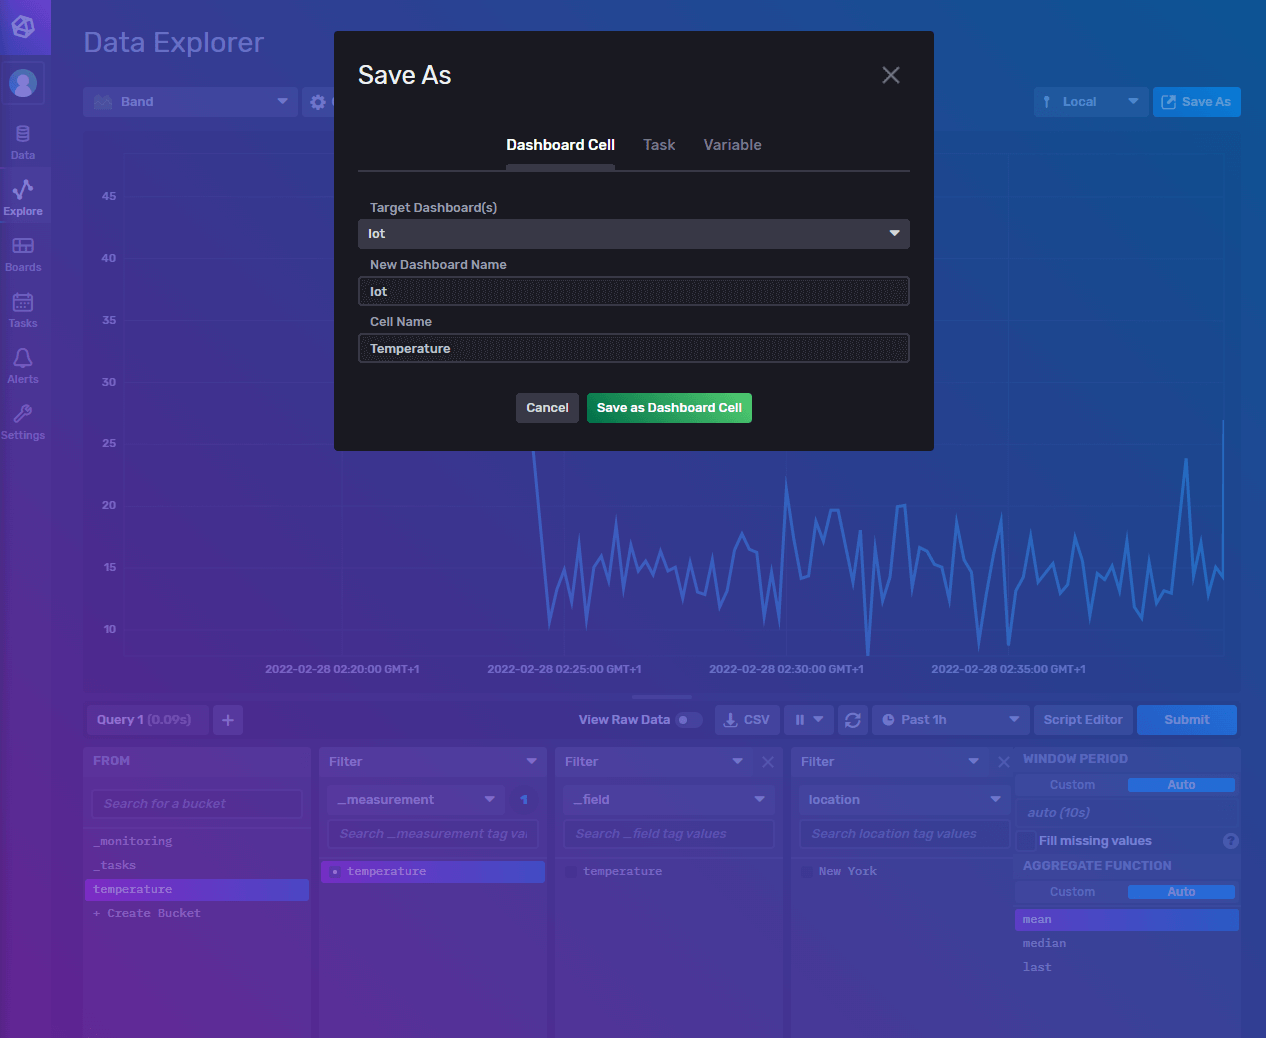
A nice feature here is that once you create a visualization that matches your need, you can click “Save As” and add it to a dashboard of your choice:
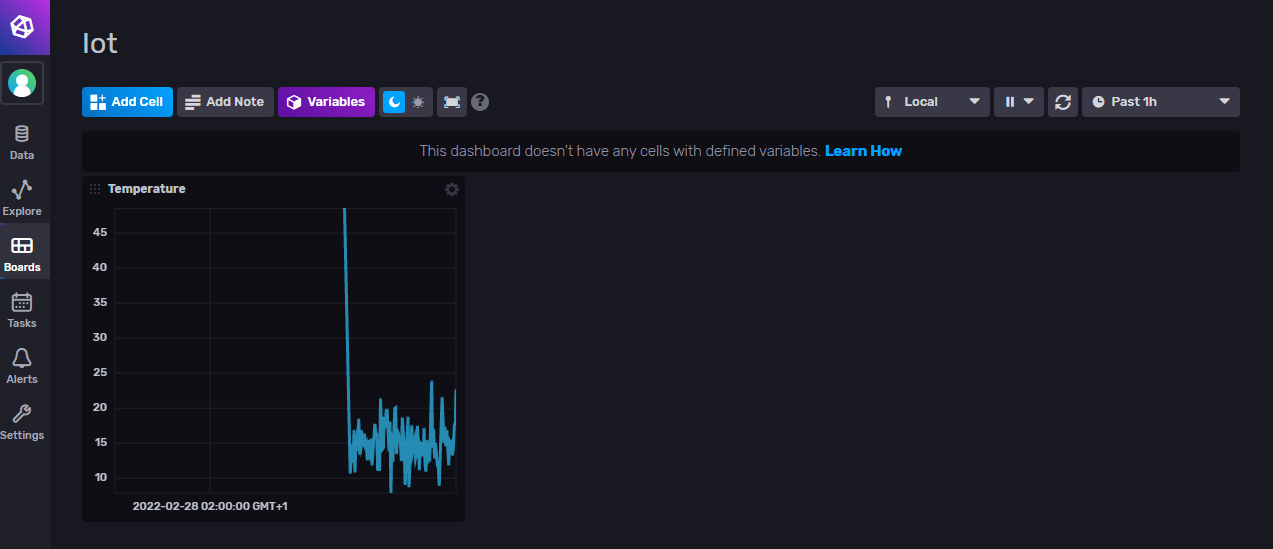
Thanks to the UI, you don’t need any third-party visualization tools and dashboarding for your application.
Conclusion
Now you know how to create both a publisher and a consumer for MQTT using Python. Not only that, but you can also store your smart sensor measurements in a time-series database and visualize them in real time.
InfluxDB database is particularly efficient for manipulating IoT data by providing fast queries and aggregation of type-dependent data. It comes with the added benefit of a powerful UI where you can visualize your data and create a dashboard in the same place.
About the author

Alexandre is a Complex Systems Engineering and Management Specialist. He has been embracing the DevOps culture since he started his career by contributing to the digital transformation of a leading financial institution in Canada. His passion is the DevOps Revolution and Industrial Engineering. He loves that he has sufficient hindsight to get the best of both worlds.
