Table of Contents

Every now and then we get requests from a developer using Windows, or a Windows-using participant at one of our workshops or events. Windows support is considered “experimental” for all components except Telegraf, but the full TICK Stack will still build and run on the platform, and we provide binaries for Windows on our downloads page. So while Windows is not an officially supported operating system and is not recommended in production, we wanted to provide some additional resources for those adventurous developers who still want to get up and running on the platform. This post will go over details of installation and configuration natively on Windows, and then touch briefly on some alternative approaches for running the TICK stack, such as Virtual Machines or Docker.
Ed: If you’re interested in official support from InfluxData on Windows, you can always reach out to our sales team! We’re sure we can come up with something.
The following instructions were tested using Microsoft’s Windows 10 Development Environment VMs.
Install
On Windows, the best way to get started is to get the Windows archives from the Downloads page and extract their contents to C:\Program Files\<Program Name>. You’ll end up with the following four directories:
C:\Program Files\ChronografC:\Program Files\InfluxDBC:\Program Files\KapacitorC:\Program Files\Telegraf
Running
If you’ve installed the applications in the directories above, each application should start using its default configuration.
First, let’s start up InfluxDB. One option to run the application is to double-click the executable, but if something goes wrong the window will close as soon as the program exits, and you probably won’t have time to read any errors that are displayed.
Instead, we’ll open up a Command Prompt for each application and use the commands from each section below to run the individual applications. You can launch a command prompt by opening the Start menu and typing cmd.exe.
InfluxDB
For InfluxDB we’re going to run the influxd.exe executable; the “d” at the end stands for “daemon”, which indicates that this is a long-running server process. Switch to the InfluxDB directory and start the application:
C:\Users\User>cd "C:\Program Files\InfluxDB\"

C:\Program Files\InfluxDB>influxd.exe
If you want to run the Influx command-line interface, you can use the influx.exe command. If you’re using the default configuration, it should connect automatically.
Kapacitor
Kapacitor also has a kapacitord.exe and kapacitor.exe executable; again, the “d” indicates which one is our long-running server process, while the other is the CLI. Launch it in its own Command Prompt window:
C:\Users\User>cd "C:\Program Files\Kapacitor\"

C:\Program Files\Kapacitor>kapacitord.exe
Telegraf
Telegraf is a single binary but requires a configuration file to start up. If you’ve installed the contents of the Telegraf download as described previously, it will automatically find the configuration. For more configuration options, please refer to the sections below.
To run Telegraf, you can use the following commands:
C:\Users\User>cd "C:\Program Files\Telegraf\"

C:\Program Files\Telegraf>telegraf.exe
Chronograf
Chronograf has two binaries, chronograf.exe and chronoctl.exe; the first one is the Chronograf server itself.
Here are the commands to run Chronograf:
C:\Users\User>cd "C:\Program Files\Chronograf\"

C:\Program Files\Chronograf>chronograf.exe
Configuration
For most users, the default configuration will be sufficient to get started, with each application exposing the following ports at startup:
| Application | Port(s) | |
|---|---|---|
| InfluxDB | 8086 |
HTTP API endpoint |
| Kapacitor | 9092 |
HTTP API endpoint |
| Chronograf | 8888 |
Web GUI |
Let’s bring up Chronograf and go through the final steps required to get everything set up and working.
First, we’ll need to connect to an InfluxDB instance. You should see the following page when navigating to Chronograf at http://localhost:8888 for the first time:
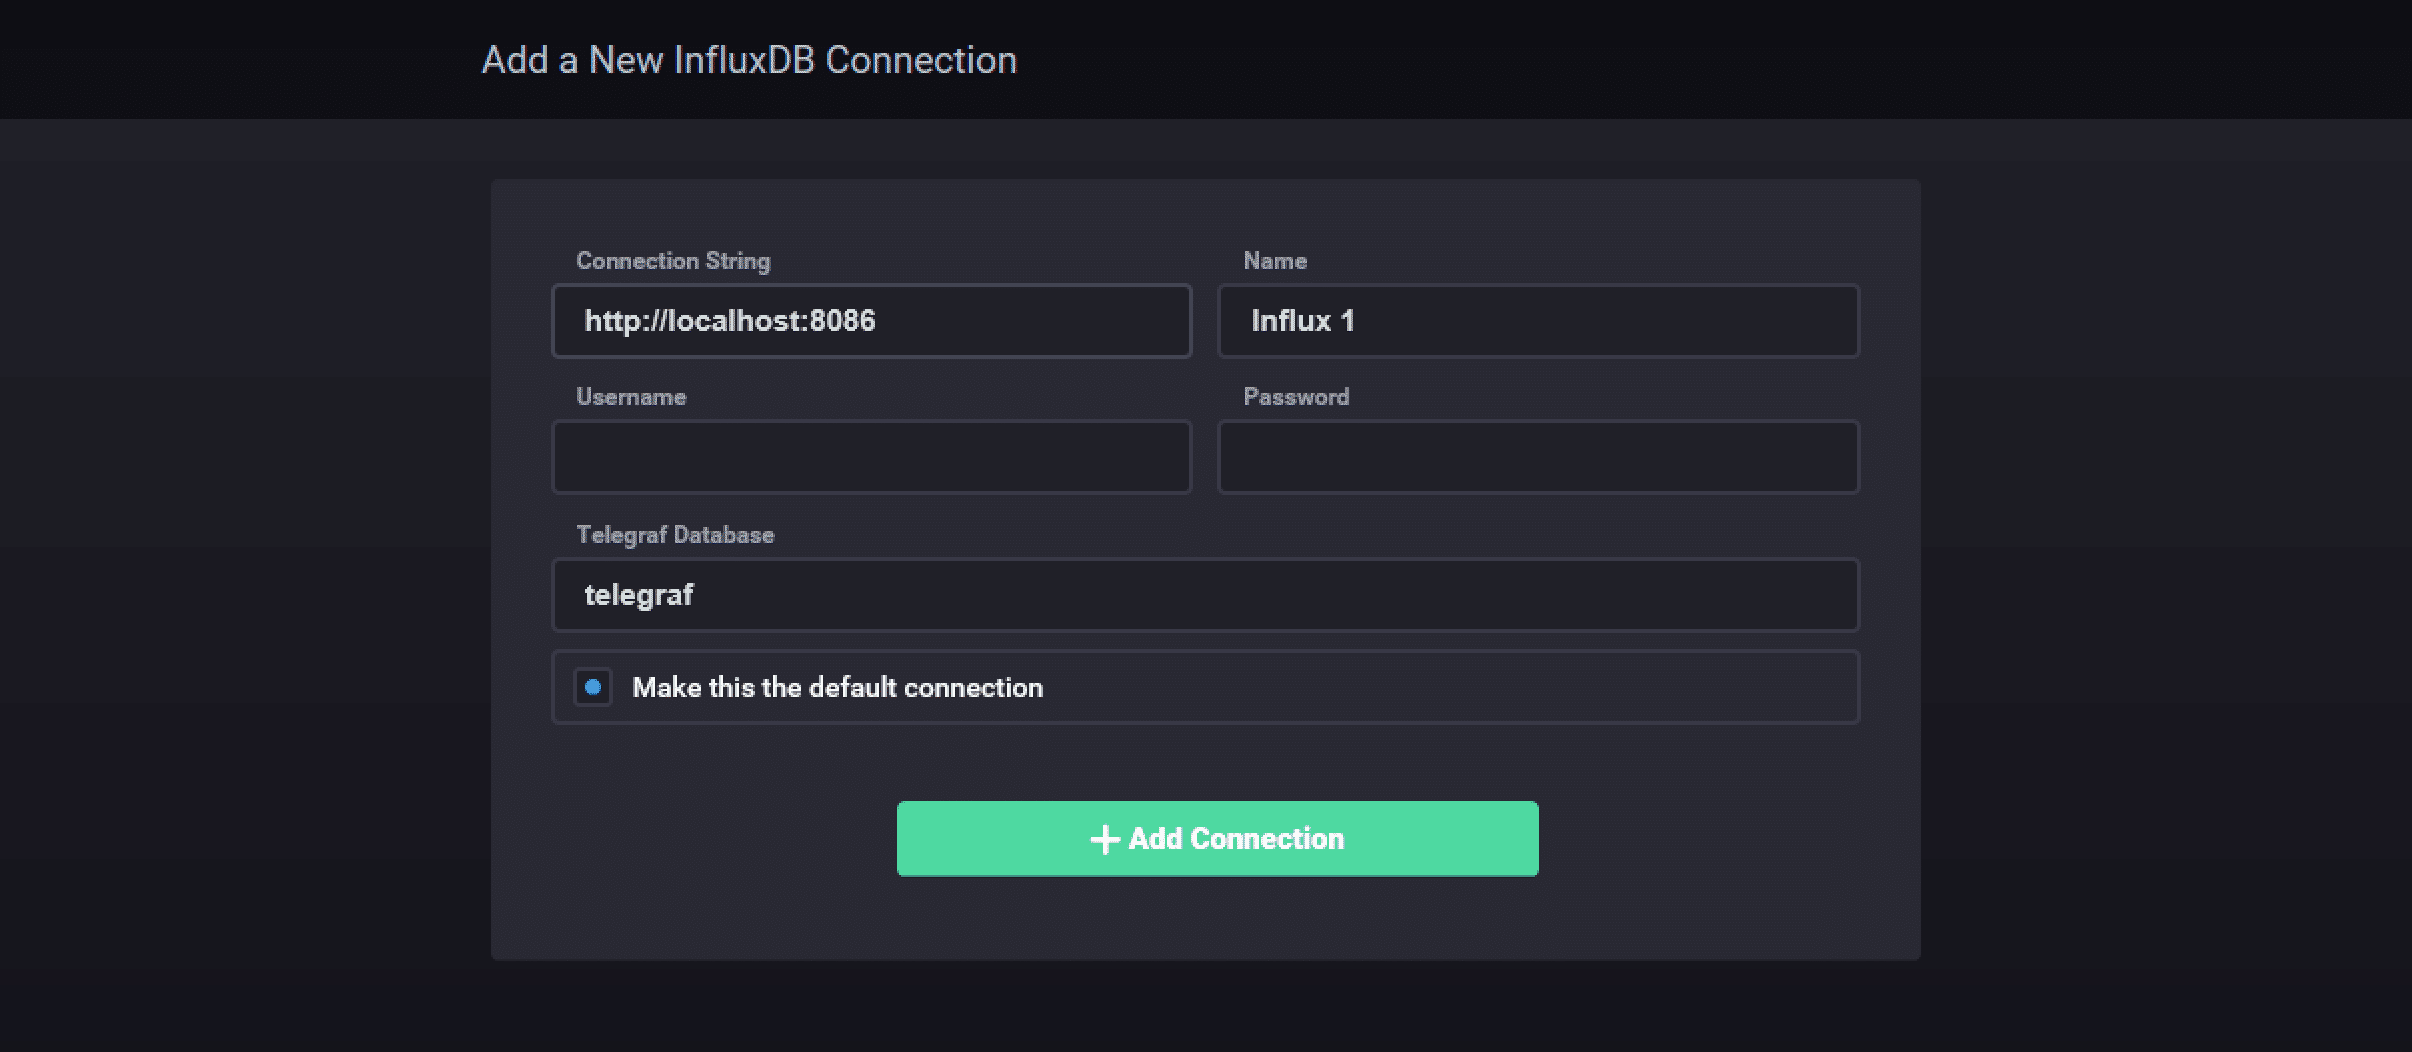
The defaults provided should work for us, so we can click “Add Connection”, after which we should see the main Chronograf interface. We also want to connect our Kapacitor instance at this time; first, navigate to the “KAPACITOR” section of the page.
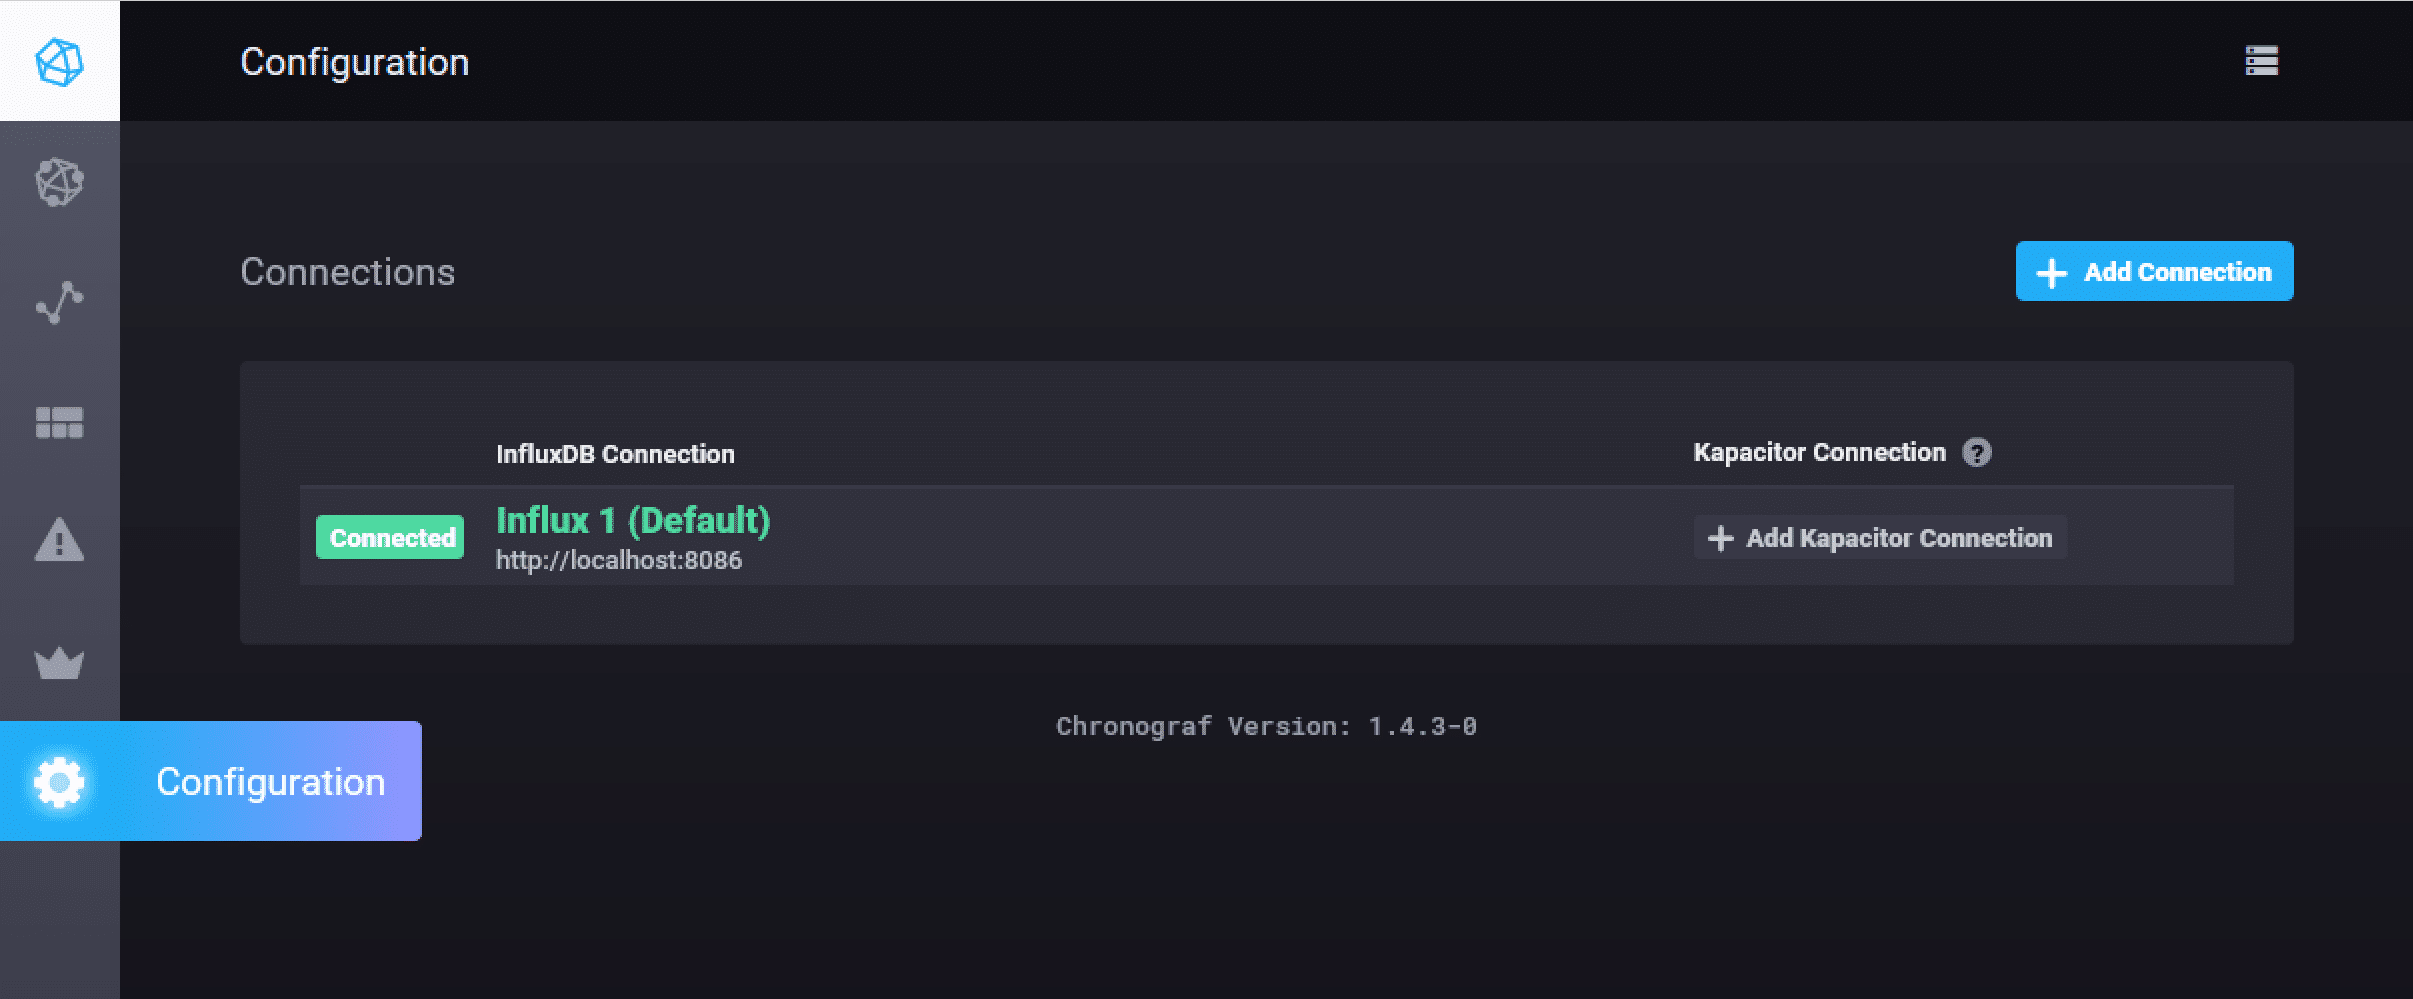
Then, next to “Influx 1”, click “Add Kapacitor Connection”.

Again, the default values should be sufficient for us, so click “Connect”.
That’s it! We should be good to go. Both InfluxDB and Kapacitor use default configurations if no configuration file is provided, while Chronograf doesn’t use a configuration file at all. Telegraf, as mentioned previously, looks for its configuration file in the C:\Program Files\Telegraf\ directory.
If the default configurations don’t work for you for some reason, you can refer to the sections below for more information about how to customize your configurations.
InfluxDB
InfluxDB’s configuration can be set either through a configuration file, or through environment variables. Any parameter from the config file can also be represented as an environment variable.
There is a default configuration file included in the download, which will end up in C:\Program Files\InfluxDB if you extract all the files from the archive; however, this file specifies some Unix locations for files and isn’t used by InfluxDB by default.
You can specify where InfluxDB looks for its config file using the $INFLUXDB_CONFIG_PATH environment variable or the -config parameter to the influxd.exe executable.
Starting InfluxDB without a config file will result in Influx using its default settings.
You can also refer to the InfluxDB configuration documentation for more details.
Chronograf
Chronograf does not use a configuration file, although most of its settings can still be changed using command-line flags. Type chronograf.exe \h to get a full list of arguments you can use, or check out the Chronograf documentation.
Kapacitor
Like InfluxDB, you can find a sample configuration included in the download, but it won’t be automatically loaded when you start the application.
You can control the configuration of Kapacitor in a variety of ways; through the config file, environment variables, by accessing the HTTP API, or by providing command line arguments.
You can specify the location of the config file using the KAPACITOR_CONFIG_PATH environment variable, or with the -config argument to kapacitord.exe.
You can find more information about using the API or environment variables to control the config in the Kapacitor documentation.
Telegraf
Telegraf on Windows looks for configuration files in a few locations. $TELEGRAF_CONFIG_PATH, /.telegraf/telegraf.conf,C:\Program Files\Telegraf\telegraf.conf.
If you want to specify a location for your config file, you can start Telegraf using the -config option, as follows:
C:\Program Files>telegraf -config "C:\<Path to your config>"Again, a deeper dive is available in the Telegraf configuration documentation.
Data
Both InfluxDB and Kapacitor need to store data on disk. On Windows, these files end up in subdirectories in the user’s home directory. InfluxDB creates .influxdb and Kapacitor creates .kapacitor.
The influx.exe command line client also writes data to the user’s home directory, in the form of an .influx_history file.
Chronograf, by default, stores its configuration in a file called chronograf-v1 in C:\Program Files\Chronograf\.
Windows Services
On Windows, long-running programs (like a server) are often run as a Windows Service.
At the moment, only Telegraf has support for running as a Windows service. You can set it up using the instructions in the repository.
We don’t currently have plans to support running InfluxDB on Windows as a service, but if this is something you absolutely need, you can set up a user-defined service using these instructions from Microsoft.
Alternatives
- From Source: If you're interested in making changes to the applications, and perhaps contributing back to the community, you'll want to download the source code from GitHub and compile it yourself. All you'll need is a recent version of Go!
- Docker: InfluxData provides a Docker sandbox that includes Bash and Windows Batch scripts to get you up and running, as well as a Docker-compose file. It's a great place to start if you're a Docker for Windows user.
- Virtual Machines: A VM is a great option if you need to run the TICK Stack in a Linux environment (perhaps to match your deployment environment), but you only have a Windows machine. Hyper-V and VirtualBox will both let you run VMs on Windows, and Vagrant can help you create a reproducible environment. We have a blog post with some more details on using Vagrant, but you'll have to update the instructions to use the latest versions of the TICK Stack.
- Windows Subsystem for Linux: Another minimally tested approach, this is something we hope to explore more in the future. Windows now provides a compatibility layer for the Linux kernel, meaning that many Linux applications can be run directly on Windows. InfluxDB can be successfully installed and run in WSL with a bit of work.
Ask Us!
If you’re using Windows and have specific questions, feel free to post to our community site or reach out to us on Twitter @InfluxDB.
